In this use case, we're going to create a BSI CRM lookup.
PRECONDITIONS
- A service is set up in Nimbus. You require service owner rights in Nimbus to create the Nimbus Power Automate Connector Flow.
- A BSI instance is up and running. You require admin rights in BSI to create the API in BSI.
🔍 Notes: For more details about custom configurations in BSI please refer to your BSI partner. Please note that Luware is not affiliated with BSI or their support. We use this CRM as an example. Note that designs and screenshots are subject to BSI internal procedures and may differ to the screenshots in this Use Case.
INC Icon Legend Accordion
Show Icon Legend
| 💡 = A hint to signal learnings, improvements or useful information in context. | 🔍 = Info points out essential notes or related page in context. |
| ☝ = Notifies you about fallacies and tricky parts that help avoid problems. | 🤔 = Asks and answers common questions and troubleshooting points. |
| ❌ = Warns you of actions with irreversible / data-destructive consequence. | ✅ = Intructs you to perform a certain (prerequired) action to complete a related step. |
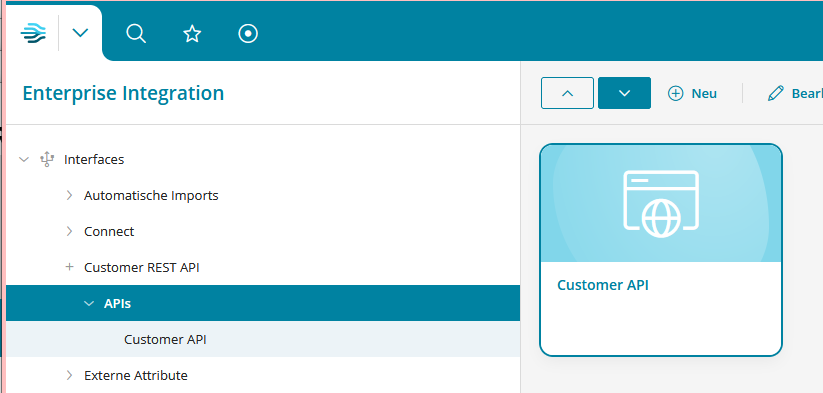
Expose an API in BSI
In your BSI instance, you want to search for and expose customer data. You can do this by building an API.
Description |
Screenshot |
|---|---|
|
 |
| Add an access Policy to the API and define your API key. | 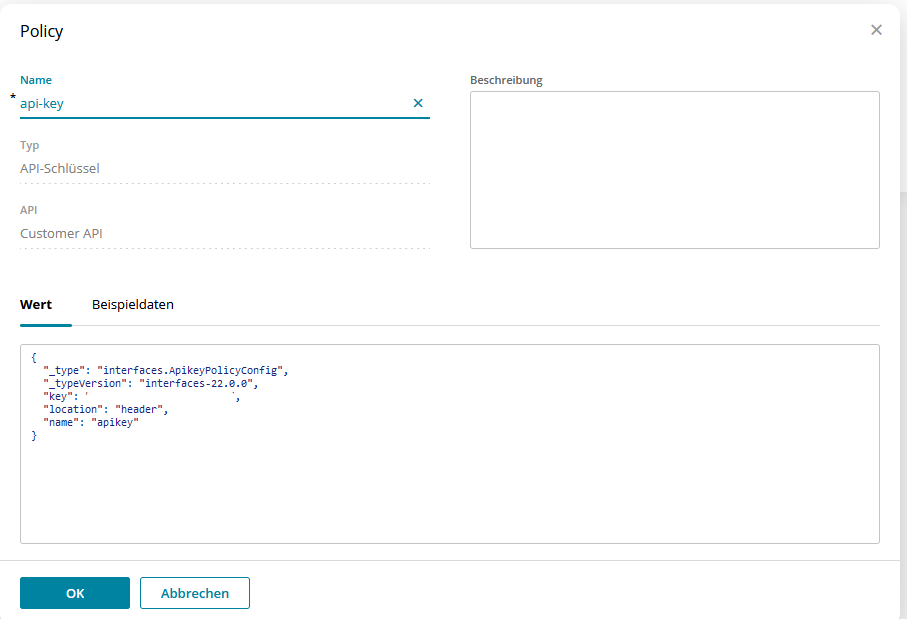 |
|
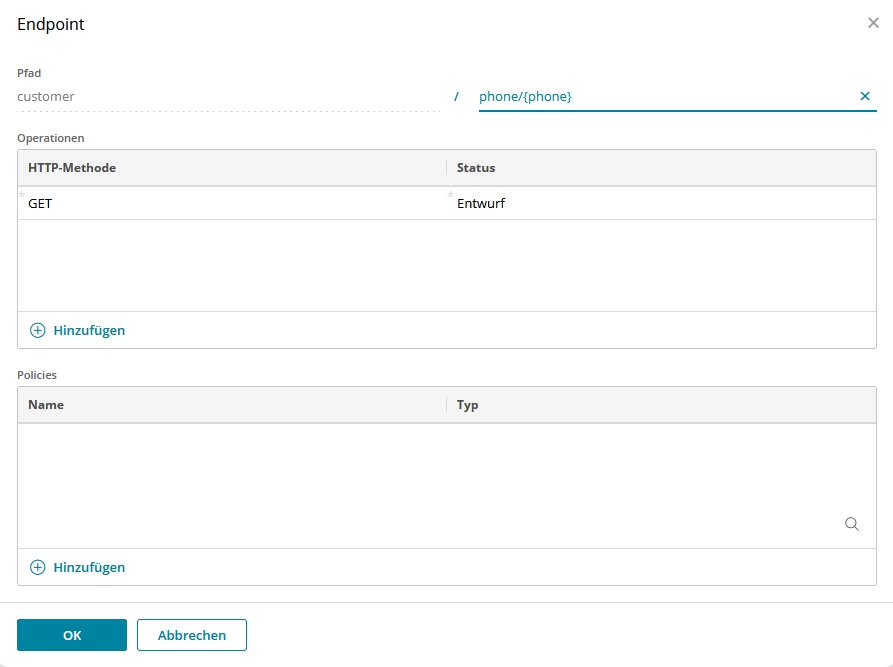
You need a single endpoint that takes a phone number and returns the customer data.
|
 |
|
 |
|
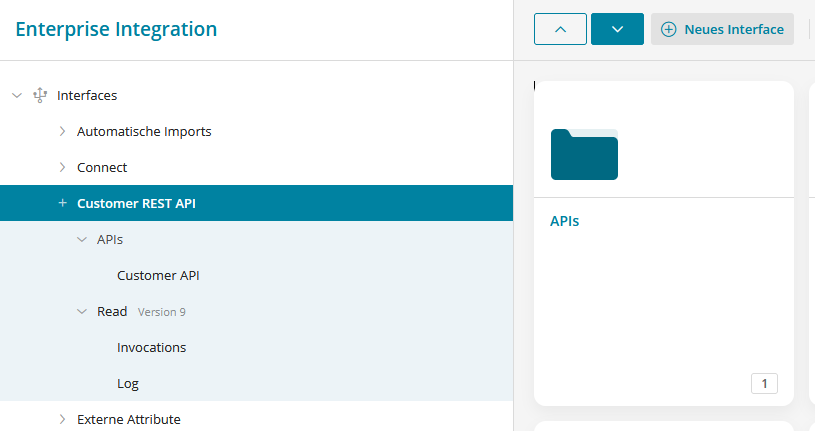
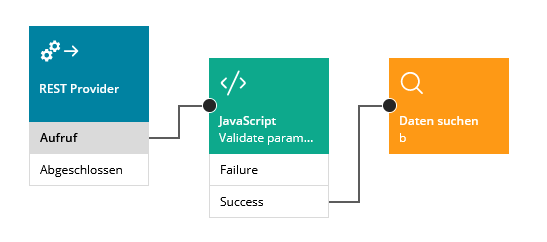
We name our interface "Read". Here is an overview of its implementation. 💡You can add the elements from the library. |
 |
|
Add a REST Provider to the implementation and set the values as follows:
|
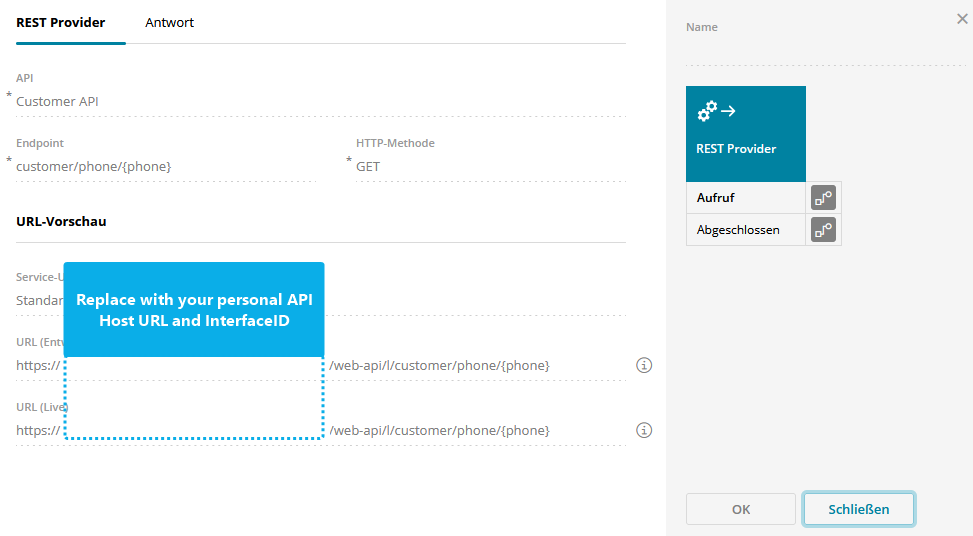 |
|
Define the response codes and messages. For response code "200" return the interchange-payload in the message. |
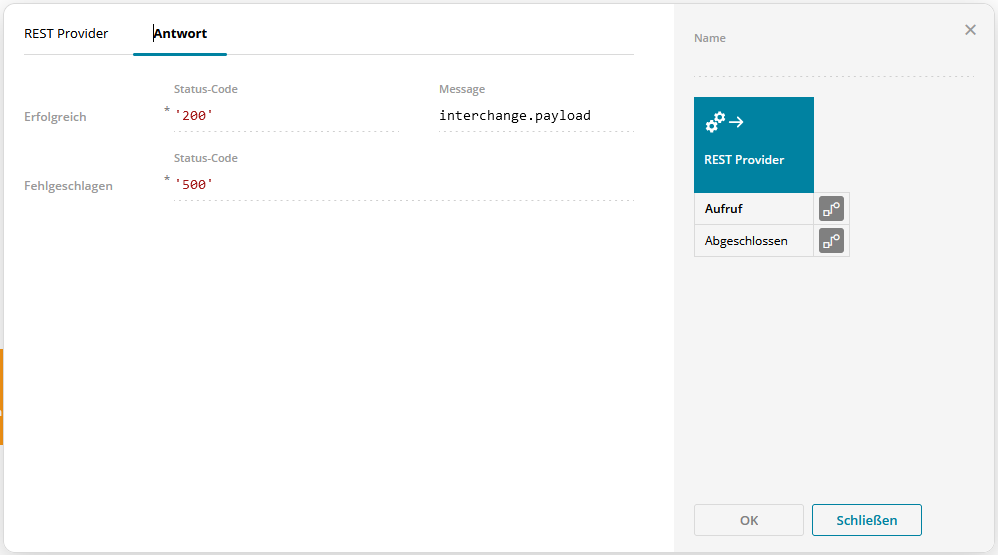 |
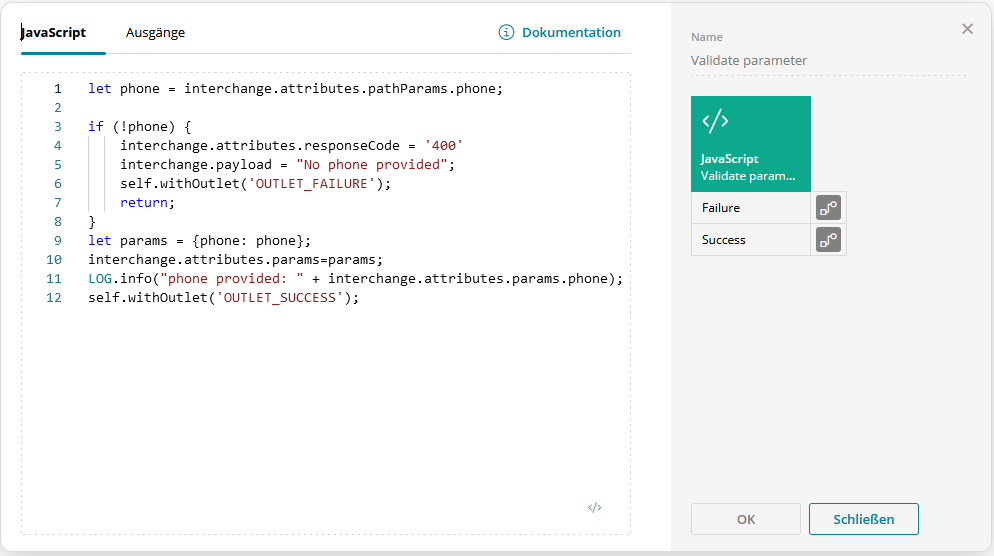
Add a Javascript element to the implementation. |
 |
|
Relate the "Aufruf" outcome from the previous REST provider element to the Javascript element. Copy & Paste the |
Javascript: |
| Define the Outcomes. | 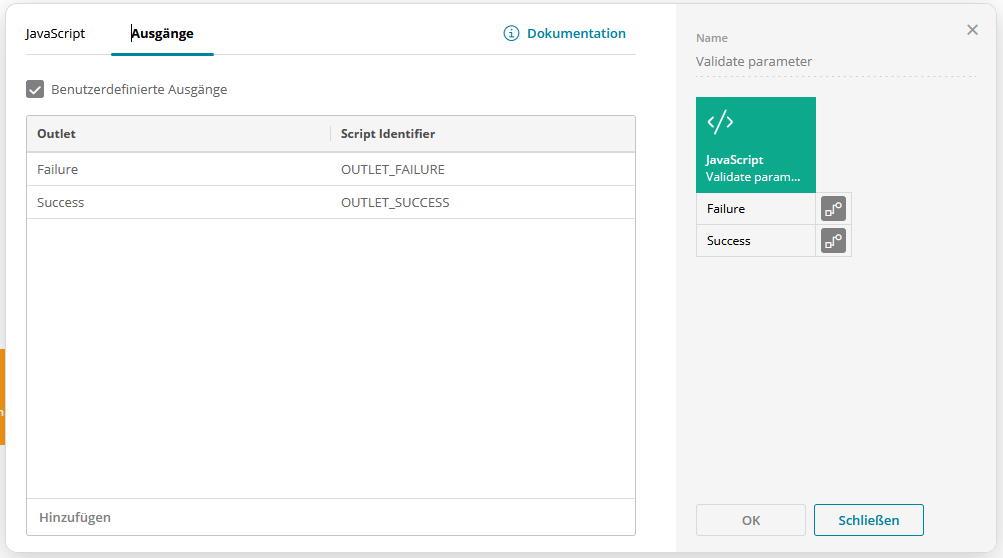 |
|
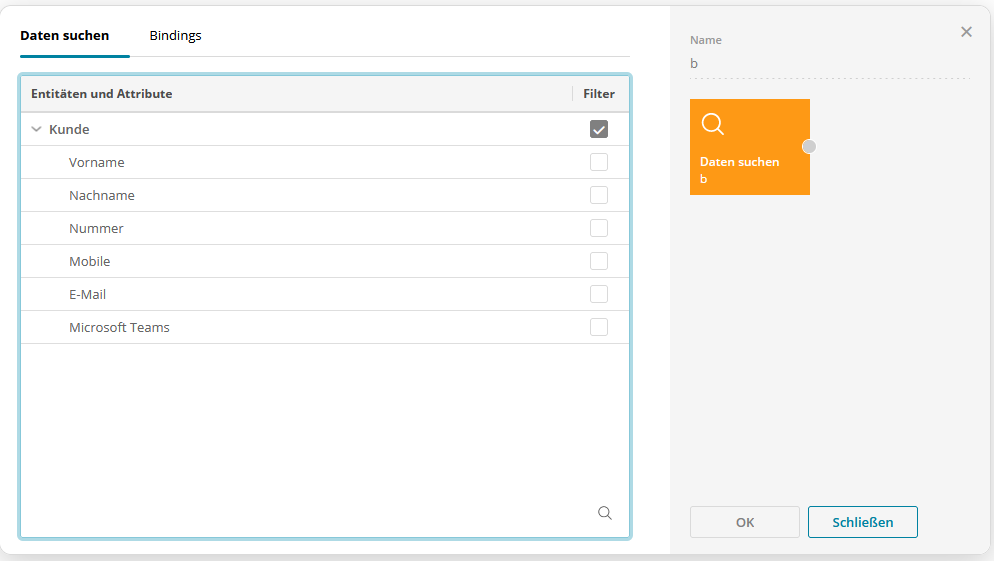
Add a "Daten suchen" element to the implementation. Relate the "Javascript" element with the "Daten suchen" element by the Success outcome. Add the Customer entity to the element and add the fields you wish to return in the response. |
 |
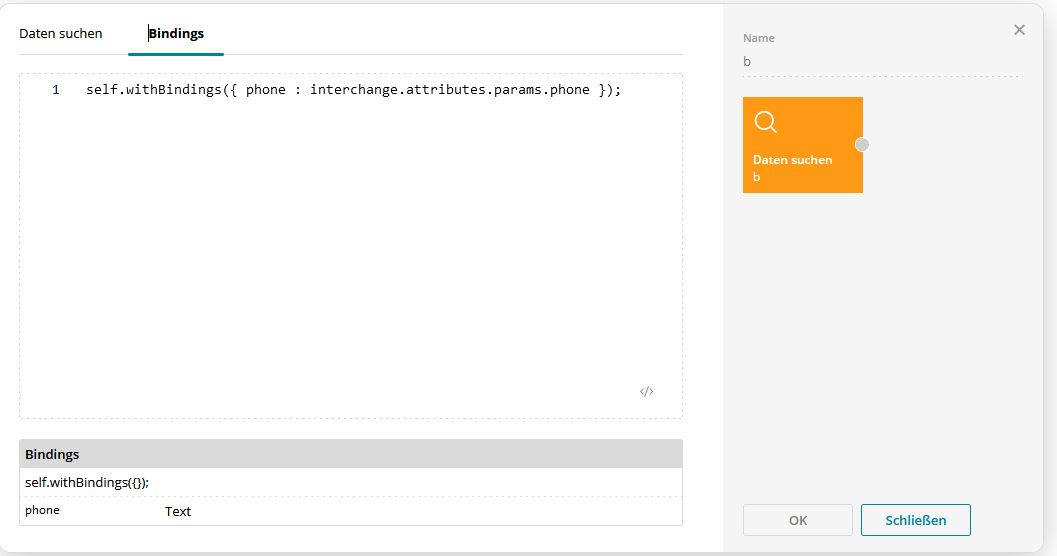
Define the bindings as follows |
Javascript:
|
✅ Run your interface to test it. For more help, contact your BSI provider. |
- |
Create the Flow
Create your new caller identification flow in Power Automate.
Description & Settings |
Screenshot |
|---|---|
| Start with When a task changes state and set it to your service(s). Select “System Accepted” for Task Events Item - 1 |
 |
| Add a new variable to the flow that should hold the APIkey of your BSI API. |  |
|
Add a HTTP element to the flow and set it as follows:
|
 |
Add a Parse JSON element to the flow. |
 |
Depending on what you return in the "Daten suchen" of your BSI Interface implementation, this might differ. In our example the returned data from the API has the following schema: |
JSON: |
|
Add a Condition element to the flow and check on
|
 |
|
If YES branch: The phone number has been sucecssfully identified. We can now map the customer fields to the Nimbus fields. Add a "UpdateTask" to the flow and map the fields accordingly. |
 |
|
If NO branch:
|
  |
✅ Finished: Now you should be ready to see customer data in Nimbus. We recommend making a test call in your Service and observe the flow if the lookup is working correctly.