On your Azure Tenant the Nimbus Connector needs to be registred to establish a trust relationship between your app and the Microsoft identity platform. 🔍 Refer to: https://docs.microsoft.com/en-us/azure/active-directory/develop/quickstart-register-app
- Go to portal.azure.com > App Registrations > New registration
- Name your application “Luware PowerAutomate connector”
⮑ The end result should look like this:
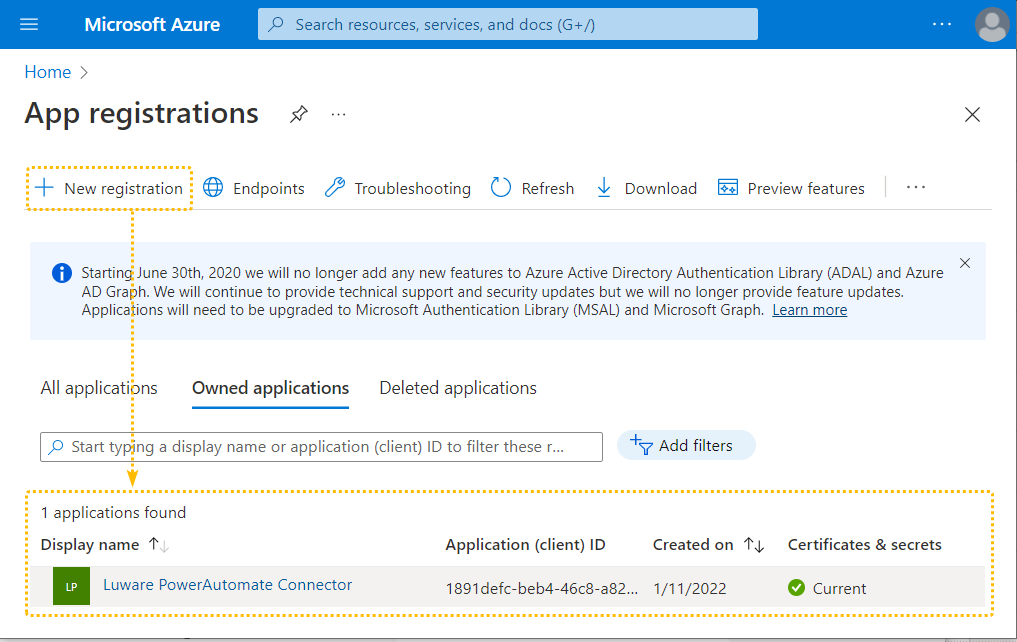
✅Keep this page open as you will need the Application (client) ID to copy for later.
Create the Application Secret
Sometimes also called an application password, a client secret is a string value your app can use in place of a certificate to identity itself.
🔍Refer to https://learn.microsoft.com/en-us/entra/identity-platform/quickstart-register-app?tabs=client-secret#add-credentials
✅ Fill out your Flow config as follows.
- Use your Application ClientID (copied from the previous step), also use it as the Resource URL.
- Fill out the Client secret with secret created.
- Check via the table below that your App details are correct.
☝ Note that these values are unique to you. Screenshots below are just examples.
| Field | Description | Filled-out App |
|---|---|---|
| Auth Type | OAuth 2.0 (automatically filled) | 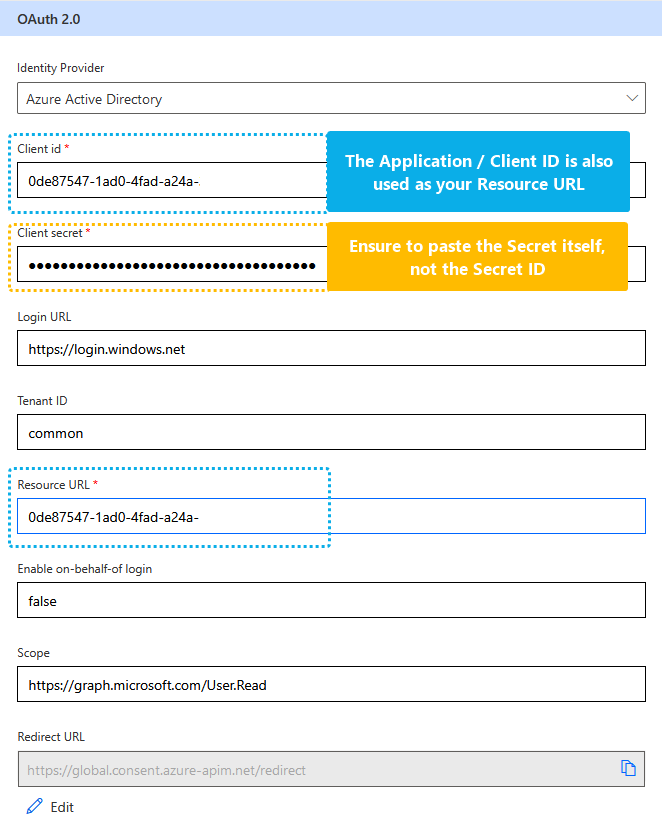
|
| Identity Provider | ☝ Attention: By default Generic OAuth 2 is selected → Select Microsoft Entra ID | |
| Client ID |
Application / Client ID (👇same as Resource URL) ✅ Taken from Azure App Registration (Overview > "Application (client) ID") → See previous step above. |
|
| Client Secret |
Application / Client Secret ✅ Taken from Azure App Registration (Certificates & secrets > Client secrets > New client secret > "Client Secret Value" → See previous step above. ☝ Make sure to paste the secret itself, not the Secret ID. |
|
| Login URL | https://login.windows.net/ (automatically filled) | |
| Tenant ID | common (automatically filled) | |
| Resource URL |
☝ Same as Application / Client ID ✅ Taken from Azure App Registration (Overview > "Application (client) ID") → See previous step above. |
|
| Scope | https://graph.microsoft.com/User.Read (automatically filled) | |
| Redirect URL |
https://global.consent.azure-apim.net/redirect ☝Will be automatically filled in once the connector is created → See next step below. |
Create Connector
- Click "Create connector". ⮑ The Redirect URL will be filled in automatically.
- ✅ Copy the Redirect URL.
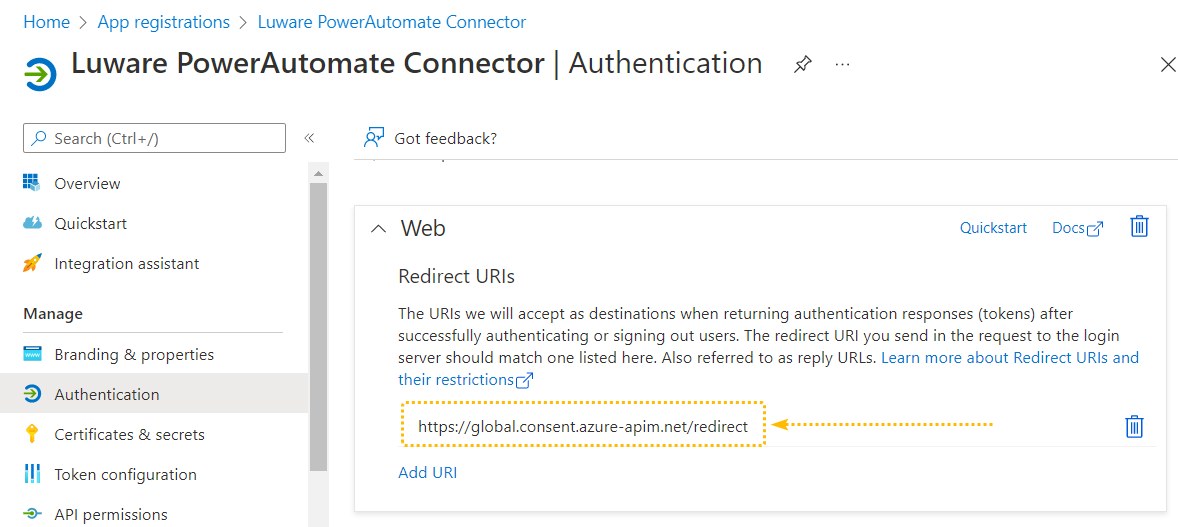
- Back in Azure, make sure to enter the Redirect URL in your Application Registration.
Show me how...
-
Add the Redirect URL:
-
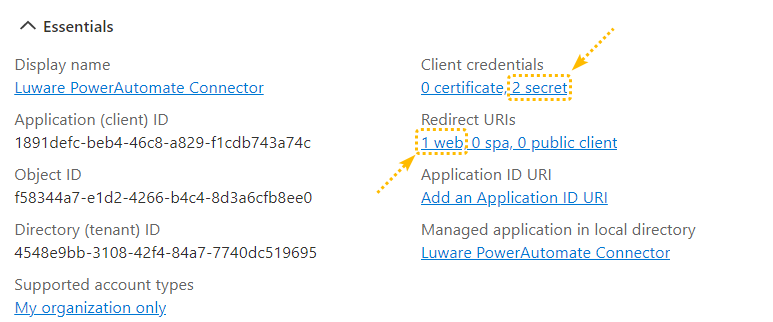
Check your App registration. It should have at least 1 Redirect URL and 1 secret.
Test the connector
On the last page of the connector creation process you can test your connector. Click New Connection and sign in with the account with which you will be creating the flows.
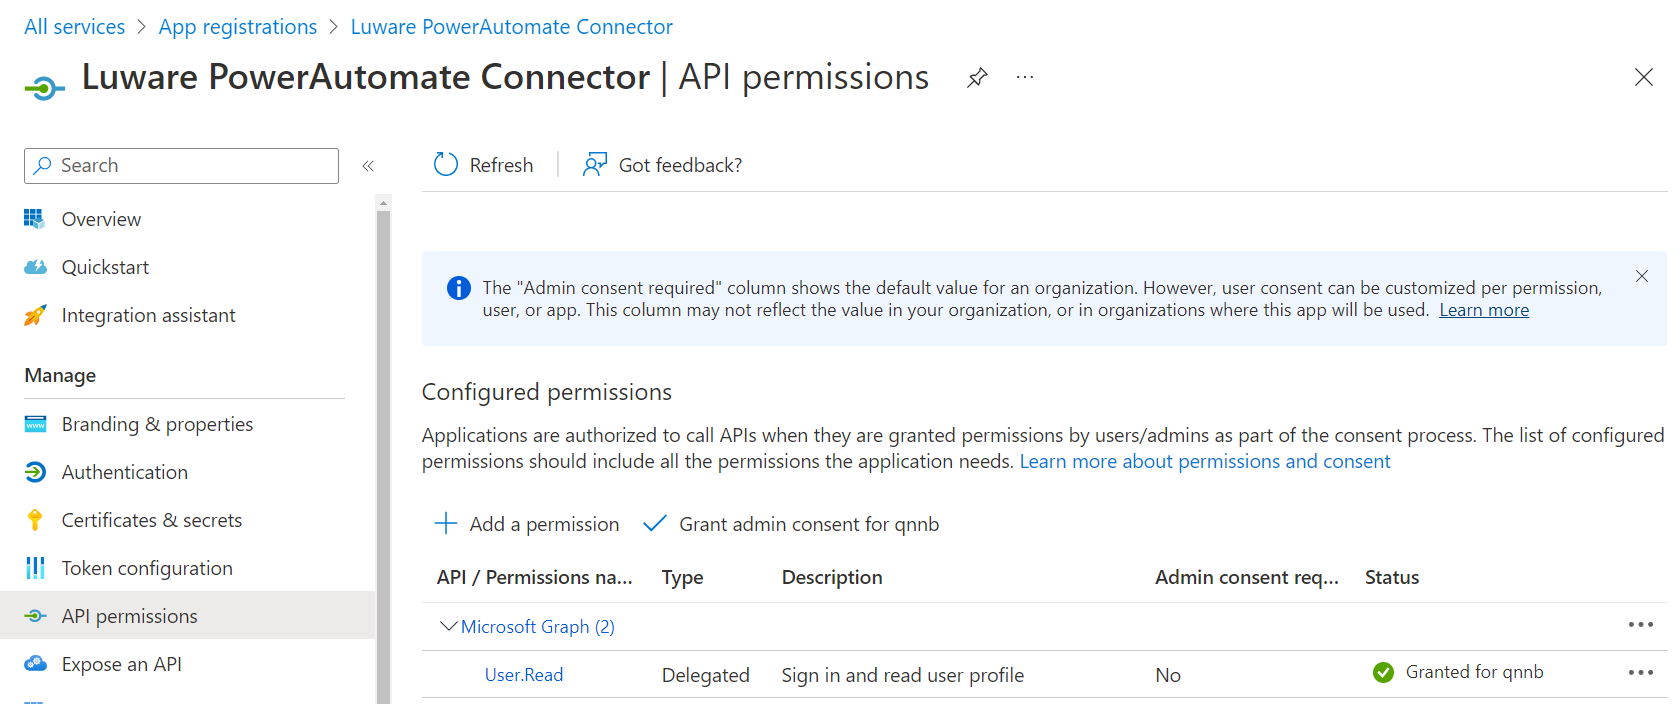
🤔 Connection refused? Your tenant admin needs to give consent on User.Read Permissions during the Nimbus App registration. This will allow you to Sign-In on the connector on behalf of the tenant administrator.