In this scenario we demonstrate how to create a callback task in Salesforce for missed calls using the Nimbus Power Automate Connector. The callback task also gets a dynamic due date assigned.
Show a preview of the flow...
PRECONDITIONS - SALESFORCE PREMIUM POWER AUTOMATE CONNECTOR
At this point we assume you have a Salesforce account with admin privileges.
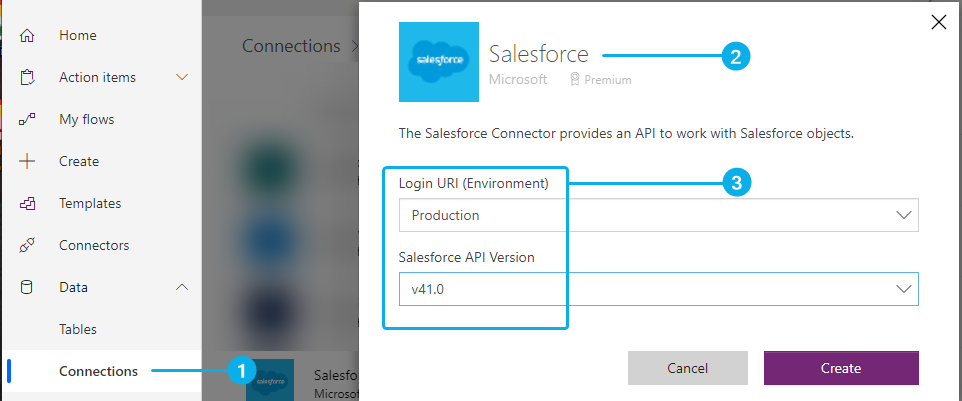
To connect to Power Automate to your Salesforce instance, perform the steps below.
- Log into your Power Automate account. Within the main menu, go to Data > Connections. Click "New Connection" and select "Salesforce".
- When adding the connector, note that this requires a Premium Power Automate account.
💡 Cost of this connector is outside of Luware product scope. - Select your URI, and the API Version and create the connection.
☝ We highly recommend testing in a "Sandbox" or creating a new account in Salesforce to test the connection. You can delete the account permanently after testing your solution.
Show Icon Legend
| 💡 = A hint to signal learnings, improvements or useful information in context. | 🔍 = Info points out essential notes or related page in context. |
| ☝ = Notifies you about fallacies and tricky parts that help avoid problems. | 🤔 = Asks and answers common questions and troubleshooting points. |
| ❌ = Warns you of actions with irreversible / data-destructive consequence. | ✅ = Intructs you to perform a certain (prerequired) action to complete a related step. |
Create the Basic Flow
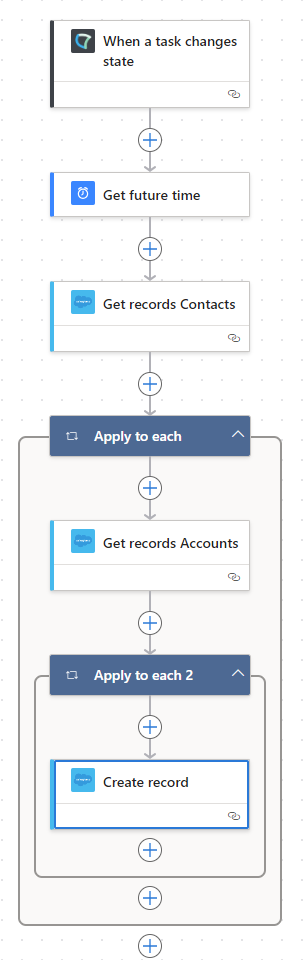
We start with the trigger for a call that has not been handled:
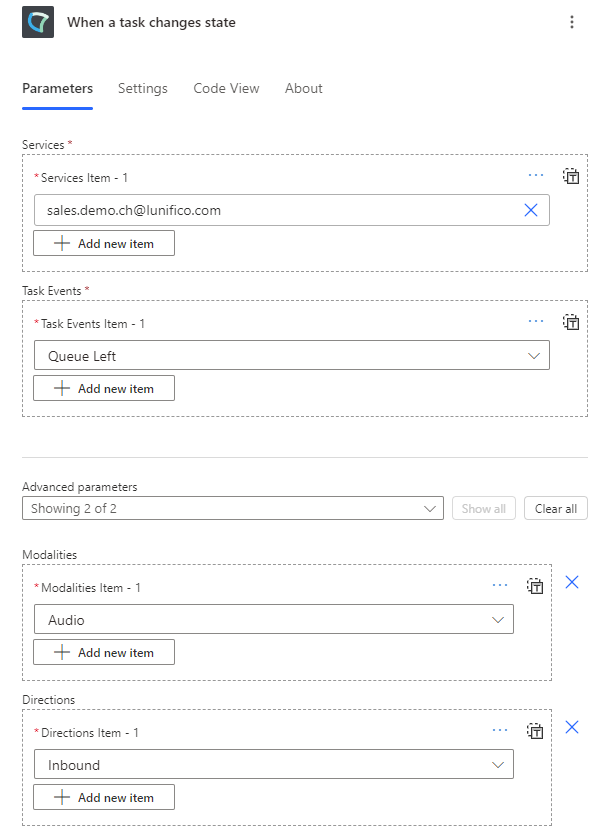
- Start a new "Automated Cloud Flow" with the Nimbus "When a task changes state" Trigger.
- Set the Trigger to the Task Event "Queue Left" to react when a caller leaves the queue.
- Set the Modalities to “Audio” and the Directions to Inbound.
- Add a "Get Future Time" element to the flow and set it to:
- Interval: 2
- Time Unit: Days
💡 This will create a future time from now + 2 Days ahead. Of course you can set this due date to any other interval.
Iterate Through Contacts and Accounts
- Add 2x a "Get records" actions from the Salesforce module in flow. The first one iterates the Contacts table, the second one iterates the Accounts table.
Change the "Get Records" fields accordingly:
Get records Contact |
Get records Accounts |
|---|---|
|
|
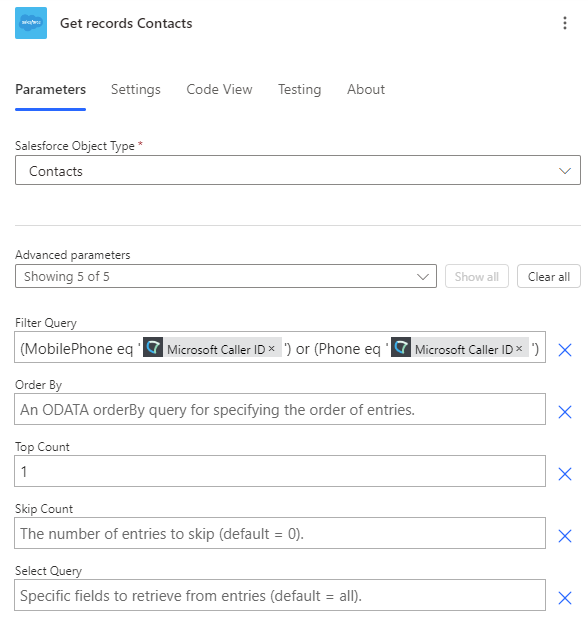
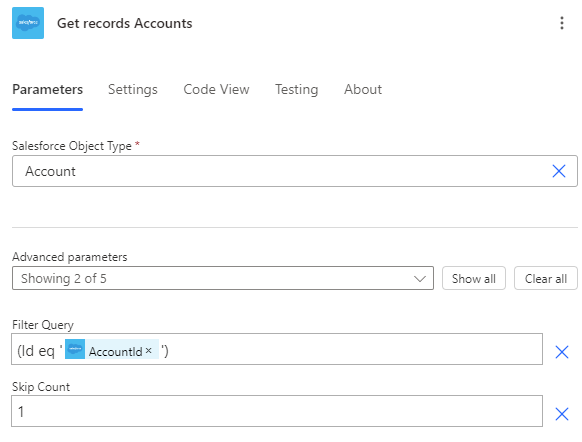
💡 The apply to each component will be added automatically to your flow.
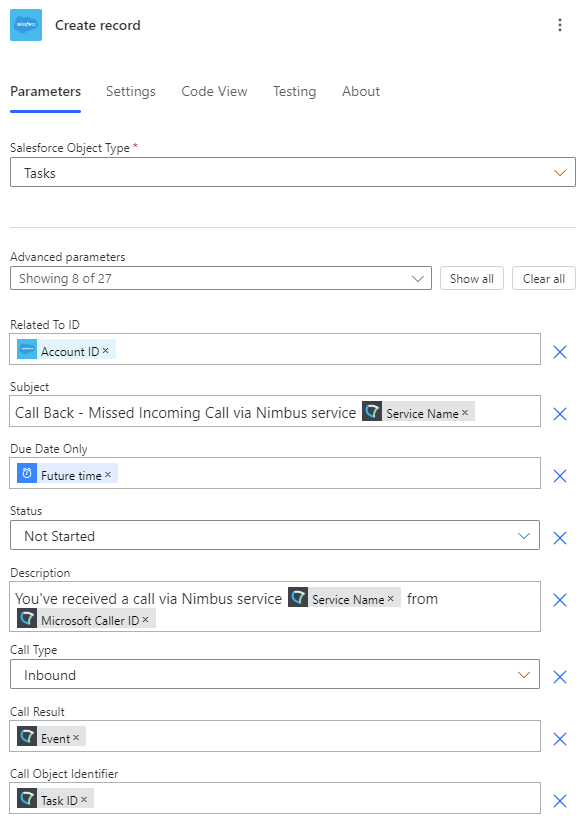
Create the Task
-
Add a Salesforce "Create record" action to your flow.
💡 This will automatically insert a second apply to each. -
Create Record fields:
- Salesforce Object Type: Tasks
- Relate To Id: AccountID (from the previous step)
-
Due Date Only: Future time
💡 Of course you can set more values accordingly to your use case.