In this use case, we're going to tackle the following topics:
- Get a directly called agent's token by defining a Direct Call Template
- Use that token (delegated permissions) to request further Azure data fields / properties via Graph
- Send that information to an external system (e.g. a CRM)
PRECONDITIONS
You require tenant administrator rights to do the following:
- Fill in fields in your Microsoft Entra ID for the users you want to read fields from
- Create Direct Call Templates in Nimbus to be used when that user is being called.
- Make sure that the user has Assistant installed as standalone app and the necessary license assigned so the request is made upon a direct call.
🔍 Note: This Use Case is written for "Direct Calls" in mind, but can also work with Service Call Templates.
Show Icon Legend
| 💡 = A hint to signal learnings, improvements or useful information in context. | 🔍 = Info points out essential notes or related page in context. |
| ☝ = Notifies you about fallacies and tricky parts that help avoid problems. | 🤔 = Asks and answers common questions and troubleshooting points. |
| ❌ = Warns you of actions with irreversible / data-destructive consequence. | ✅ = Intructs you to perform a certain (prerequired) action to complete a related step. |
Create Direct Call Template
- Log into Nimbus Admin. Head to Configuration > Direct Call Templates
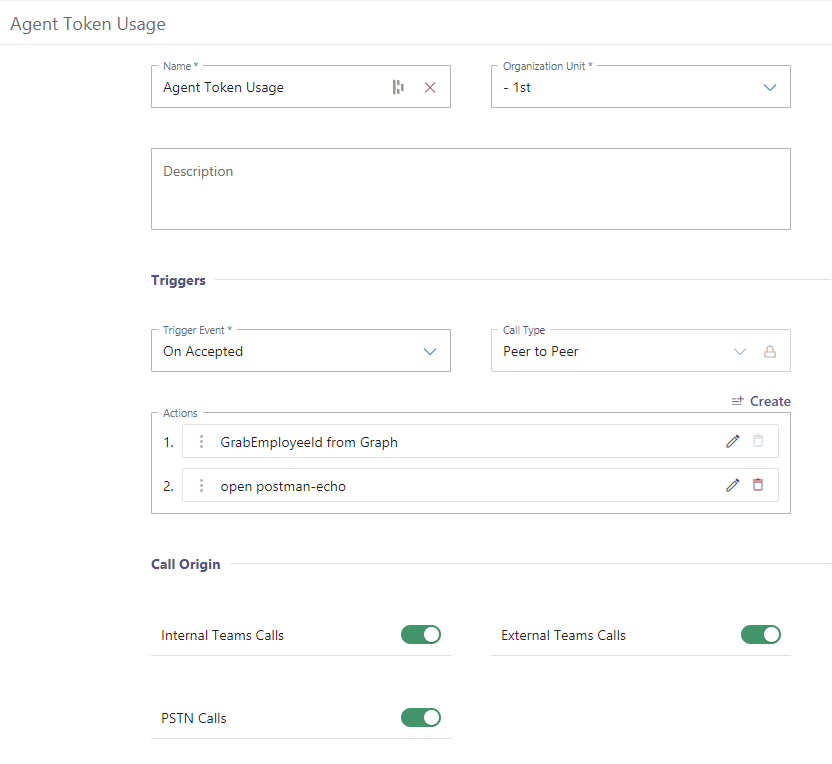
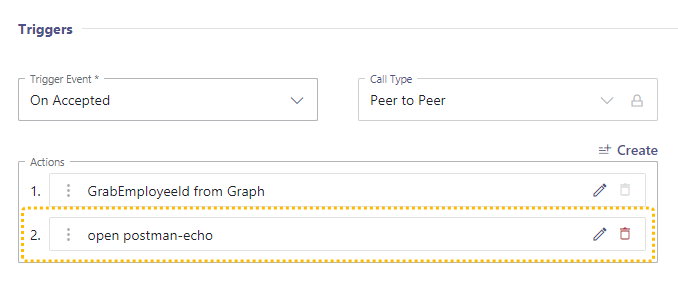
- Create a new Template. In our example we call it “Agent Token Usage”
- This template will consist of 2 actions:
- Grab an Employee Information via Microsoft Graph, which will use the Agent Token for delegated permissions to read out data fields from Microsoft Entra ID.
- Open PostmanEcho, which proofs that upon a call the information was successfully retrieved.
💡 You can substitute this action with a CRM call or other API call of your choosing.
Configure Your Template Actions
✅ After creation of your template it's time to configure it's actions, starting with the actual Graph Request.
-
Add as first action to get the EmployeeID from Graph. 💡 Our Action naming is just an example.
 Graph Request Action
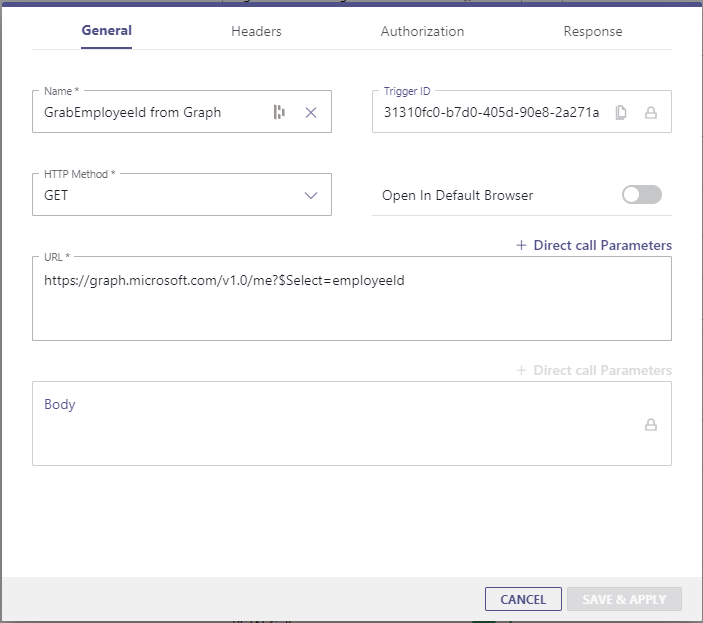
✅ The Trigger ID will be needed in the next step. Make sure to copy it for later. -
In the "General" tab, make sure your URL is configured as follows
https://graph.microsoft.com/v1.0/me?$Select=employeeId
💡 "employeeId" is your example used in Microsoft Entra ID available through Graph API. You can use any field of your choice. -
In the "Authorization" tab, ensure that "Use Agent Token" is selected as Authentication method.
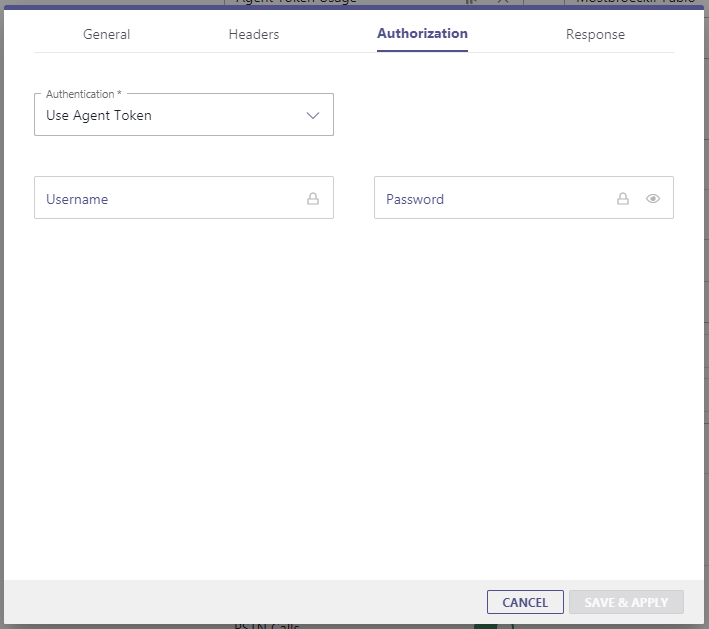 "Agent Token" setting
- In the "Response" Tab , ensure "Wait for Response" is enabled with a recommended timeout of 5s.
- Close the action with "Save and Apply"
Check for Successful Data Retrieval
✅ In this step we add a 2nd action to test the data retrieval from Graph. We use Postman in this example to make an API request. You need to substitute this with your own CRM requests.
- Still within your Call Template, create a 2nd action right below the first Graph retrieval.
-
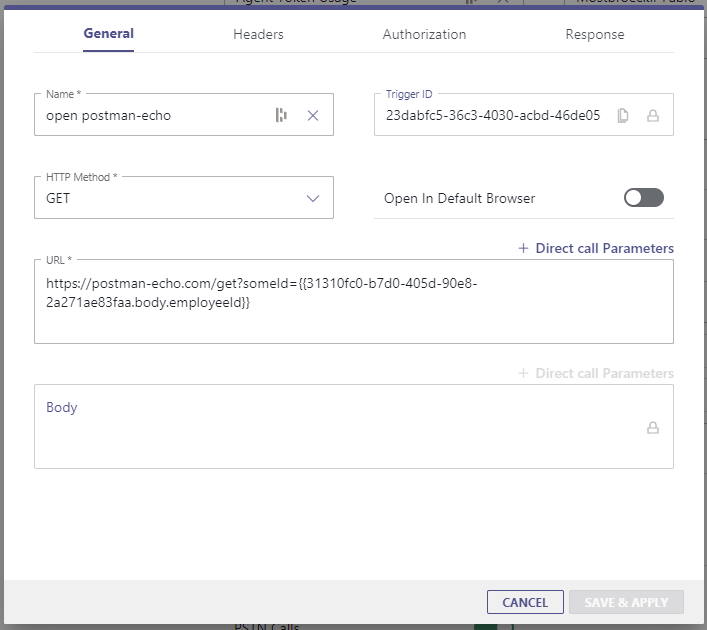
In the "General" settings, specifiy the URL field as follows:
 Setting up an API request using the previous Action Trigger ID and Azure AD “employeeId”
✅ Use your Trigger ID copied from the previous step (Template Action)
https://postman-echolcom/get?someId={{YourTriggerID.body.employeeId}}
💡 Note that the Field "employeeId" needs to matches directly with the one from Microsoft Entra ID for the user (or with any other field of your choice).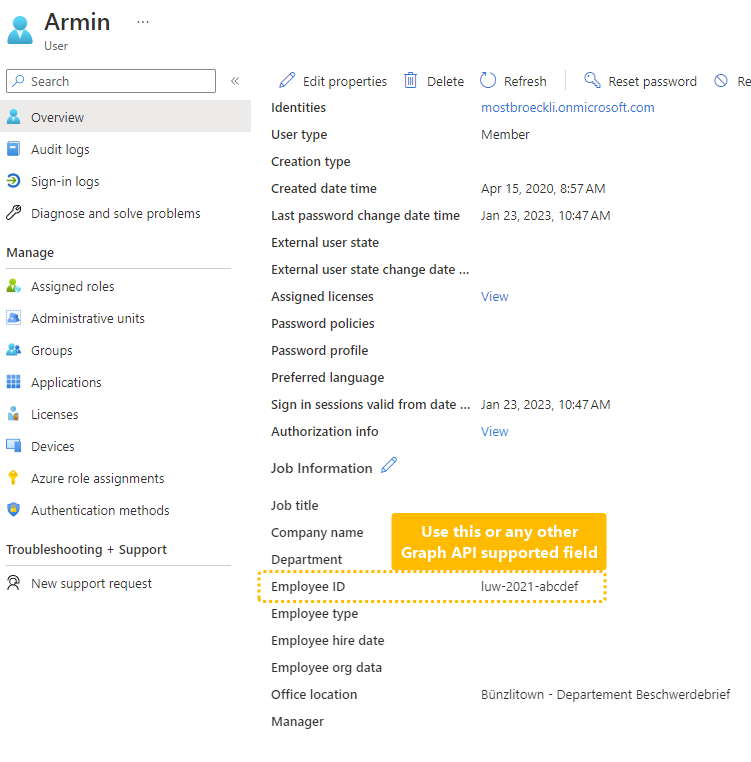
Lastly, save and close your new call template.
Assign and Test the Template
✅ Finally you need to assign the template to a user that has the Assistant app installed and licensed.
- Head to the User Administration > YourUser > Assistant Tab
-
Assign your newly created template
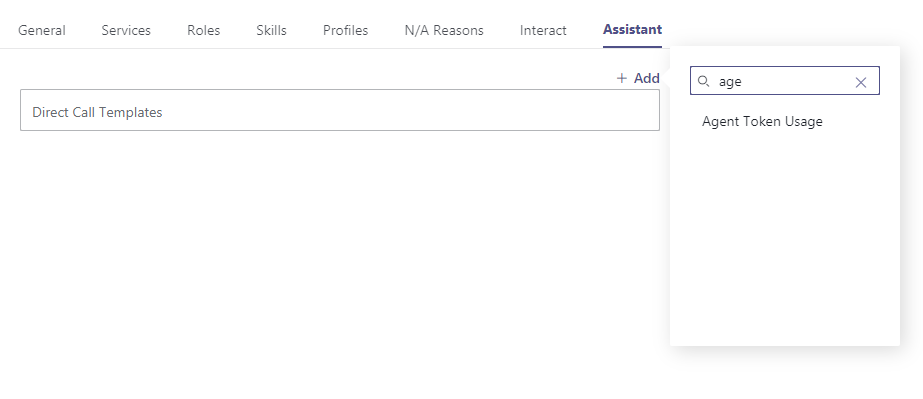 Assignment of the template to a user
-
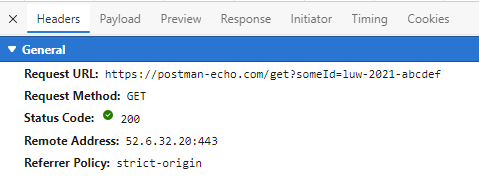
Now, directly call that user while having your web-development tools open in bowser. You can verify the request and results directly in there:
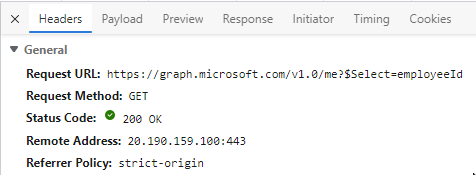
Verifying the Graph API request
|
In the header you can see how the Graph request for the employeeId is sent. |
|
| In the preview you see the field contents of "employeeId" |
4. second action then gets executed (GET request to postman-echo) which contains the actual values
|
| In the request URL you can see the retrieved employeeId is sent accordingly |
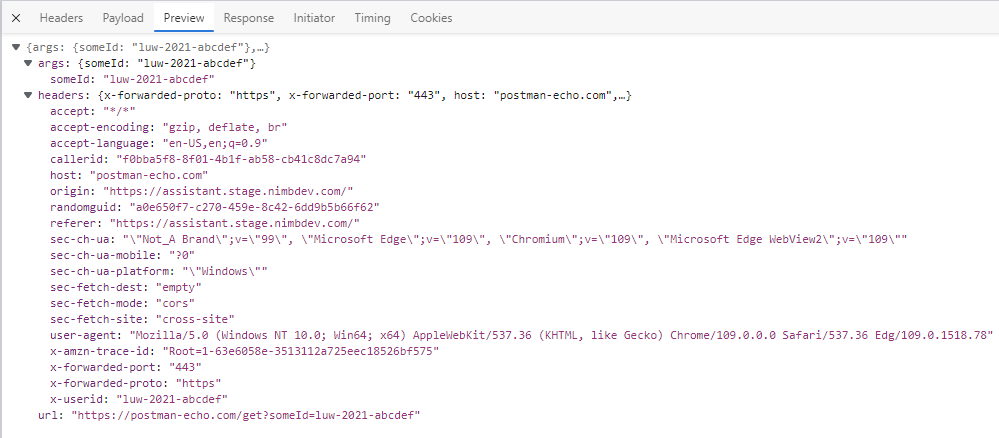 |
The headers specified in the 2nd action are filled accordingly too (x-userid, randomguid and callerid) |