In this use case, we handle customer calls via PSTN to a service or an agent directly. As a first step Assistant can request information from a CRM-API based on the caller's identification. This would then return the dossier ID of that identified customer. In the subsequent request Assistant can use the response and open up the default browser to immediately show the valuable formation to the agent.
In this Use Case we're going to tackle the following:
- Grab additional information from a CRM-System.
- Use the response in a follow-up request to be shown in the default browser.
PRECONDITIONS
You require tenant administrator rights to to create, update and delete Assistant Service Call Templates.
- Enterprise Routing Contact Center Enterprise Routing or Contact Center licensed services may make use of service call templates.
- Service Call Templates are configured and assigned to the service itself via Extension Service Settings. → Details will be explained in step 1 below.
Show Icon Legend
| 💡 = A hint to signal learnings, improvements or useful information in context. | 🔍 = Info points out essential notes or related page in context. |
| ☝ = Notifies you about fallacies and tricky parts that help avoid problems. | 🤔 = Asks and answers common questions and troubleshooting points. |
| ❌ = Warns you of actions with irreversible / data-destructive consequence. | ✅ = Intructs you to perform a certain (prerequired) action to complete a related step. |
Creation of a Service Call Template
- Login as Admin to the Nimbus backend.
- Go to Configuration > Nimbus Assistant > Service Call Templates
-
Create a new Template.
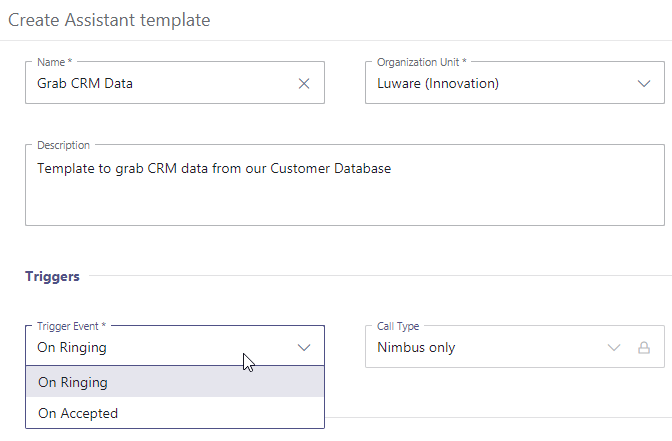
- Fill out all the required fields like Name and Organization Unit, where this Template will be available (💡 should be placed on the same OU as your service or higher level).
- Choose the Trigger event upon which the action should get triggered (On Ringing / On Accepted)
- Additionally toggle the desired Origins (e.g. PSTN / External teams calls)
- Click the "Create" button to generate the new template.
Creation of Actions
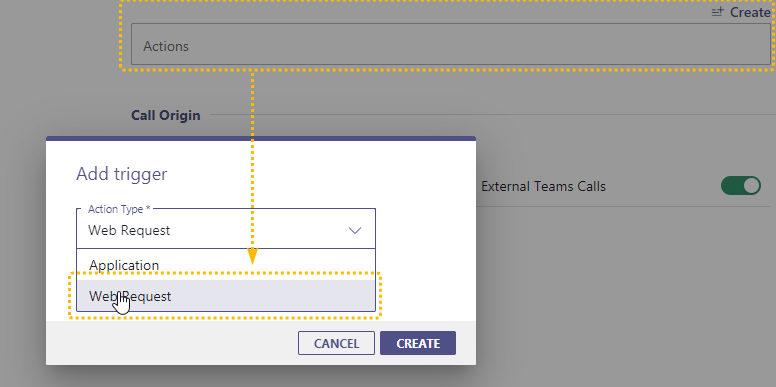
✅ After the creation of the template the actions inside need to be created too. These are the "steps" that are executed in order once your template is triggered.
- Open your newly created template.
- Locate the "Actions" area. Click Create and select a Web Request as Trigger
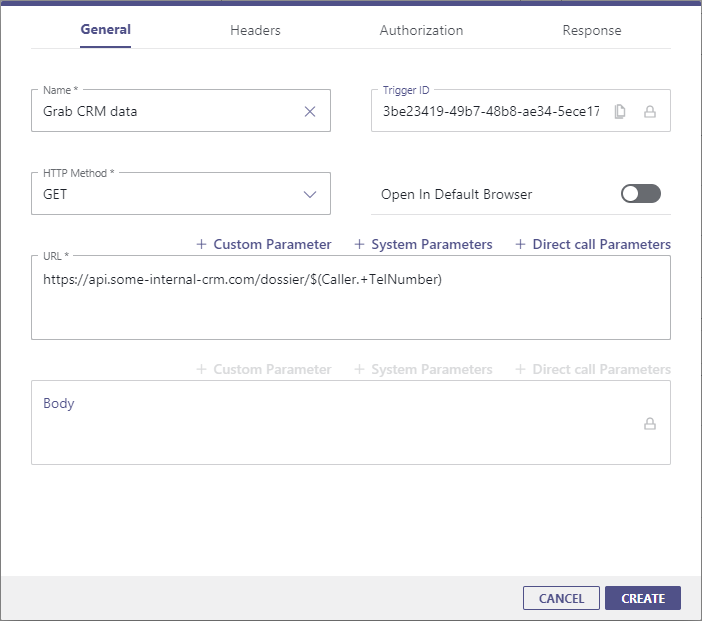
- In the tabs, fill out details as follows:
Tab |
Tasks |
|---|---|
General
|
 |
|
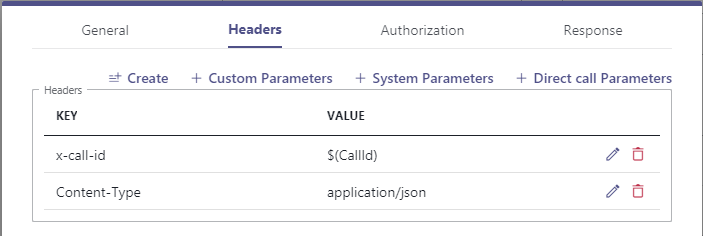
Headers
|
 |
|
Authorization
|
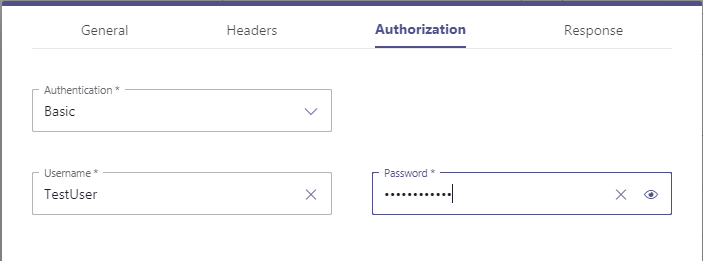
|
|
Response
|
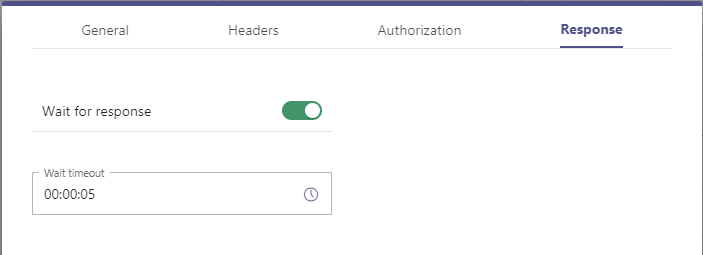
|
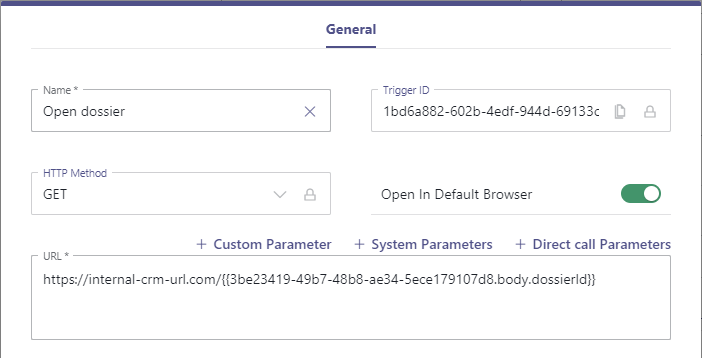
4. ✅ Copy the Trigger-ID from the General tab to your clipboard. You will be needing it for next step.
5. Generate another Web Request Action. (same as Step 2 above).
6. This time, select "Open in default browser" → The view changes as follows:
Example: https://internal-crm-url.com/{{8a1a467e-c4ba-44e9-b4f0-5b8fe3a3b236.body.dossierId}} |
|
7. Click Save & Apply.
Assigning the template to a service
- Go to the Service Settings of the service where the template shall be used.
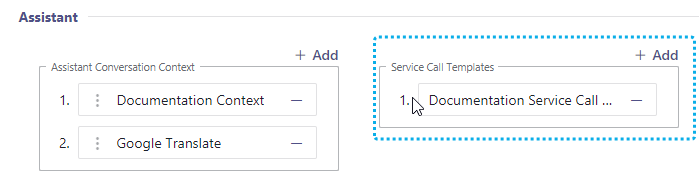
- Go to Extensions tab > Assistant section.
- Select your template and assign it as a Service Call Template.
- Click Save & Apply. → During the next service call, the template will now trigger its defined actions.
🔍 Related to these steps above, you can also create Direct Call Templates and assign them to users via their Assistant User Settings. → See Use Case - Setting up Assistant.
Tips and Troubleshooting
| Tip | Description |
|---|---|
| Things to keep in mind |
☝ Depending on the API some adjustment of the wait-duration should be considered. If the timer elapses before receiving a response, the parsing will not be successful |
| Simple JSON Example | Example response from a request with the Trigger-ID (e.g. 622df4fc-fcf8-423b-b8b8-f0d3ea8f567e): Accessing the property status can be achieved in the following way |
| Array JSON | Example response from a request with the Trigger-ID (e.g. 622df4fc-fcf8-423b-b8b8-f0d3ea8f567e) : Accessing the property status of the first array can be achieved in the following way |