In this use case, we're going to create an IVR for a helpdesk ticketing line. When a call comes in, the caller is asked to choose, whether …
- … they want to talk to an Agent about an existing open ticket
- … create a new ticket with an Agent
PRECONDITIONS
- You require service owner rights to to create the Power Automate flow. You require a Power Automate "Premium" subscription to use the "Zendesk" Flow connector. The cost for flow subscriptions is determined by Microsoft and out of Luware support scope.
- A service you have access to must be set up and ready to receive calls.
- You have an existing Zendesk installation in your organization and you have an account to create/edit/delete data on it.
- For Zendesk you should have an instance set up to store and look-up caller data. Please refer to Use Case - Looking up caller information from Zendesk for instructions.
Show Icon Legend
| 💡 = A hint to signal learnings, improvements or useful information in context. | 🔍 = Info points out essential notes or related page in context. |
| ☝ = Notifies you about fallacies and tricky parts that help avoid problems. | 🤔 = Asks and answers common questions and troubleshooting points. |
| ❌ = Warns you of actions with irreversible / data-destructive consequence. | ✅ = Intructs you to perform a certain (prerequired) action to complete a related step. |
Create the workflow IVR
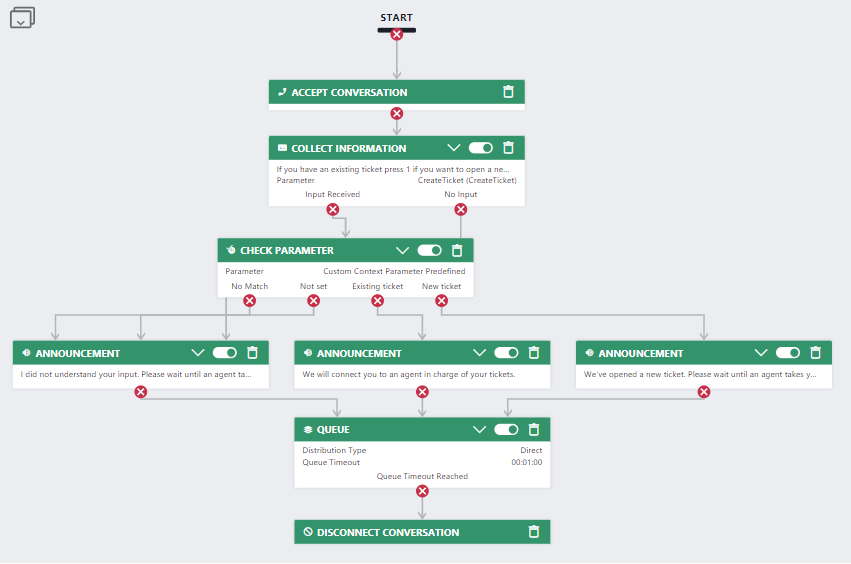
✅ We want to create an IVR, asking the caller to press 1 if she wishes to speak to an agent about her open tickets or 2 if she desires to create a new ticket. We save the choice in a parameter "CreateTicket" and route all branches to the queue.
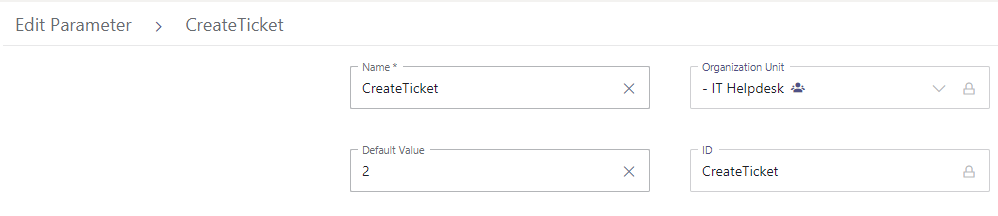
In Nimbus, access Configuration > Parameters and create a new parameter.
- Name it "CreateTicket" for the service.
- Set the default value to "2", which will be used later for routing to a "New Zendesk Ticket" creation.
Then create a new workflow with the name "Ticket service IVR" with the following activities:
Assign the workflow to your Nimbus service via the Service Settings.
Creating your Flow
✅ Now it's time to start your flow to read your custom parameter content and react accordingly.
-
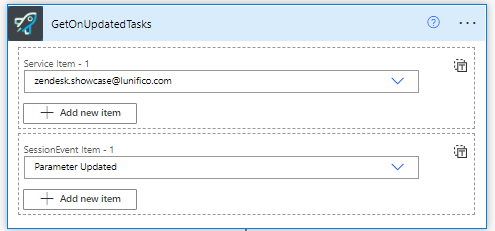
Start with a "GetOnUpdatedTasks" Nimbus trigger element and set the Session Event Item to "Parameter Updated".
- Then add a first variable to the flow:
- Name = UpdatedParameterName
- Type = String
- Value = @{triggerOutputs()?['body/UpdatedParameterName']}
- 💡 In between, you can optionally check if the UpdatedParameterName really is "CreateTicket" to ensure errors are handled. We omit that here.
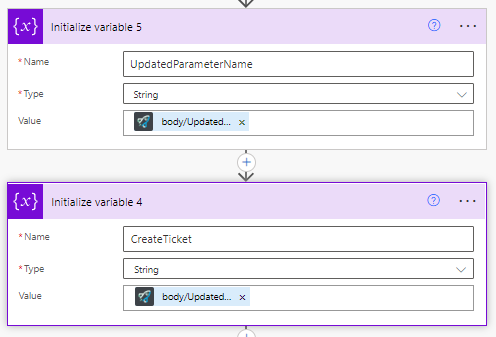
- Then add a second variable to the flow:
- Name = CreateTicket
- Type = String
- Value = @{triggerOutputs()?['body/UpdatedParameterValue']}
Get Caller Information from Zendesk
✅ Now, we want to find the caller information in Zendesk.
-
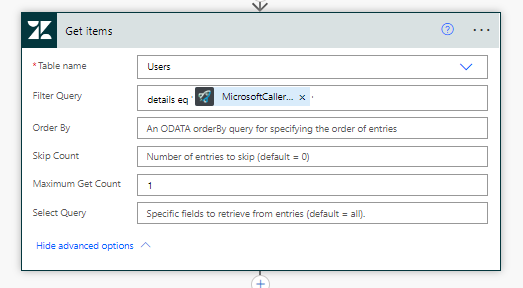
Add a Zendesk "Get items" element to the flow:
- Table name = Users
- Filter query = details eq '@{triggerOutputs()?['body/microsoftCallerId']}'
-
Maximum Get Count = 1
- Now we need to store the information from the Zendesk "Users" table into some flow variables.
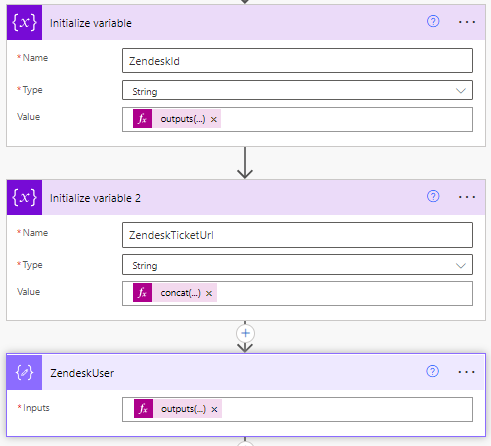
Add the following elements to the flow:-
Zendesk ID Variable
- Name = ZendeskId
- Type = String
- Value = @{outputs('Get_items')?['body/value'][0]['key']}
-
Zendesk URL Variable
- Name = ZendeskTicketUrl
- Type = String
- Value = @{concat('https://yourdomain.Zendesk.com/agent/users/',variables('ZendeskId'),'/requested_tickets')}
-
User Compose element
- Name = ZendeskUser
-
Inputs = @{outputs('Get_items')?['body/value'][0]}
-
Zendesk ID Variable
✅ We want to switch on the CreateTicket Parameter that holds the caller's choice from the IVR.
- Add a switch case to the flow.
- Switch on the variable previously created: @{int(variables('CreateTicket'))}.
- If the value is 1 then open the URL of the existing ticket.
- If the value is 2 then create a ticket and open the URL of the new ticket.
Your switch case should now looks as follows:

Existing ticket branch
-
Add another Zendesk "Get Items" to the flow and set the following values:
- Name = "Get Open Tickets"
- Table name = Tickets
-
Filter query = status eq 'open' and requester_id eq @{variables('ZendeskId')}
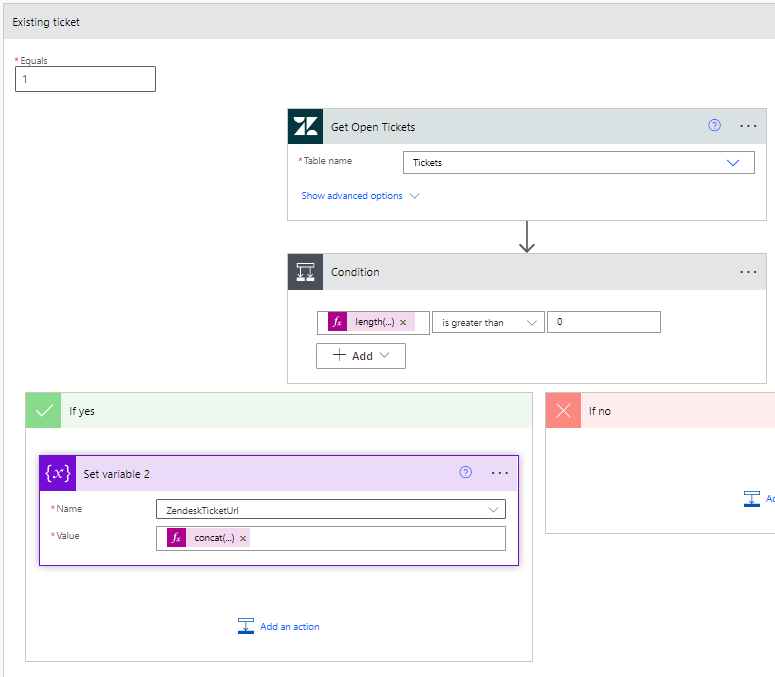
- Check on the length of the ticket collection returned by the "Get Items" element.
-
In the "If yes" branch, add a "Set variable" element to the flow and set the variable "ZendeskTicketUrl" accordingly to:
CODE@{concat('https://yourdomain.Zendesk.com/agent/tickets/', outputs('Get_Open_Tickets')?['body/value'][0]['id'])}
💡 Only if the length is greater than 0, then there are open tickets and we want to set the URL to the most recent one, which is the first item in the collection: - In the "If no" branch we simply do nothing and skip over this step.
-
In the "If yes" branch, add a "Set variable" element to the flow and set the variable "ZendeskTicketUrl" accordingly to:
New ticket branch
-
Add a Zendesk "Create Item" element to the flow and set the following values:
- Table name = Tickets
- type = incident
- subject = New auto ticket from Nimbus
- description = Please fill out
- status = open
-
requester_id = @{outputs('ZendeskUser')['id']}
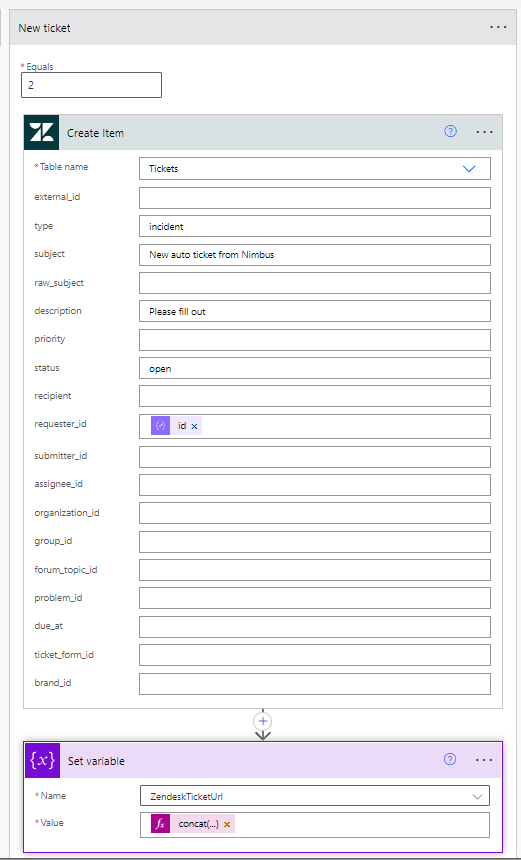
- Then add a "Set variable" element to the flow and set the variable "ZendeskTicketUrl" accordingly to:
CODE
@{concat('https://yourdomain.Zendesk.com/agent/tickets/', outputs('Create_Item')?['body/id'])}
Update the Nimbus task
-
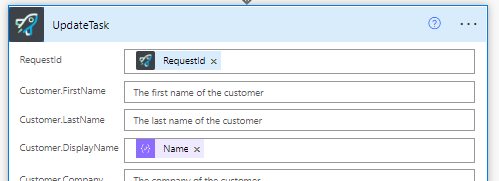
Add a Nimbus "UpdateTask" to the flow and set the values to:
- Customer.DisplayName = @{outputs('ZendeskUser')['name']}
- Customer.Email = @{outputs('ZendeskUser')['email']}
- Customer.CustomFields.ZendeskId = variables('ZendeskId')
- Customer.CustomFields.ZendeskTicketUrl = variables('ZendeskTicketUrl')
Test the flow
- Open Nimbus in your browser so context can open in extra tabs.
- Call your service and wait for the "Collect Information" activity.
- Choose (1) for an existing ticket and (2) for a new ticket. You should see the custom context URL open for the called agent accordingly.