Related Use Case
This Use Case shows how to make use of Use Case - Running your Nimbus Flows From Anywhere to route incoming WhatsApp messages to Nimbus using Twilio.
Overview
We assume that you have a UI which can be used as a WhatsApp client to display WhatsApp messages from clients. It also offers a form to reply to messages. On this page, we describe the backend of this application.

We will create two Power Automate Flows to receive and send WhatsApp messages over Twilio and one for distributing the message as an external task to Nimbus.
PREREQUISITES
-
In Twilio: configure the WhatsApp sender and channel + create api key.
🔍 OPTIONAL: Read the docs Overview of the WhatsApp Business Platform with Twilio | Twilio. -
In Azure: create a new enterprise application and grant access to the Power Automate API
🔍 ALSO SEE: Use Case - Running your Nimbus Flows From Anywhere. - Your custom app is ready to use. It is used as the UI/WhatsApp client. It could be a simple website like this one:

Create Your Flows
Flow 1: Push messages from Twilio to your App
In Twilio, you can configure a URL to push messages to whenever a new message is received. You could directly route to the API of your custom app without passing through Power Automate. But sometimes this is not easy and depends on how much customization your app provides, if it is reachable from the outside, whether you've built it inhouse or if you need to use predefined ways to integrate custom APIs. We show you how to implement this step as a Power Automate Flow and use the Azure generated public URL in Twilio.
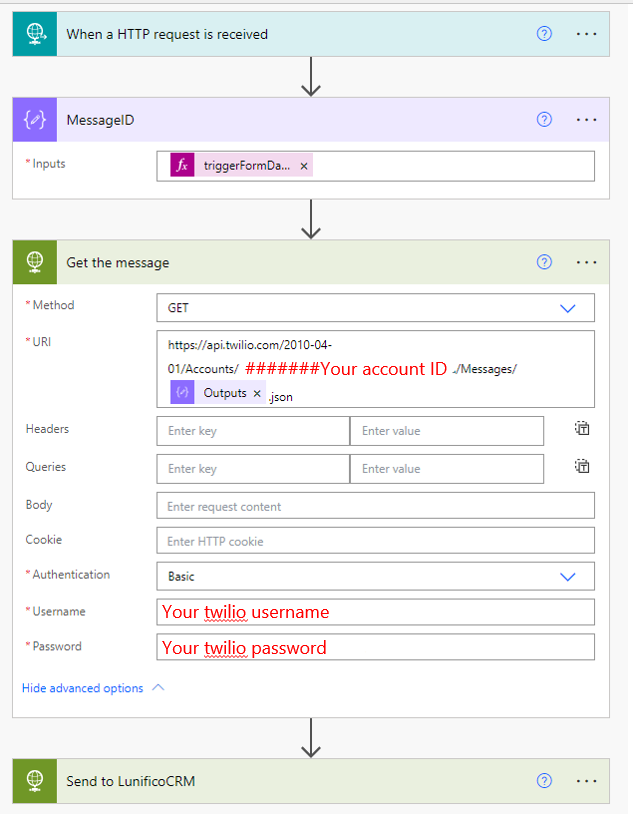
- Start with a “When a HTTP request is received” Trigger Event .
- Add the JSON schema of the Twilio message to it.
As we developed the solution the schema looked like this:
{
    "type": "object",
    "properties": {
        "$content-type": {
            "type": "string"
        },
        "$content": {
            "type": "string"
        },
        "$formdata": {
            "type": "array",
            "items": {
                "type": "object",
                "properties": {
                    "key": {
                        "type": "string"
                    },
                    "value": {
                        "type": "string"
                    }
                },
                "required": [
                    "key",
                    "value"
                ]
            }
        }
    }
}
- Store the MessageID in a variable. Use "triggerFormDataValue('SmsMessageSid')" as input.
- Add another HTTP request to the flow. You can now get the message content over the Twilio API using the API URL, your username, password, and the stored MessageID.
- Notify your own application about the reception of the message for further handling (surface message content).
- Save the flow.
- Copy the trigger URL. In Twilio, forward all Inbound Messages to your Inbound Power Automate Flow using the URL.
Flow 2: Route the message through Nimbus
In your app, on getting a notification of a new message, you want to route the WhatsApp message to Nimbus via external tasks.
✅ Use the content of the message received from flow 1 and create an External Task in Nimbus for it, as described in Use Case - Running your Nimbus Flows From Anywhere.
You can configure a screen pop for your app by setting the Conversation Context of the service to the route that links to the message in your app.
Flow 3: Reply to a message
💡 Again, as for flow 1, you could directly call Twilio's Rest APIs from within your custom app - we recommend this option. But if it is not possible, we show you a way how to use Power Automate for it.
In your app, you want to send a message back over Twilio via your reply form. It is possible to trigger a Power Automate flow and use Twilio's Power Automate Connector to send the message.
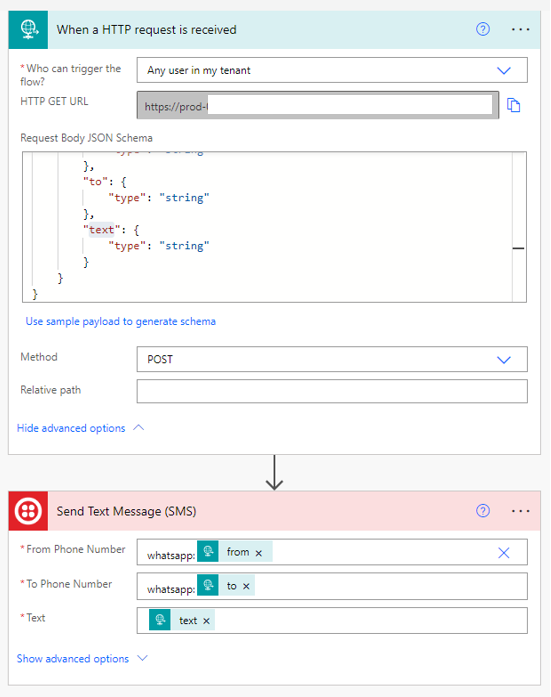
- Start your flow with the “When a HTTP request is received” secured trigger and …
- … use the “Send Text Message (SMS)” element from the Twilio Connector.
☝It is important to add the prefix “whatsapp:” to the From Phone Number and To Phone Number fields, so that Twilio recognizes it as a WhatsApp message.
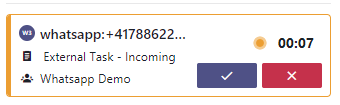
Test Your Flows
In your Nimbus service, you should see the incoming message. On the other end, ensure that you receive the replies.