DEPRECATED USE CASE
As of the introduction of extended presence tracking via application permission, this use case is not supported anymore and will be removed soon. Please refer to Use Case - Tracking Extended User Presence via Application Permission instead.
🤔 How to grant permission for extended user presence tracking via application permission?
The permission to track the extended user presence can be granted either by running provisioning script or clicking the grant link in Extensions Tenant Settings one:
Grant permission by running the provisioning script
✅ Granting permission by running the provisioning script needs Tenant Administrator rights.
To grant the permission this way, run the provisioning script as a Tenant Administrator.
Grant permission with the grant link
- Go to Extensions Tenant Settings.
- In section Presence Tracking, click the grant permission button.
⮑ This will ask you to sign in with your account. A green checkmark is shown if the permission was granted successfully: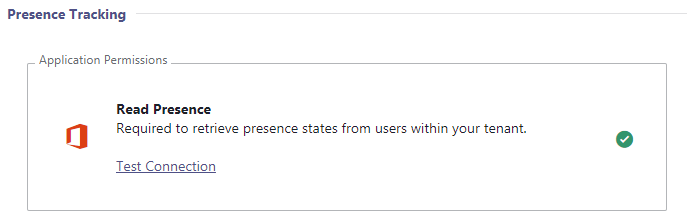
In this use case, we explain how to track extended user presence. For this you need to invite Nimbus Guest Users to your tenant.
PRECONDITIONS
- Nimbus Installation is complete and at least one Service is provisioned on your tenant.
- In extension you should know about the Distribution Service Settings, accessible to you if you are Team Owner or Tenant Admin. 💡 These settings define when service calls are distributed to the users (team members) based on their MS Teams status (Away, DND, etc). More on this will explained below.
- You require Tenant Administrators rights to access the Nimbus Tenant Administration > "Presence Tracking" section.
- You also need Tenant Admin credentials to invite guest users within your Azure Portal.
🤔 What is extended user presence and why guest accounts?
For an extended status presence such as "Busy → In a Call" or "Busy → In a Conference", these presence accounts are required to improve call routing. Without having guest users on your Tenant as means to check, Nimbus cannot see any extended user presence status.
🤔 What happens after this setting is active?
When activating the presence tracking feature, call handling is handled according to the MS Teams status as follows:
| Calls are delivered while | Calls are NOT delivered while |
|---|---|
|
Available Busy* Busy in a Meeting*
|
|
|
💡 Note that Nimbus will adhere to Distribution Service Settings, so ensure to check there if your calls are not delivered as expected. 🔍 Also refer to the related Microsoft Documentation: User Presence States in Teams. | |
Guest User Details
✅ Before you can use the extended presence feature you need to invite two guests users to your tenant. The steps are described below.
- Within the Nimbus UI > Tenant Administration > head to the "Presence Tracking" section
- Take note and mouse over the "Presence Account 1 & 2" user mail addresses to see their details.
💡 These accounts are individual to your Nimbus cluster. Examples below have been blurred to prevent mistakes. - Make sure to copy your individual presence account name, including the @ domain ending. The account details will be used in a step below.
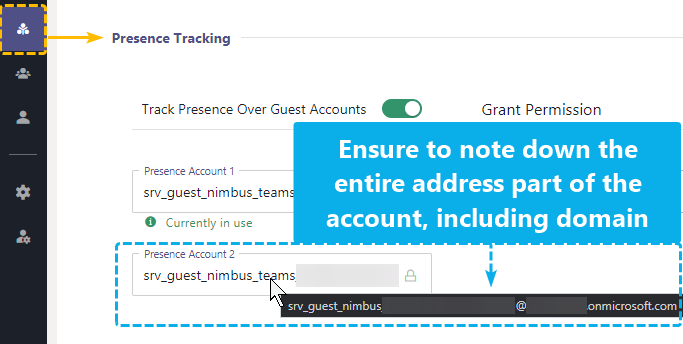 Screenshot showing two individual presence accounts
Invite Guest Users
INC Invite Azure Guest Accounts
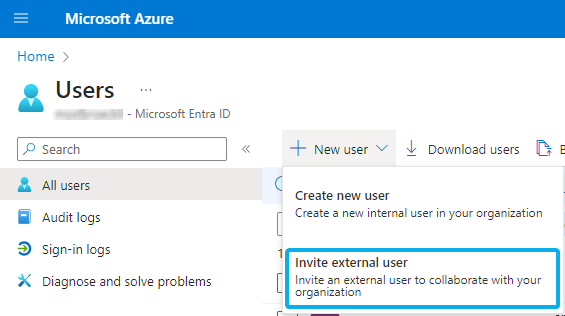
- As Tenant Admin, log into your Azure Portal.
- Go to Users > New Users and select “Invite external User”.
-
Invite both guest users 1&2 on your tenant. Add each of the previously copied email addresses (e.g. svr_nimbus_guest@onmicrosoft.com) and click Invite.
⮑ A standard Azure invite mail will be sent out to Luware.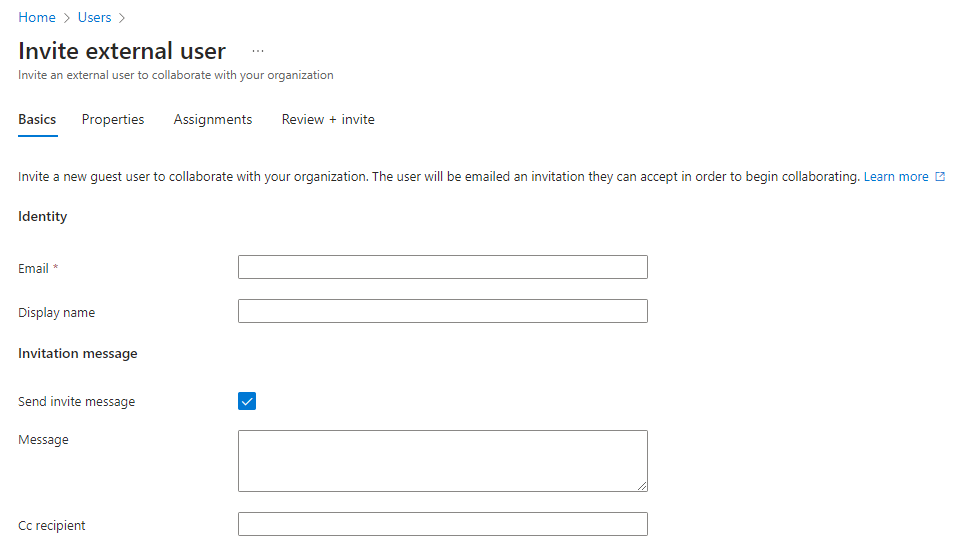
☝ Note that MFA (Multi Factor Authentication) needs to be disabled for these users. Otherwise, this feature will not work as the guest users cannot sign in to your tenant. - Let your Customer Success Specialist know that the guest users have been invited.
-
Please wait while steps are done in the background:
- Luware cloud operations team must accept the guest invitations. Please allow for some time for this to happen.
- Once successful, the "Account is not added as guest" message should disappear on your side in the Nimbus admin UI.
- If this is not the case, please get in contact with the Luware support.
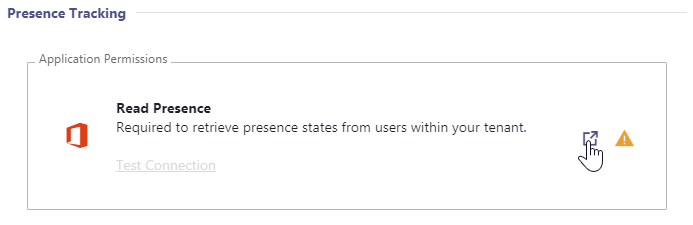
Grant Delegated Permissions
💡 This step can be done in parallel to the previous steps. Once granted, either of the presence accounts will make use of these permissions and no further actions are required on your side.
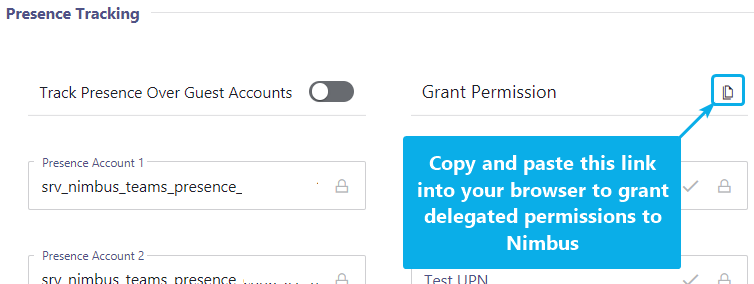
Copy & paste URL from the "Grant Permissions" area into your browser. This link must be opened by logged-in a Tenant Administrator in order to work.
🤔 Which permissions are granted to these users? Refer to Nimbus Required App Permissions > "Presence Tracking"
Results:
- Once granted, the "Permission is not granted" note should disappear in the admin UI.
- You can now enable the "Track Presence Over Guest account" feature and test the status tracking via the "Test UPN" field.
Adjust Your Service Settings
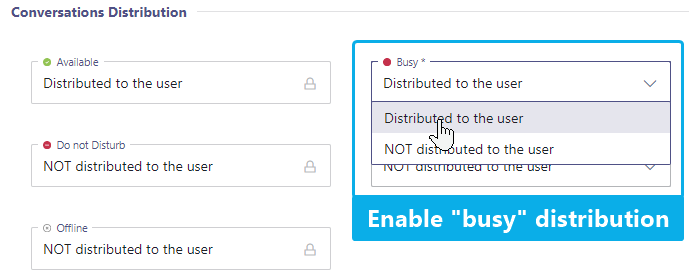
💡 With all previous "track presence" steps successfully performed, Nimbus is now able to distinguish between busy states.
✅ We recommend to check your Service Settings > Distribution > Conversations Distribution tab and have converations "Distributed to the user" even while busy. Nimbus will automatically detect if an existing Nimbus service call is already handled by that user and re-route incoming calls accordingly.
Secure Workaround for MFA
INC Secure Workaround for MFA
In some cases Nimbus will require you to invite Guest Accounts to support extended features on your Tenant. We realize that not using MFA for presence accounts is a big limitation. If your IT policy mandates MFA on all accounts, there is a workaround that whitelists IP ranges. To circumvent this problem you can use the following workaround:
- Add trusted Locations with the Nimbus Server IP Addresses (Switzerland)
- Add a conditional access policy to limit the access to the given trusted location.
Learn more…
Add Trusted Location
- Go to Named locations within Azure Portal (https://portal.azure.com)
- Add a new IP ranges location
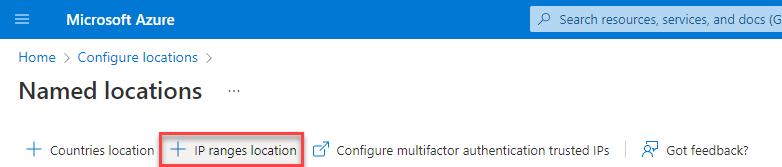
- Enter a Name and add the IP addresses for the location and check the Mark as trusted location option
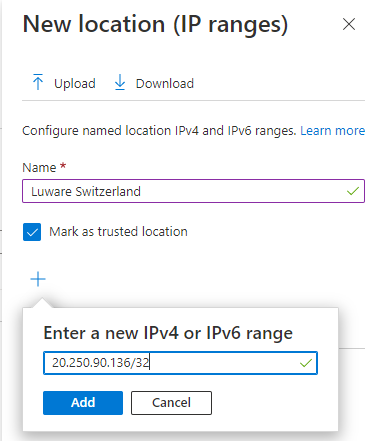
- Add all IP addresses for the location (see table below)
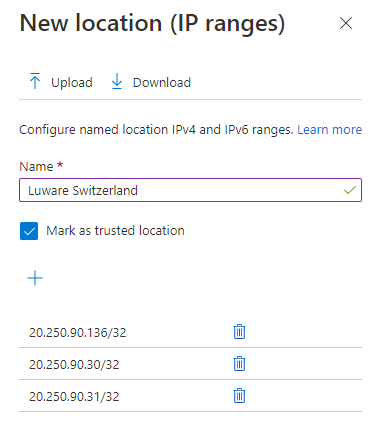
and click on Create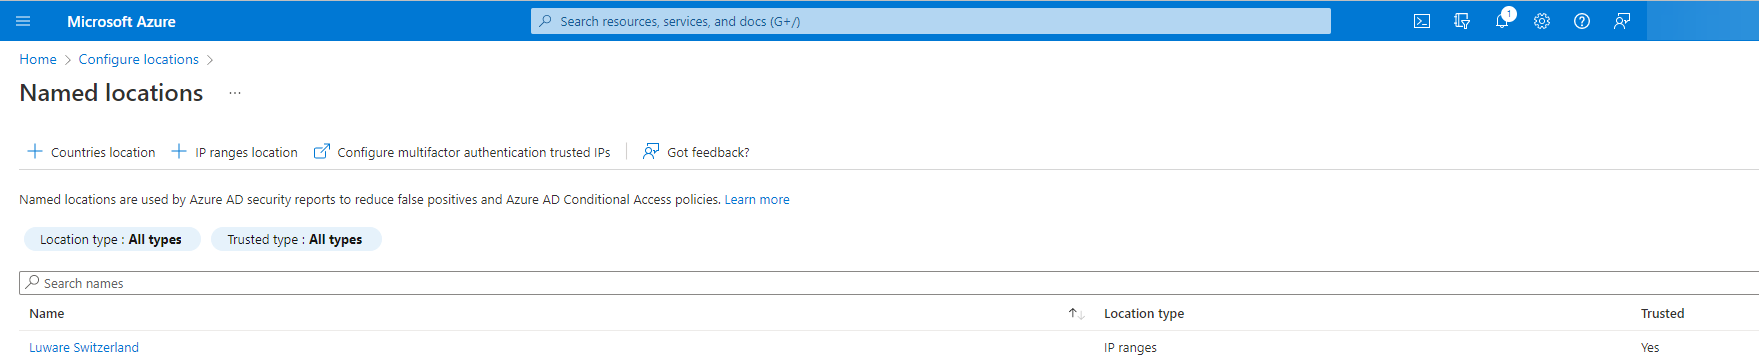
Add a conditional access policy
- Go to the Azure portal (https://portal.azure.com)
- Switch to Conditional Access and select Policies
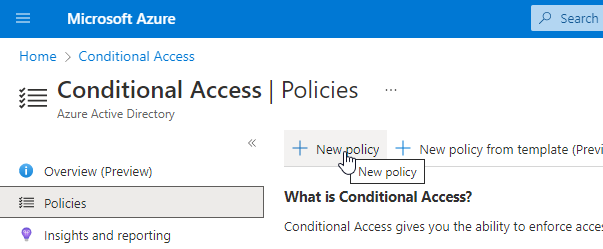
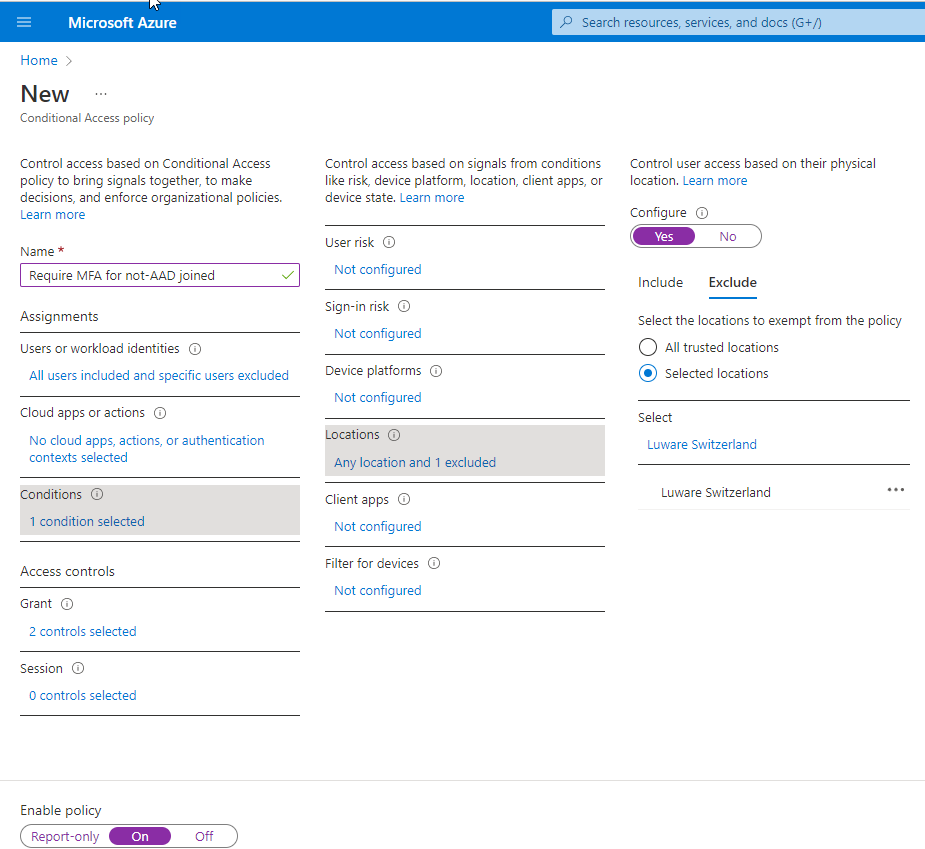
- Select an existing you want to change or create a new policy and configure the Condition section to add your trusted location as excluded from the MFA policy
Nimbus Cluster IPs
| Switzerland North 01 | |
|---|---|
| Switzerland North 02 | |
| Germany West Central 01 | |
| Germany West Central 02 | |
| United Kingdom South 01 | |
Caution: These IPs are configured by Microsoft and can be changed without prior notice.
Troubleshooting
| Error | Description | Solution |
|---|---|---|
Unknown Error (XX0000) |
Enhanced Presence has been enabled, Guest Accounts have been added, Permissions have been approved, Multi-Factor Authentication has been disabled for the Guest Accounts. However, the following error message appears when trying to check the status of users: |
Solution A: Change global collaboration settings
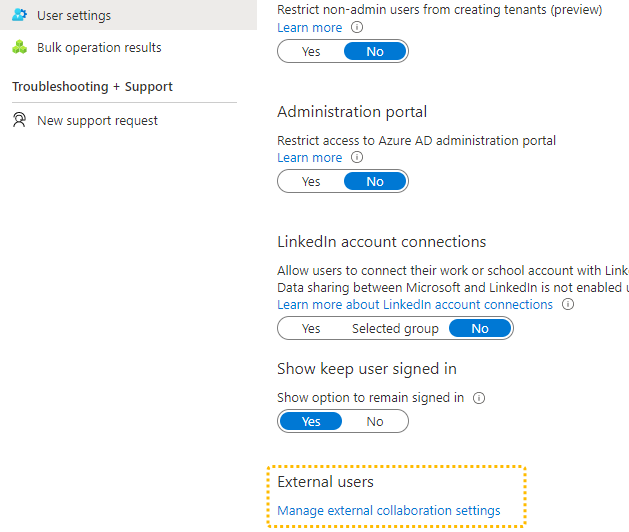
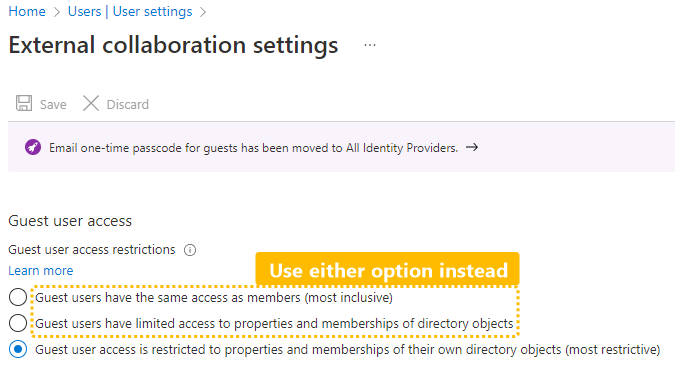
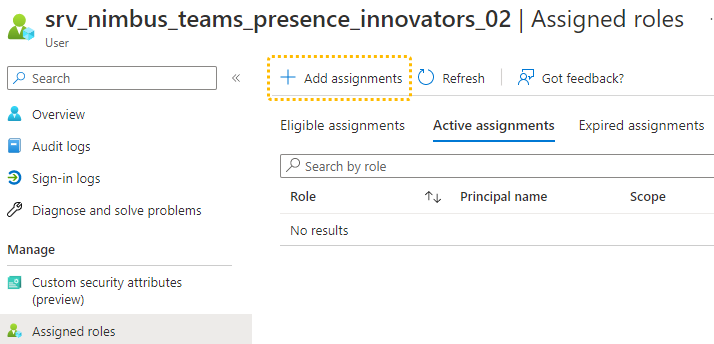
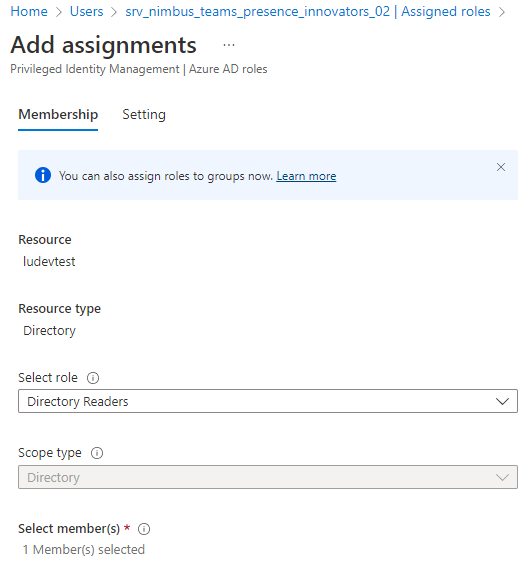
This is a global setting and applies to all (future) guest accounts. If you do not want to change this, consider solution B below. Solution B: Change individual user role assignmentSince the External Collaboration Settings are a global setting, you may not want to relax these rules just for one application. Instead you can just assign a special role to the guest accounts.
After the setting is changed, it may take up to an hour for the Nimbus Enterprise App to properly read the users' presence data. |