Address books extend the Nimbus search beyond what is within your internal O365 user directory. Additionally, by using the Nimbus Power Automate Connector you can manipulate addressbooks live, or enable your service teams to expand search entries via own lists.
Good to know
- Note: Address book configuration is limited to Tenant Admins, managed via backend Administration > Configuration > Address books.
- When your team is using Attendant Console (an optional App to enable for Nimbus) you can configure the available address books used for searches and call forwarding by placing them in the correct Organization Units .
☝ Restrictions and Limitations:
- Address Book size recommendation: To maintain the best possible performance during Nimbus call handling, we recommend keeping your Address Book size below 65.000 contact entries.
- Address books are limited to the local tenant and accessed as read-only.
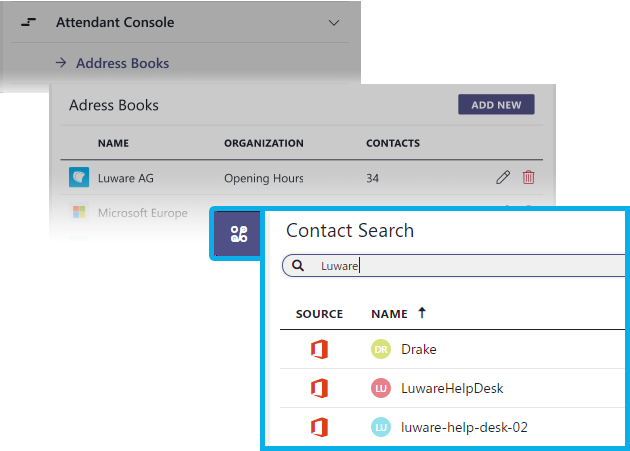
Add new Address Book
- To add a new book, click on "Add New"
→ A dialog window will open - Specify the Name and Icon
- Pick a Organization Units to make this address book available under.
- Confirm when done.
Address Fields
The following fields will be read from each user in the address book and can be used for later search, e.g. within Attendant Console:
INC Supported User Search Fields
Supported fields / filters for Attendant Console 2.0 (AC2)
Attendant Console 2.0 (AC2) supported search fields and filters tables:
INC Supported Search Fields and Filters (AC2.0)
Free Text Search
Prerequisites: The full search functionality only applies if permissions are granted. See Attendant Console - Permissions.
Legend
✅Fields are supported by Free Text Search
❗Limited by "starts with" logic
☝️Needs at least 3 characters to start searching
| Search within | "All" Tab |
Configured Groups |
||||
|---|---|---|---|---|---|---|
Fields |
O365 Directory |
Outlook Address Book |
Nimbus Address Books |
Nimbus Services |
Nimbus Address Books |
All Sources |
Display Name |
✅❗☝️ |
✅❗☝️ |
✅☝️ |
✅☝️ |
✅ |
✅ |
Contact Details |
✅❗☝️ |
✅❗☝️ |
✅☝️ |
✅☝️ |
✅ |
✅ |
Note |
✅☝️ |
✅ |
✅ |
|||
| First Name | ✅☝️ |
✅ |
||||
| Last Name | ✅☝️ |
✅ |
||||
| UPN (User Principal Name) | ✅☝️ |
✅ |
||||
✅☝️ |
✅ |
|||||
| IM Address | ✅☝️ |
✅ |
||||
| Business Phone | ✅☝️ |
✅ |
||||
| Mobile Phone | ✅☝️ |
✅ |
||||
| Home Phone | ✅☝️ |
✅ |
||||
| Company | ✅☝️ |
✅ |
||||
| Department | ✅☝️ |
✅ |
||||
| Job Title | ✅☝️ |
✅ |
||||
| Country | ✅☝️ |
✅ |
||||
| State | ✅☝️ |
✅ |
||||
| City | ✅☝️ |
✅ |
||||
| Postal Code | ✅☝️ |
✅ |
||||
| Street Address | ✅☝️ |
✅ |
||||
| External Custom Field 1-10 | ✅☝️ |
✅ |
||||
Filters
Note: Filters only work if this field is actually used for the contact.
| Search within | "All" Tab |
Configured Groups |
|||
|---|---|---|---|---|---|
Fields |
O365 Directory |
Outlook Address Book |
Nimbus Address Books |
Nimbus Services | All Sources |
City |
✅❗ |
✅ |
✅❗ |
✅ |
|
Company |
✅❗ |
✅ |
✅ |
||
Country |
✅❗ |
✅ |
✅❗ |
✅ |
|
Department |
✅❗ |
✅❗ |
✅ |
✅❗ |
✅ |
Initials |
✅ |
✅ |
|||
Job Title |
✅❗ |
✅❗ |
✅ |
✅❗ |
✅ |
Postal Code |
✅❗ |
✅ |
✅❗ |
✅ |
|
State |
✅❗ |
✅ |
✅❗ |
✅ |
|
Street Address |
✅❗ |
✅ |
✅❗ |
✅ |
|
Note |
✅ |
✅ |
✅ |
✅ |
✅ |
Usage within Contact Search
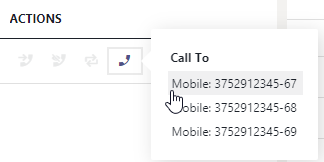
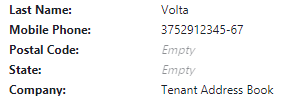
When performing a search (e.g. from within Attendant Console) the information will be displayed as follows:

Note that apps like Attendant Console can make use of multiple fields (e.g. phone-numbers per user), but not all entries may be shown in info pop-ups due to size or design constraints. | |
|
|
Use Case - Address Book via Excel/Power Automate
Want to keep your address books up-to-date and accessible to your whole service team? We prepared a handy Use Case for this
Show me how...
Use Case - Adding External Address Books via Power Automate
It is possible to add an external address book to Nimbus with the use of the Nimbus Power Automate Connector. In this example, we use an Excel file available to your whole team which can be updated with ease and automatically added to the Nimbus Address Books using a flow.
BEFORE YOU START
General Requirements:
- Power Automate Connector: If not done previously before, the Nimbus Power Automate Connector (Custom Connector) must be configured once for your tenant as an Azure application. As a Tenant Administrator you can follow the instructions on Microsoft Power Automate Connector page.
- Nimbus Administration user privileges are needed to be able to add the address book. Contact your tenant administrator or customer service support if you don't have access.
Service / Team Requirements:
- You need write access to the Files Tab in your MS Teams Client where your service will store the address book.
- Prepare an Excel sheet with the user entries for your future address book – 🔍 The steps will cover this as an an example.
- User access to Address books: users need an Attendant Console or a Nimbus Assistant license in order to search within the address book by using their respective Attendant Console search UI. Any Nimbus administrator can grant Attendant licenses via User Administration, or use License Management to assign the available contingency in bulk.
Adding an Address Book
Login as Tenant Admin and go to Configuration (Admin).
- Locate "Address Books" in the Configuration list.
-
Click on “Create New”.
⮑ A dialog window will open.- Specify the Name and Icon.
- Pick an Organization Unit (OU) to make this address book available under.
💡 The higher the OU level, the more users will see the entries in their Attendant Console search. Keep data privacy in mind when playing the book. - Confirm when done.
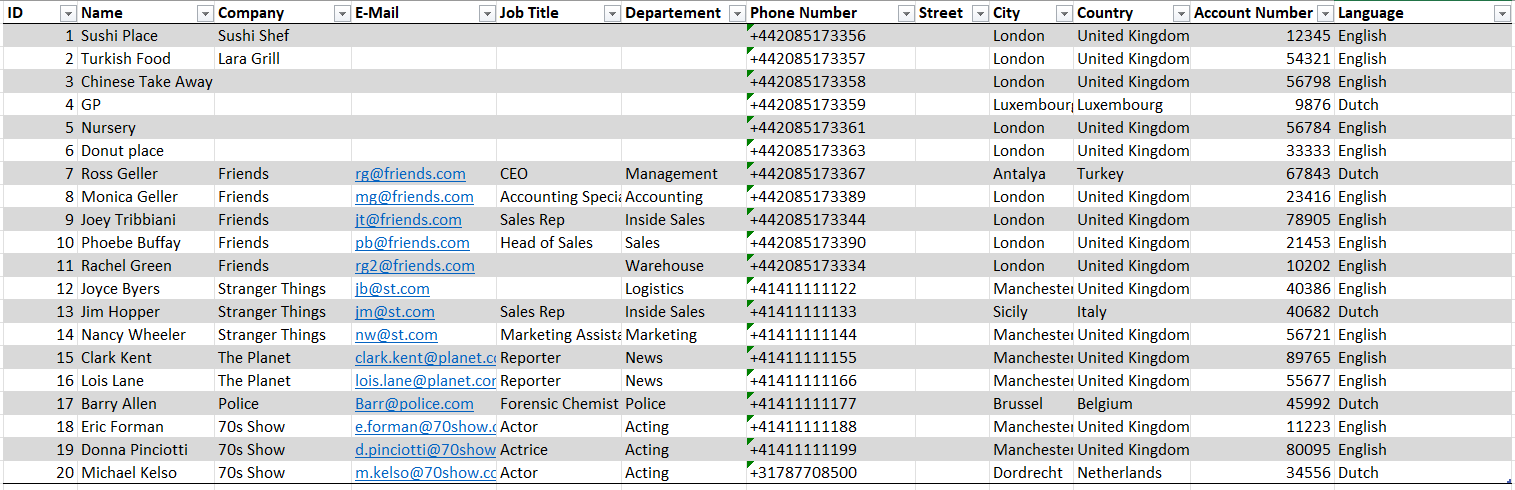
Create Excel Sheet
-
Create an excel sheet with user details and make sure it is in a table format – see example below:
-
Save the excel sheet for your team to access, e.g. in the "Files" tab created for each Nimbus service team.
💡 Of course you can vary this step by using any other SharePoint location accessible to you or any selection of team members / owners.
☝ Please note that by default "Files" in a team are accessible to all team members. Ensure not to expose any potential private customer data in your address book.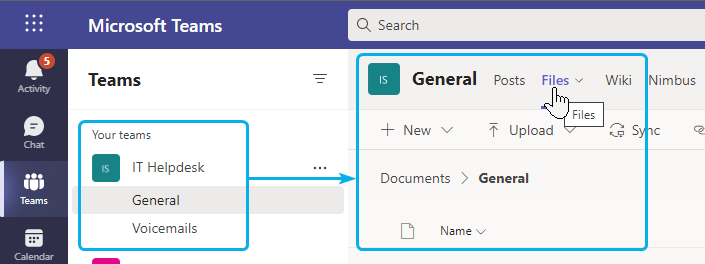
Create flow for the address book
- Visit the Flow landing page: https://make.powerautomate.com/
- Head to "My Flows"
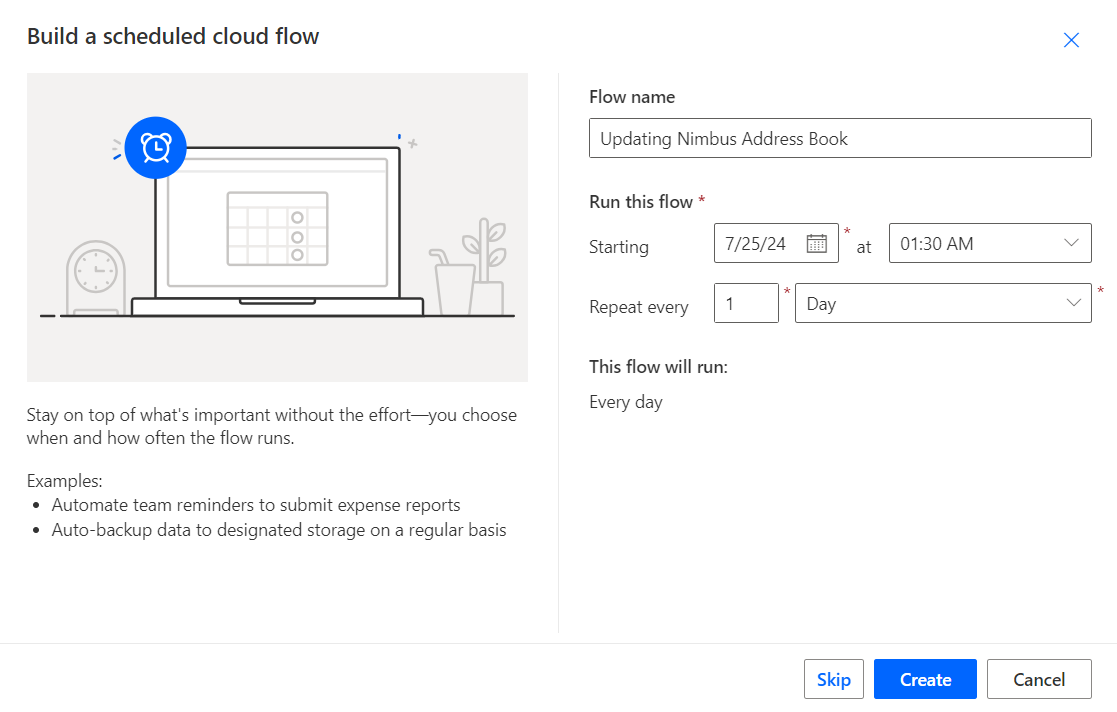
- Click on "+ New Flow" and create a blank "Scheduled cloud flow"
- Give your new flow a speaking name, e.g. "Updating Nimbus Address Book", set the desired schedule
- Click the Create button
- In the editing area click
 to add a new action
- Search for "excel list" and select “List rows present in a table” under the “Excel Online (Business)” section
- Configure the SharePoint Item as follows (💡 In this step you need the Excel file from the previous step. You can of course place the file somewhere else, but keep in mind that your Flow user needs permanent access to the file's storage location and no one else should have access to the file and personal details therein.):
| Field | Value to fill in / 🌟 = Nimbus dynamic content | |
|---|---|---|
| Location | Select the SharePoint Site hosting the Excel file from the dropdown box | 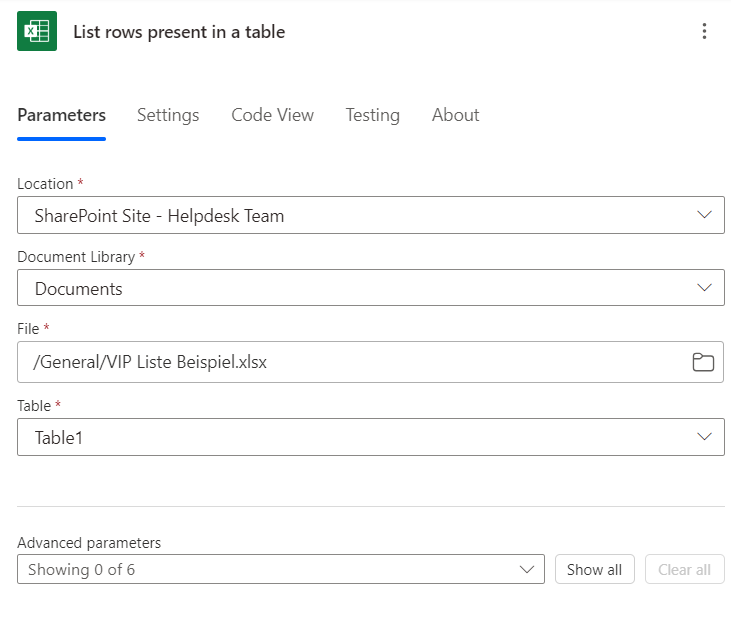 |
| Document Library | Select the document library storing the Excel file from the dropdown box | |
| File | Select your Excel file from the dropdown box | |
| Table | Select the table from your Excel file from the dropdown box | |
💡If your Excel list (or whichever data source you've chosen instead) includes a lot of entries, you may find that Power Automate will by default only return the first 256 entries. To get more entries, you can access the Settings of the "List rows present in a table" action and enable the Pagination feature, with an appropriate page size.
- In the editing area click to add a new action.
- Search for "Nimbus" and select “Add a contact to an address book” under the “Luware Nimbus” section.
- Configure the action as follows:
| Field | Value to fill in / 🌟 = Excel dynamic content | |
|---|---|---|
| Addressbook | Select the Nimbus Address Book you created from the dropdown box | 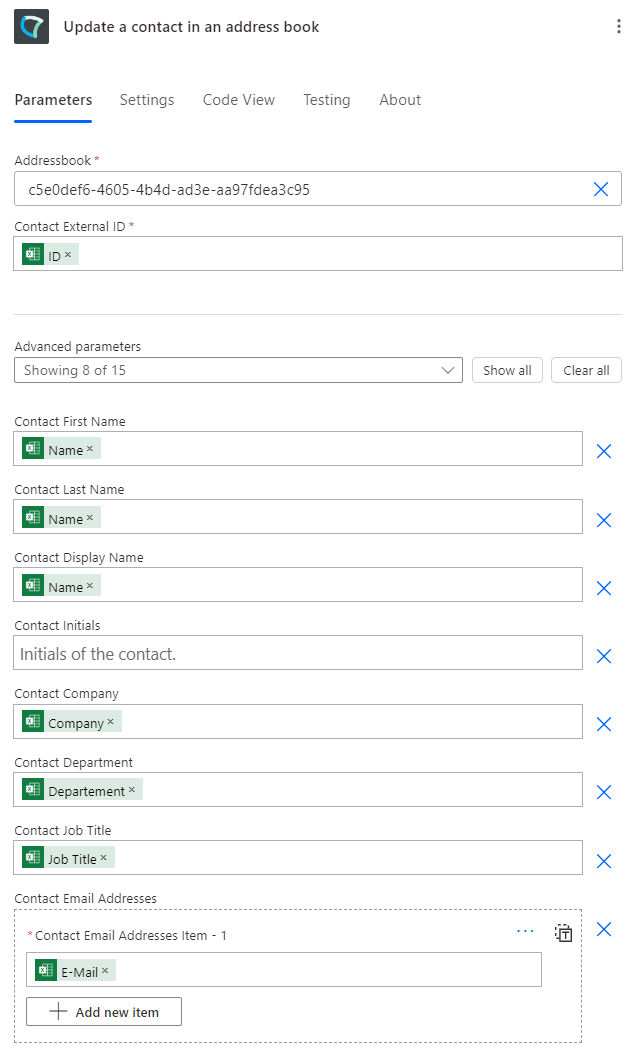 |
| Contact External ID | 🌟ID | |
| Contact First Name | 🌟Name | |
| Contact Last Name | 🌟Name | |
| Contact Display Name | 🌟Name | |
| Contact Company | 🌟Company | |
| Contact Department | 🌟Department | |
| Contact Job Title | 🌟Job Title | |
| Contact Email Addresses | ||
- Verify that your flow now looks something like this:
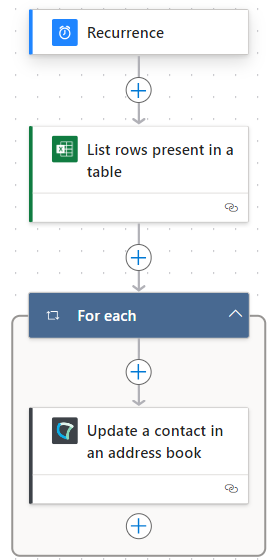
Verify
-
Test that your flow runs successfully at least once without errors.
💡 1 You can of course also adjust or replace the initial "Recurrence" trigger to anything else that ensures that new entries to your Excel Address book entries are transferred over into Nimbus Address Books in a timely manner. - You can also validate via the search of Attendant Console if (new) entries are shown, with the Address Book icon shown as source.

SOME POINTS ON ORGANIZATION UNITS
Keep in mind that the visibility of address book entries depends on the Organization Unit assignment for both Attendant Console user and the address book itself. Users will only find entries if the address book is on the same OU level or higher as their account.
💡 If you want an address book to be available to Attendant Console users from different OU branches you need to make sure the book is placed higher on the OU-tree than all of the users accessing it. This follows the "reading along the path" rule as explained on the Organization Units page.
🌟 Congratulations - you have now successfully made address book management easier for your team.
INC Address Book Limitations
Address Book Field Size Limitations
Please note that Address Books fields are bound to size limitations. When exceeded, the Nimbus Power Automate Connector will return an error 400 Bad Request.
Learn more…
| Area | Field | Limitation |
|---|---|---|
| Contact | ExternalId | 128 characters |
| Firstname | 64 characters | |
| Lastname | 64 characters | |
| Displayname | 256 characters | |
| Initials | 16 characters | |
| Company | 64 characters | |
| Department | 64 characters | |
| JobTitle | 128 characters | |
| UPN | 128 characters | |
| IMAddresses | IMAddress |
Maximum of 10 addresses 128 characters per address |
| Emails | EmailAddresses |
Maximum of 10 addresses 128 characters per address |
| PhoneNumbers |
Businessphones Mobilephones Homephones |
Maximum of 10 phone numbers (per type). 32 characters per phone number |
| Address | Adresses | Not more than 10 addresses |
| Street: | 1024 characters | |
| City: | 128 characters | |
| Country | 128 characters | |
| State | 128 characters | |
| Postal code | 40 characters | |
| CustomFields | Field array of name / value pairs. | Maximum of 20 custom fields |
| name | 64 characters | |
| value | 1024 characters |