In this use case, we're going to tackle a scenario where your service can enable an emergency/special announcement that lasts for a period of time.
- This scenario is an extension to Use Case - Creating a custom settings page for a workflow, but with more control over your announcements.
- In extension, you will be able to control the emergency case based on your defined start and end time.
PRECONDITIONS
For this use case you need:
- A Power Automate Premium subscription (for the "SharePoint" Element).
- The Team Owner to share a "flow configuration file" with the team which contains the different announcement tests. → More on this in the steps below.
Show Icon Legend
| 💡 = A hint to signal learnings, improvements, or useful information in context. | 🔍 = Points out essential notes or a related page in context. |
| ☝ = Notifies you about fallacies and tricky parts to help avoid problems. | 🤔 = Asks and answers common questions and troubleshooting points. |
| ❌ = Warns you of actions with irreversible/data-destructive consequence. | ✅ = Instructs you to perform a certain (prerequired) action to complete a related step. |
SharePoint List Preparation
✅ As a first step, we create a SharePoint List that contains your variables for the future case workflow.
- Within your SharePoint, create a "Custom List". Give it a fitting name like "Emergency Cases"
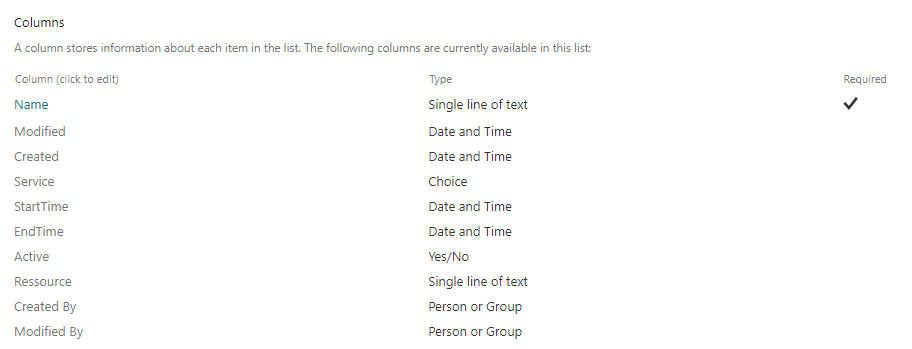
- The list should have the following fields (columns):
Field |
Type |
Description |
Example |
|---|---|---|---|
| Name | String | Name of the list entry | Dt. IT Service Team |
| Service | String | Name of the service as it is shown in Nimbus 🔍 See Service Settings. |
Deutsches IT Service Team |
| StartTime | Date and Time | Date and time when the emergency should start | 2022-08-19T07:00:00Z |
| EndTime | Date and Time | Date and time when the emergency should end | 2022-08-19T22:00:00Z |
| Active | Yes/No | Is the emergency active? | Yes |
| Resource | String | Name of the audio | Netzwerkstörung |
At the end, your list should be looking something like this:
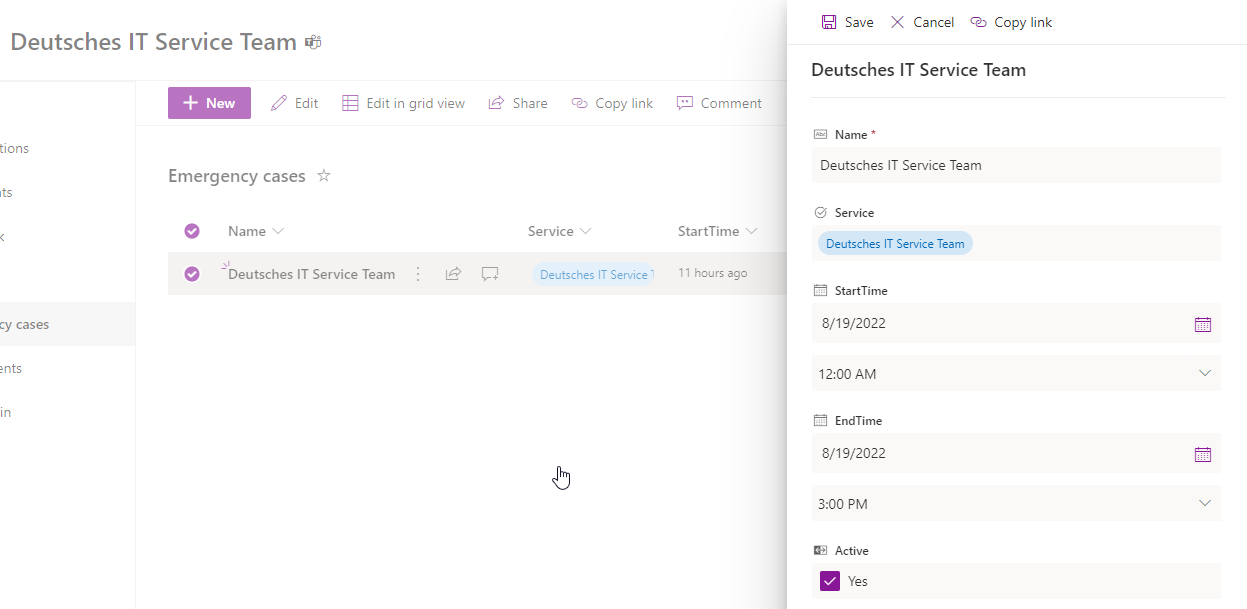
3. Note that each time when an emergency announcement is necessary, the list entry must be edited:
- The StartTime & EndTime must be set.
- The "Active" switch also has to be set. Note that only the first "Active" message found in your list will be used in your Nimbus workflow.
Here is an example entry that we've made in order to explain the next steps:
Flow Overview
✅ After your list is set up, it's time to start a new workflow.
Show me the workflow...

💡 Looks large - but don't worry. We will go through the flow step by step in the next chapter.
Flow Setup
- Go to the Power Automate website and log in.
- Go to "My Flows" and create a new "Automated Cloud Flow".
- On the next page, "Skip" the first step and instead select “Add a trigger”.
- Search for “Nimbus” and choose “When a task changes state”.

- Select your service for which you want the emergency case for and “System Accepted” as the Task event.

- Add a new Action "Initialize Variable" and set the following values:

- Name: StartTime
- Type: String
-
Value: Function -> utcNow()
💡 The Variable StartTime will be initiated with the actual UTC Date/Time value.
- Add another “Initialize Variable" and set the following values:

- Name: ServiceName
- Type: String
-
Value: Select the TeamName from the Nimbus PowerConnector
💡 This should initialize the Variable ServiceName with the name of the called service.
- As next activity, add a SharePoint “Get Items” element to your workflow.

- Site Address: URL of your SharePoint Site
- List Name: Select the Name of your Emergency Case List, you created
- In Advanced parameters select the Filter Query and add the following filter:
- Filter Query: (Service eq ‘<ServiceName>’)
- Replace the <ServiceName> with the Variable you created earlier.
- Add a “Apply to each” control and add a Condition activity.

💡 Below: green marked values are from your SharePoint Query, violet values refer to the variables you created.
💡 Function means that you have to add the function “FormatDateTime()” and add the variable as value to it.
Inside, add the following rows:- <Service Value> is equal to <ServiceName>
- <StartTime> is less than or equal to Function FormatDateTime(<StartTime>)
- <EndTime> is greater than or equal to Function FormatDateTime(<StartTime>)
- <Active> is equal to true
- Add an "Condition" step to your flow (IF Yes/No)
- Add an Nimbus "Update Task" Action to both branches of the Condition so it now looks as follows:

- Within the each area, add the following values:
"If Yes" Area |
No Area |
|---|---|
| RequestId: TaskID from the OnNewTask Element | RequestId: TaskID from the OnNewTask Element |
|
Customer.Custom.Fields
Add a second field
💡 From your earlier SharePoint GetItems Query |
Customer.Custom.Fields area
|
- Save your Flow.
Workflow Setup
✅ After setting up your flow handling, it's time to set up your Nimbus workflow.
In the workflow for your service add the following two "Check Parameter" Workflow Activities:
| Check Parameter - Custom Parameter: Is Emergency | How it looks like |
|---|---|
|
|
|
Add two checks to the Element: Check1
Check2
|
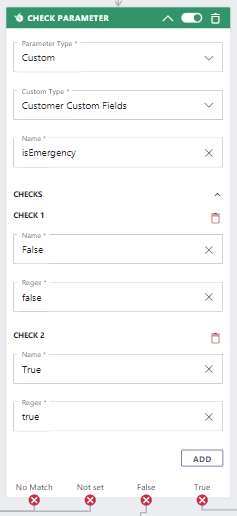
2. Connect the exits to the next activity you want to perform. In our case we route the "True" Exit to our second Check Parameter activity.
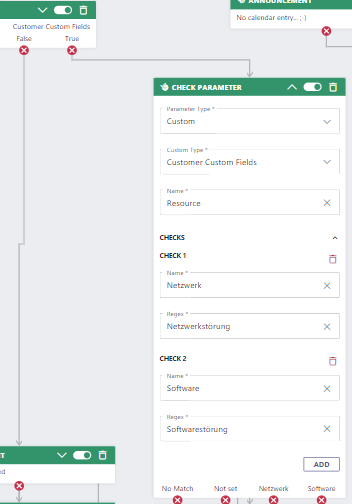
| Check Parameter - Custom Parameter: Resource | How it looks like |
|---|---|
|
Fill the values according to your PowerAutomate workflow:
In this second "Check Parameter" example element we now need to add checks for all different resource-types we have in our SharePoint List "Resource" column (→ Step 1). In our example defined 2 resources - feel free to define your own:
|
|
Accordingly, we rout our exits of this activity to individual announcement activities Check1
Check2
With this two Check Parameter we can cover up to 10 Emergency Announcements:
|
3. As final steps we recommend the following:
- Upload the individual audio file Resources to use within an "Announcement" workflow activity.
- Define further (up to 9) emergency announcements in your SharePoint list.
- Test your workflow in a live-call to see if all emergency cases are are properly handled.
RELATED PAGES
A simplified variant of this case with fewer variables to handle can be found on Use Case - Creating a custom settings page for a workflow.