In this use case, we handle the scenario where you want to communicate with Assistant using a custom API, which is reachable via custom scopes.
Below you can find an example of how such scenario can be covered and what additional steps are required for having a Service Call template assigned to a service.
PRECONDITIONS
You require tenant administrator rights to to create, update and delete Action Templates
- Enterprise Routing Enterprise Routing or Contact Center licensed service access Context Service Settings.
- The Service Call Templates is configured and assigned to the service mentioned above.
- The Agent behind the service is set up properly to use Assistant and has the necessary license assigned. → See Use Case - Setting up Assistant .
💡 Tip: You can apply the concepts shown here to both Direct Call Templates and Service Call Templates.
Show Icon Legend
| 💡 = A hint to signal learnings, improvements or useful information in context. | 🔍 = Info points out essential notes or related page in context. |
| ☝ = Notifies you about fallacies and tricky parts that help avoid problems. | 🤔 = Asks and answers common questions and troubleshooting points. |
| ❌ = Warns you of actions with irreversible / data-destructive consequence. | ✅ = Intructs you to perform a certain (prerequired) action to complete a related step. |
Expose an API
|
✅ To get started, create an App registration in your 1 or update an existing one. 💡 Leave all application options as they are. Now to get started with the API Steps:
References: |
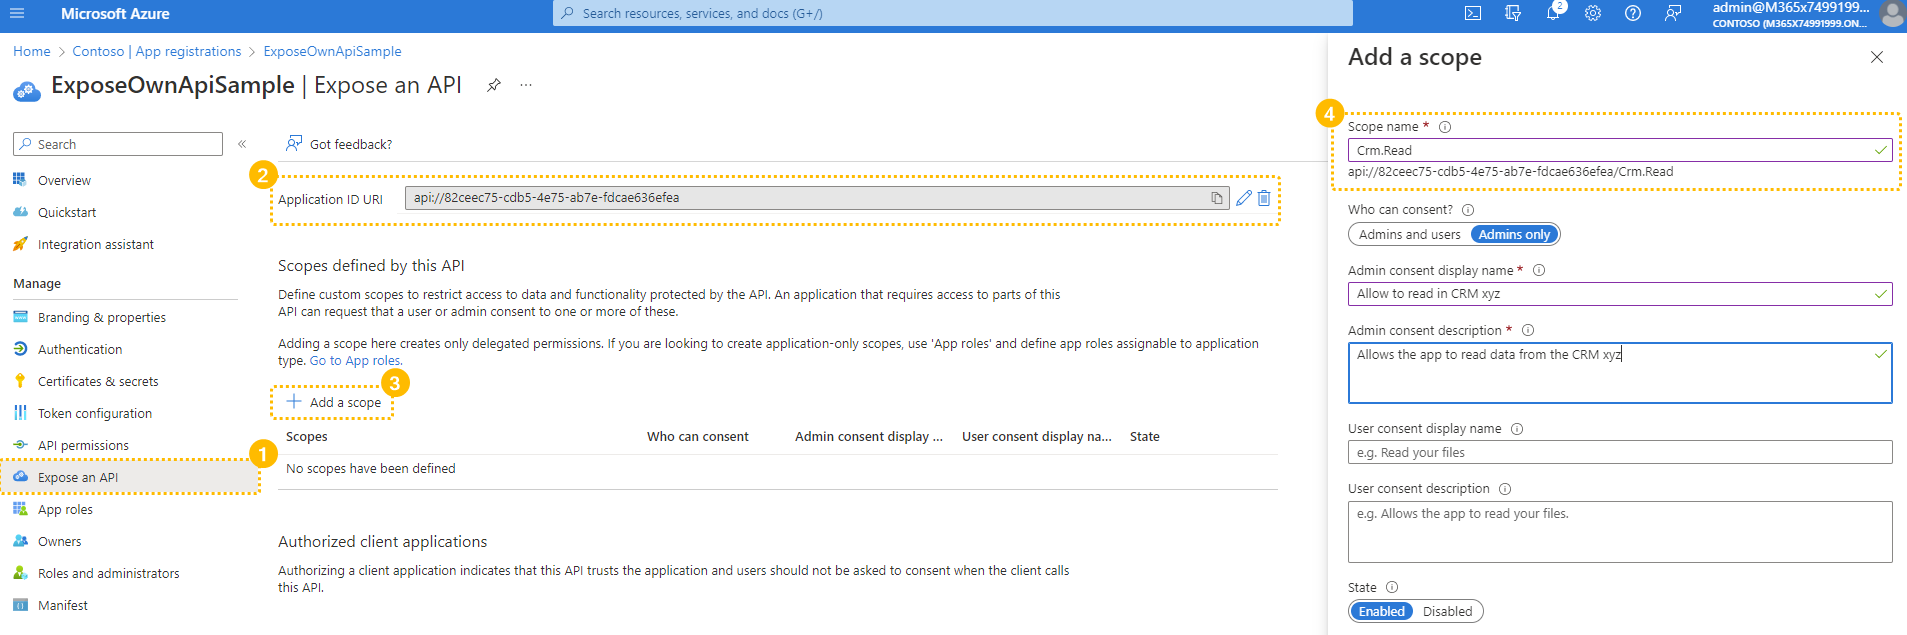
|
✅ After the Scope creation:
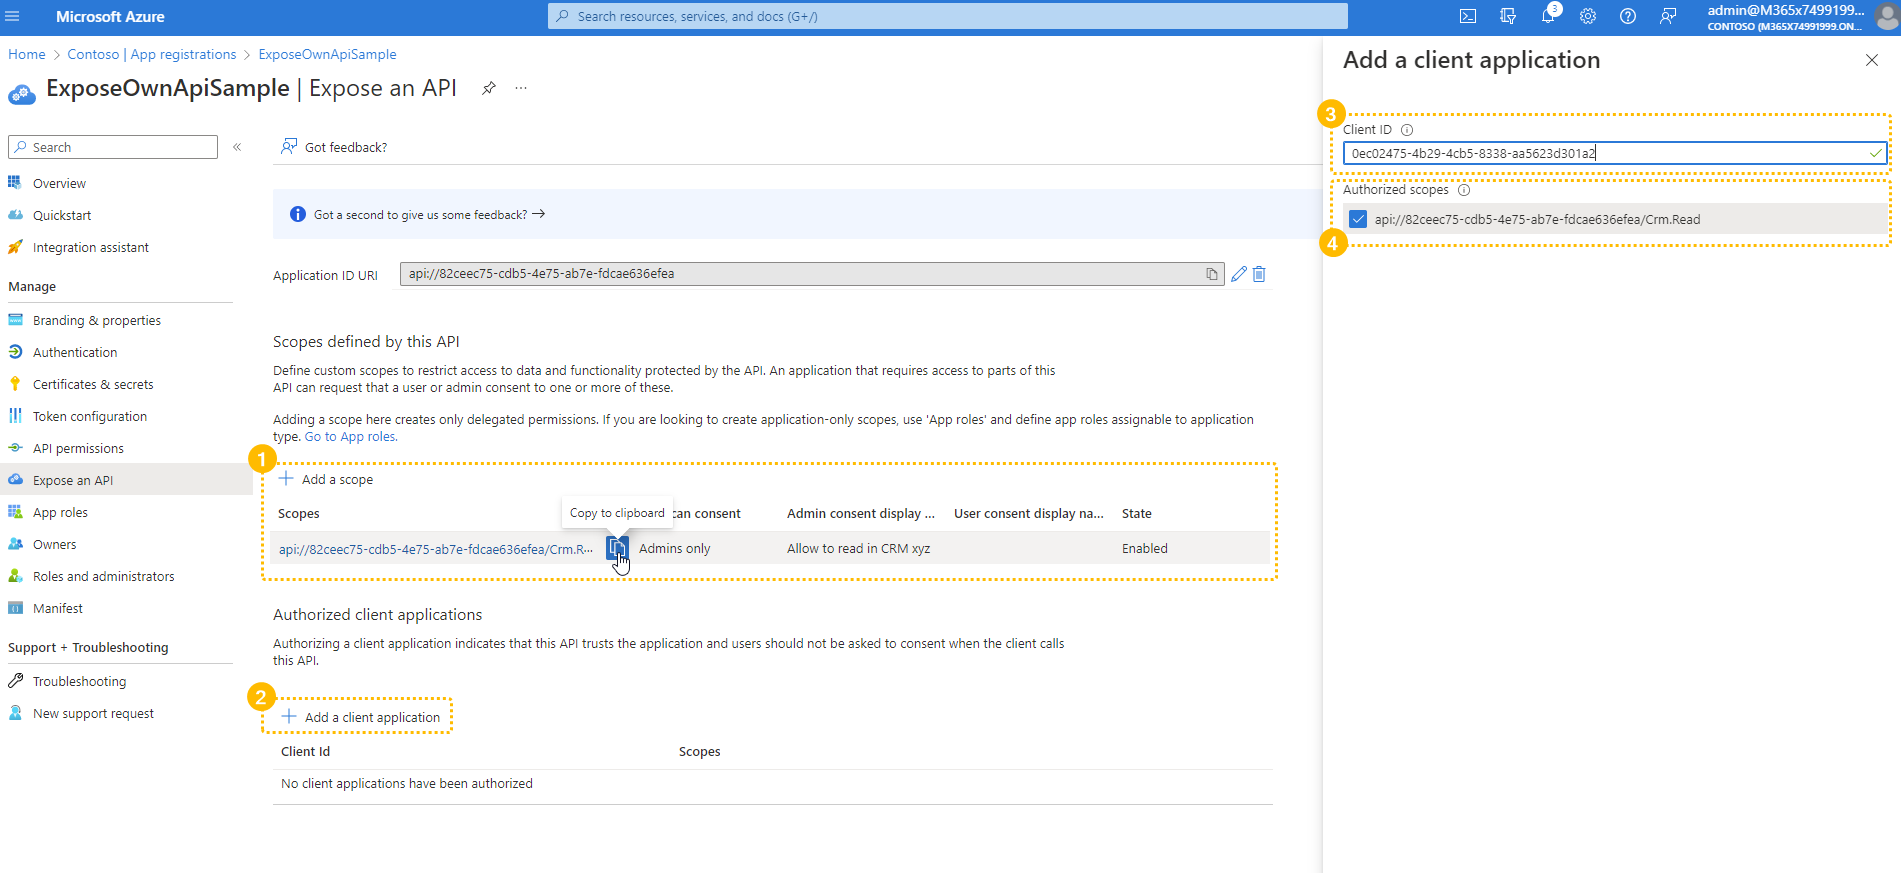
Now we make sure that the Assistant Client ID gets added under the section Authorized client applications. This is the "Luware Nimbus ACS" client ID supplied by the Nimbus Customer Success team. 💡 Note that you will only find this App in your Tenant when a preivous grantlink by Nimbus customer success was confirmed. Under "Authorized Scopes" paste the Scope Link from your clipboard (step 1). |
 |
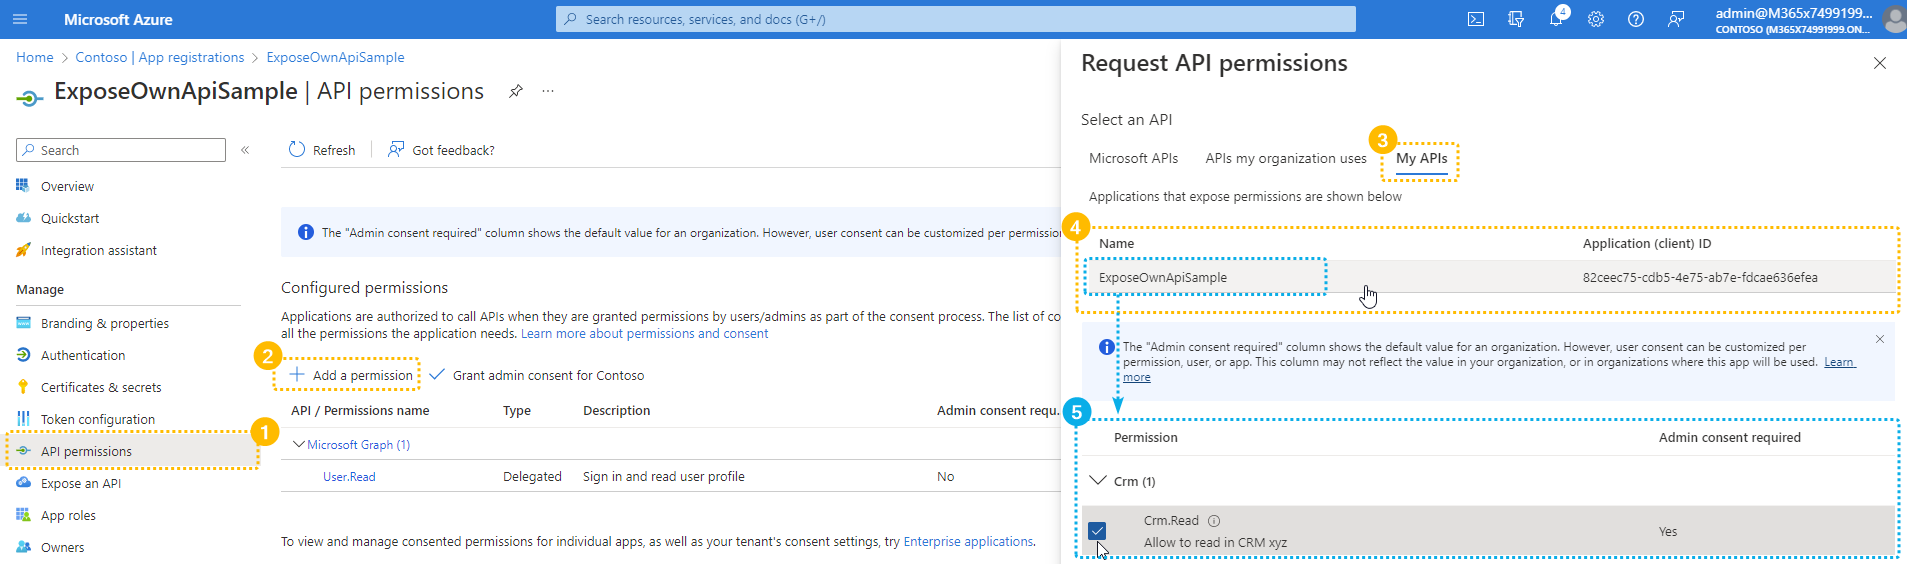
Grant admin consent
✅ After the Client Application was added:
|
 |
Usage of custom scopes within Assistant
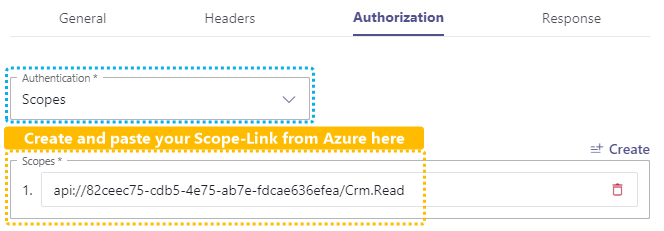
✅ Ensure to have the "Scope Link" ready for this step. We will need it to create a Service Call Template with a Web Request action.
🔍 You can follow the steps of Use Case - Chaining of Assistant requests, however with the following differences to your first web request action:
Define the URL to your CRM. Note that this is a case-by-case topic. The API call and parameter to identify a caller is completely up to you. Refer to the System Fields and Parameters page for a list of available references within Nimbus. |
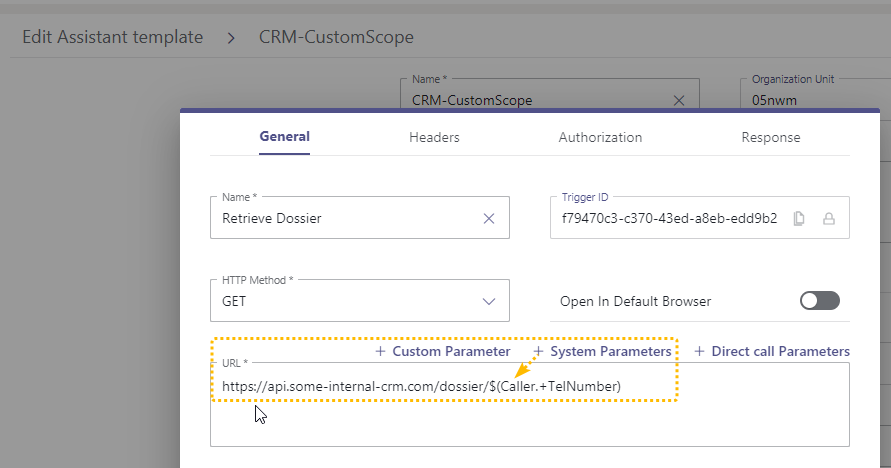
|
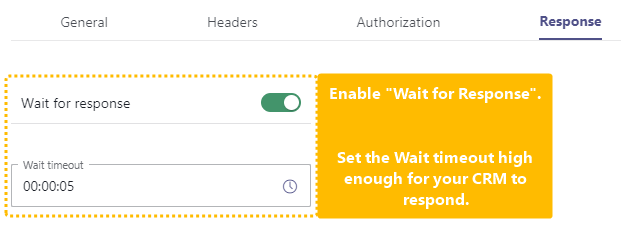
💡 You can skip the "Headers" tab as optional.
💡 In our example: ☝ Please note that this link is completely unique to your Scope and Naming, Ensure that the spelling is done correctly on the name suffix after the / |
 |
|
|
|
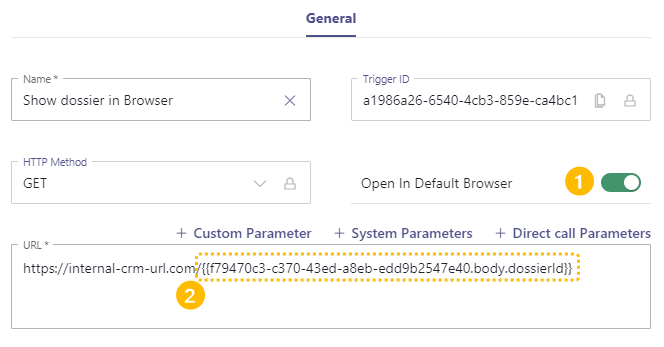
Back in the "General" Tab
|

|
✅ Now we show your web results in the Browser of your Agents. Add another trigger action of type "Web Request" right after your previous.
Create an URL as follows and paste the Trigger ID Click on Save and Apply.
|
|
Protect your own API (sample for a simulated backend API in c#)
In this step we show some possibilites how you can protect your backend and verify your custom scope.
💡 This is just a sample, your API can look completely different.
🔍 Your appsettings.json contains the necessary values (for the -application mentioned above in step 1)
| Property | Value |
|---|---|
| Instance | https://login.microsoftonline.com/ |
| Domain | Your domain either with .onmicrosoft or your owned domain |
| TenantId | Your TenantId |
| ClientId | The Id of the client application |
| Audience | ☝ The audience needs to match the Application ID URI |
| Scopes | Your scopes you want to verify. E.g. "crm.read" |
| CallbackPath | /signin-oidc or what ever you have configured as redirectUri |
| ClientSecret | via Azure Key Vault |
| ClientCertificates | via Azure Key Vault |
- Add your service for the Authentication to your builder during startup based on the configuration above
- Use the correct controller attributes to secure your API controller
- [Authorize] - for regular Authorization
- [RequiredScope(RequiredScopesConfigurationKey = "AzureAd:Scopes")] - the verify the correct scope from the configuration