In this Use Case we cover the following scenario:
- The Nimbus service workflow asks the caller for an input, we'll trigger on a Parameter Update to catch the customer input and send it to a storage table in Azure.
- In a second step we'll connect the Power BI report to the table and add the data to the report. For this we will be creating a Azure Table storage table in your tenant and add data to it during a Power Automate flow.
- Lastly we extend the Luware Power BI Report with the data from the Azure Table storage.
PRECONDITIONS
You require service owner rights to access the Power BI OData Feed Interface.
- The Nimbus Power Automate Connector is installed and preconditions are met.
- A service is set up and generating productive data.
- A storage account in Azure has been created.
- We have downloaded and opened the Luware Nimbus reporting file (Nimbus.pbit) in Power BI.
INC Icon Legend Accordion
Show Icon Legend
| 💡 = A hint to signal learnings, improvements or useful information in context. | 🔍 = Info points out essential notes or related page in context. |
| ☝ = Notifies you about fallacies and tricky parts that help avoid problems. | 🤔 = Asks and answers common questions and troubleshooting points. |
| ❌ = Warns you of actions with irreversible / data-destructive consequence. | ✅ = Intructs you to perform a certain (prerequired) action to complete a related step. |
Prepare Nimbus
-
Create a new Parameter with ID= "PIN".
☝ Leave the default value blank.
-
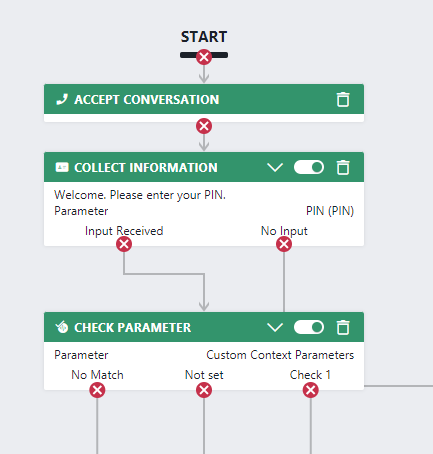
Create a workflow with a "Collect Information" @workflow activites followed by a "Check Parameter" activity.

- The Collect Information activity asks for the caller input and stores the value into the Nimbus context parameter "PIN".
Set the following within the Collect Information activity:- Prompt text = Welcome. Please enter your PIN.
- Parameter to Save = PIN
- Max digits = 4
-
Set the fields of the Check Parameter activity to:
- Parameter Type = Custom
- Custom Type = "Custom Context Parameter*
- Name = “PIN”
- Route the output nodes according to your needs.
Create a storage table in Azure
✅ Create a new storage table* in Azure and add a property to it:
- CustomerInput - String

*🔎 For more detailed instructions on how to add a storage account and table read Use Case - Connecting to Azure Table Storage Inside a Flow.
Create the flow
Flow overview

- Visit the Flow landing page: https://make.powerautomate.com/
- Go to "My Flows".
- Click "+ New Flow" and create a blank "Automated Cloud Flow".
- Give your new flow a speaking name, e.g., "Save Customer PINs".
- In the text box underneath, search for “Nimbus” and choose the “When a task changes state” trigger.
- Click the Create button.

- Select the “When a task changes state” trigger.
- In the “Services Item” dropdown select the Nimbus service's UPN.
💡 You can also get the data of multiple services at this point, but for the sake of simplicity we keep it to one service in this example. - In the “Task Events” dropdown select “Parameter Updated”.
- In the “Advanced parameters” dropdown enable “Modalities” and "Directions".
- In the “Modalities Item” dropdown select “Audio”.
- In the “Directions Item” dropdown select “Inbound”.
- Navigate to the “Settings” page of the trigger and add the following expression as a “Trigger condition” to trigger the flow only in case the “PIN” parameter is updated:
@equals(triggerBody()?['UpdatedParameterName'],'PIN')
- In the editing area click
 to add a new action.
- Search for "Azure table storage get entity" and select “Insert Entity (V2)” under the “Azure Table Storage” section.
- Configure the action as follows:
| Field | Value to fill in / 🌟 = Nimbus dynamic content | |
|---|---|---|
| Storage account name or table endpoint | Select an existing connection setting from the dropdown list |  |
| Table | Select IVRChoices from the dropdown list | |
| Entity | |
|
💡 In case no connection exists yet for the Azure Table Storage, Power Automate will ask you first to connect.
🔎 To get more information about the options, please have a look at the official Azure Table Storage - Connectors article.
Adapt the Power BI Report
-
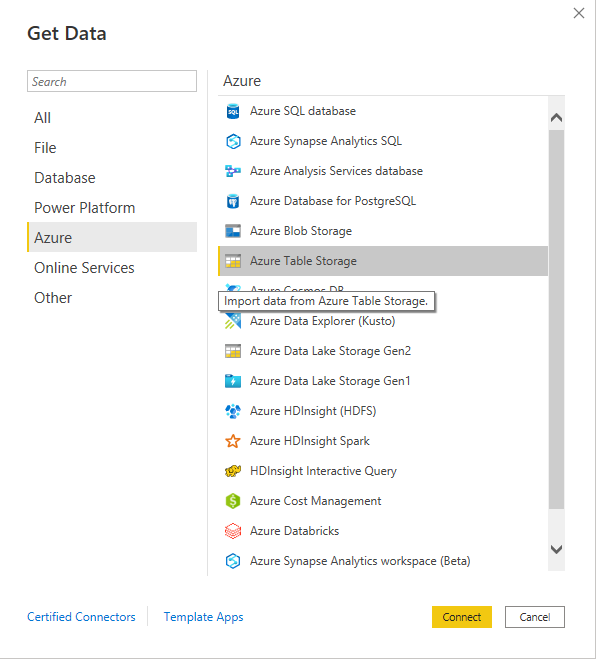
Open the Luware Power BI report, go to "Get Data" and select "Azure Table storage".

- After successful connection you can go to the model view and you'll see the table here:
 |
 |
-
Select "..." > "Edit query" on the new table so that you can format the table columns.

-
Select the content row and expand the hidden columns.
- Make additional changes to data format or column title if needed.
- The table should now look like this and is ready for use.
