In this Use Case we tackle the following scenario:
- Your call center offers lots of options in an IVR. For your customer it takes a long time to listen to all options while only few of them are relevant.
- Instead of playing the whole list of options in an IVR we want to play only relevant options to our customers. We can do this with a simple Power Automate integration and using the TTS announcement activity in the Nimbus workflow.
- For the calling customer this is convenient because they get relevant options and save time. The announcement text can be shorter than the default text with all options, thus the customer spends less time listening to it.
PRECONDITIONS
- A service is set up and ready to receive calls.
- You are service owner and can access Workflows.
- You need access to Power Automate to use the Nimbus Microsoft Power Automate Connector.
INC Icon Legend Accordion
Show Icon Legend
| 💡 = A hint to signal learnings, improvements or useful information in context. | 🔍 = Info points out essential notes or related page in context. |
| ☝ = Notifies you about fallacies and tricky parts that help avoid problems. | 🤔 = Asks and answers common questions and troubleshooting points. |
| ❌ = Warns you of actions with irreversible / data-destructive consequence. | ✅ = Intructs you to perform a certain (prerequired) action to complete a related step. |
Prepare in Nimbus
VARIANT A
First, create a Parameter in Nimbus called "DynamicIVR". This parameter's default should hold the full IVR text such as:
Press 1 for Option 1
Press 2 for Option 2
Press 3 for Option 3
Press 4 for Option 4
☝ Keep in mind, that Nimbus has a character limit on the TTS "Announcement" Workflow Activities . If the text exceeds the limit, it will not be played.
VARIANT B
If you have longer announcements, then you need to create more than one Parameters i.e. "DynamicIVRPart1", "DynamicIVRPart2", "DynamicIVRPart3", etc.
| NAME | DEFAULT VALUE |
|---|---|
| DynamicIVRPart1 |
Press 1 for Option 1 Press 2 for Option 2 Press 3 for Option 3 Press 4 for Option 4 Press 5 for Option 5 |
| DynamicIVRPart2 |
Press 6 for Option 6 Press 7 for Option 7 Press 8 for Option 8 Press 9 for Option 9 |
| DynamicIVRPart3 | Press 10 for Option 10 Press 11 for Option 11 ...etc. |
✅ The following steps describe variant A.
Create the Workflow
VARIANT A
Step |
Details |
|---|---|
|
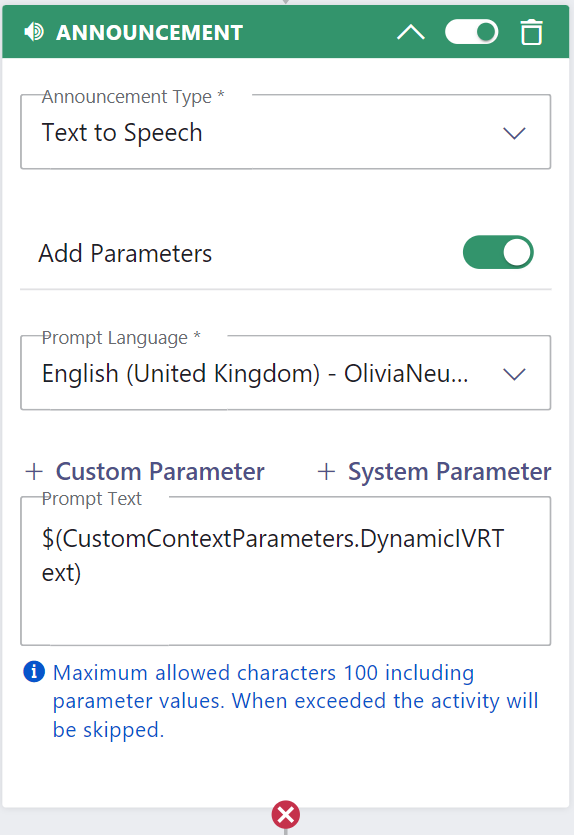
Add an Announcement activity and enable "Add Parameters".
|
|
|
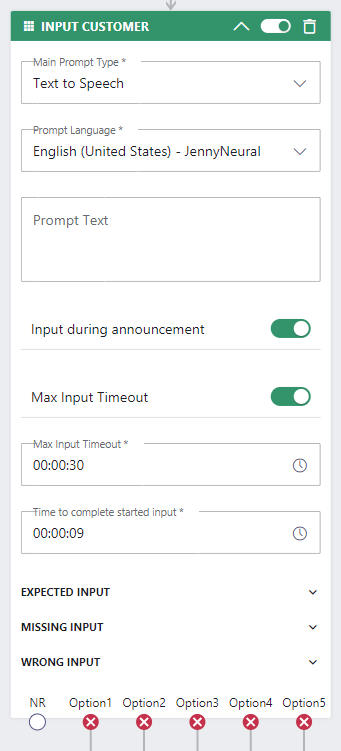
Then add the "Input Customer" activity.
|
|
✅ Follow-up: Finish your workflow according to your needs, then don't forget to assign it to your service's respective Modalities Service Settings. You are now ready to implement the Nimbus Power Automate Connector flow.
Create the Power Automate Flow
☝Note: The following steps are just a stub, because the logic how you create the dynamic text is up to you. We'll provide you with further examples you can use as inspiration.
| Step | Details |
|---|---|
|
Begin the flow with a “When a task changes state” Nimbus trigger.
|
 |
|
The next step should be done based on where you store your calling user details.
|
This step depends greatly on your CRM or user directory to look up your customers. 💡 You can also define other customer-defining factors, e.g. country of origin, age, previous call contents. Everything however relies on what you store in your own CRM system, database or list. Nimbus only stores system System Fields and Parameters. 🔎 As an inspiration, you can have a peek into some of our "Lookup" Use Cases on how to get data from various sources: |
|
Based on how you identify and announce to your user you can now overwrite the default contents of your announcement Parameters
|
 |
✅ As a reminder: When running variant B (e.g. longer or multiple announcements) don't forget to update all your Parameters individually (Update all values: DynamicIVRPart1, DynamicIVRPart2, DynamicIVRPart3) | |
Follow up each "Compose" element in your flow with an Update Task Nimbus connector action.
|
 |