In this use case, we're going to show how you can create your own (additional) Trigger Events in a Nimbus workflow. By doing so you get more opportunities to manipulate or save data via the Nimbus Power Automate Connector in your flows, e.g. to do storage operations in the background before Nimbus clears all data objects after a Workflow has concluded. The main trick explained in this use case is to use the Conversation Handling > Save to Parameter activity.
PRECONDITIONS
- A service is set up and ready to receive calls.
- You are service owner and can access Workflows.
- You need access to Power Automate to use the Nimbus Microsoft Power Automate Connector.
Show Icon Legend
| 💡 = A hint to signal learnings, improvements or useful information in context. | 🔍 = Info points out essential notes or related page in context. |
| ☝ = Notifies you about fallacies and tricky parts that help avoid problems. | 🤔 = Asks and answers common questions and troubleshooting points. |
| ❌ = Warns you of actions with irreversible / data-destructive consequence. | ✅ = Intructs you to perform a certain (prerequired) action to complete a related step. |
Prepare in Nimbus
-
Create two parameters as follows:
 💡 Note that one is having a "NotSet" default value which we're going to overwrite during the workflow.
These paramaters act as "Trigger name" examples. You can of course change the names to something that implies the intent or position in your workflows, e.g. "BeforeDisconnect" or "AfterAnnouncement". - With your parameters ready, go to the workflow editor, open or create a workflow, and locate the place, where you want your custom parameter "triggers" to be called.
-
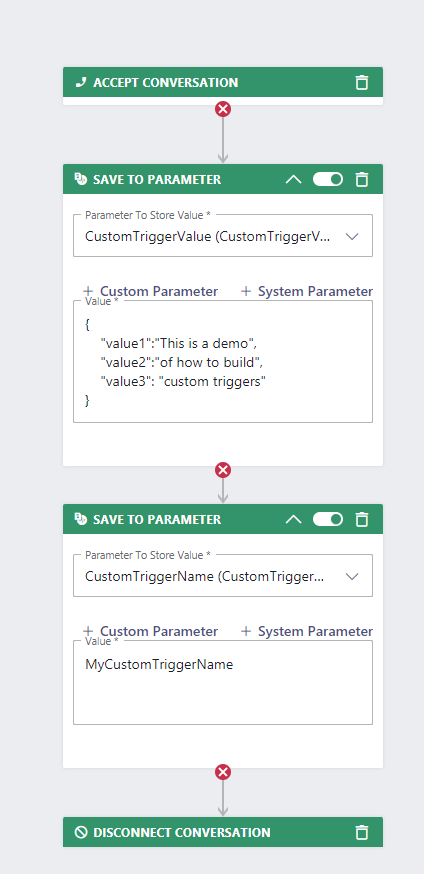
Add two "Save to Parameter" activities to that location.
- The first "Save to Parameter" will save the value of the trigger for post processing in Power Automate.
- The value can be in JSON format to store more than one string.
- The second "Save to Parameter" will store the trigger name, overriding its default.
Create the Power Automate Flow
In Power Automate, you can catch your new trigger called "MyCustomTriggerName" by using the trigger “When a task changes state” with the event “Parameter Updated”.
Description |
Screenshot |
|---|---|
| Start the flow with the trigger “When a task changes state” from the Nimbus Connector and select the event “Parameter Updated”. |  |
|
Then go to Settings inside “When a task changes state”. Add a trigger condition to only trigger Power Automate when the 2nd parameter has been updated in the workflow. |
 |
Next, we want to get the value into Power Automate from our CustomTriggerValue. For that we use a Filter Array. From = triggerOutputs()?['body/taskInformation/customContextParameters'] Fields = item()?['Name'] Value = CustomTriggerValue |
 |
Next, we insert a Parse JSON and there we first press “Generate from sample button” to generate the schema with the data set in the workflow. |
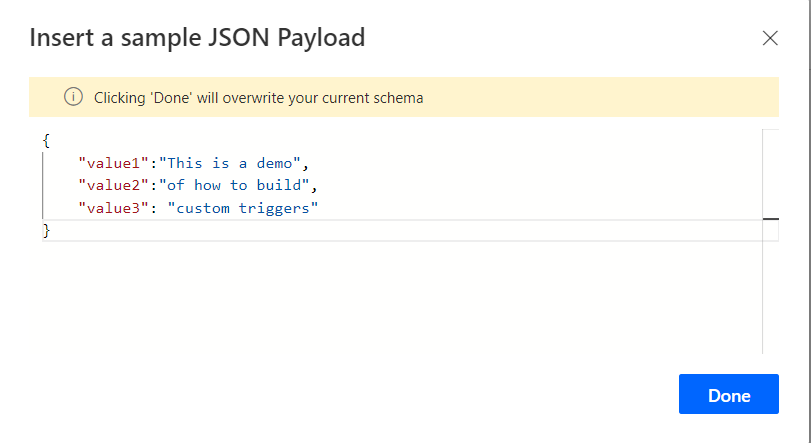 |
For the Content of the Parse JSON we select the Value of the the Custom Context Parameter Value from the Filter Array |
 |
✅ Now you are ready to implement the rest of your flow under the Parse JSON. You can use the Parse JSON object which holds the CustomTriggerValue values for further processing.