In this use case, we're going to create an example workflow with the following learning goals:
- Learn basic rules on how to structure your workflow efficiently.
- Learn concepts and settings related to workflows within Nimbus.
- Learn about navigation-related configuration steps and understand their meaning, so that you can set up future workflows with ease.
PRECONDITIONS
You need to have a team owner for this use case. In the steps below, you will need to access to the following areas of Nimbus:
Accessing Workflows
|
Accessing Service Settings
|
|---|---|
Within the Nimbus app or portal page in your browser, head to "Configuration" > "Workflows". 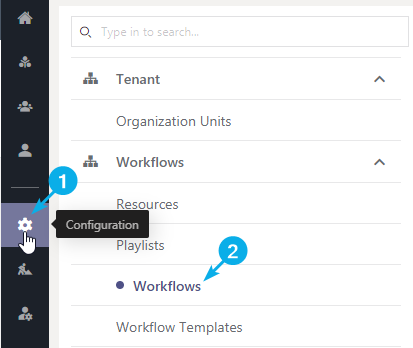 |
Within the Nimbus app or portal page in your browser, head to "Services Overview" > “Settings” and select the correct team to configure. 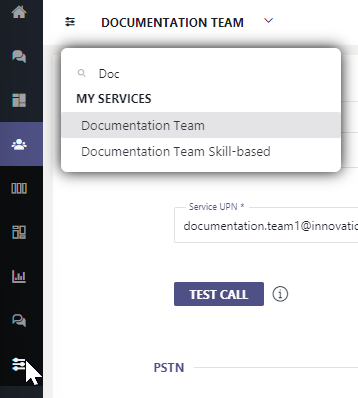
|
Show Icon Legend
| 💡 = A hint to signal learnings, improvements or useful information in context. | 🔍 = Info points out essential notes or related page in context. |
| ☝ = Notifies you about fallacies and tricky parts that help avoid problems. | 🤔 = Asks and answers common questions and troubleshooting points. |
| ❌ = Warns you of actions with irreversible / data-destructive consequence. | ✅ = Intructs you to perform a certain (prerequired) action to complete a related step. |
Creating Your Workflow
✅ Let's assume you are helping the IT Helpdesk to build their new documentation. For that purpose, a simple workflow for your personal "Documentation Team" service marks the starting point.
-
Go to Configuration > Workflows and click “Create new”.
💡 Note how you can now specify the w's name, as it will appear in later selection lists. - Select the workflow type Audio/Video and click “Next”.
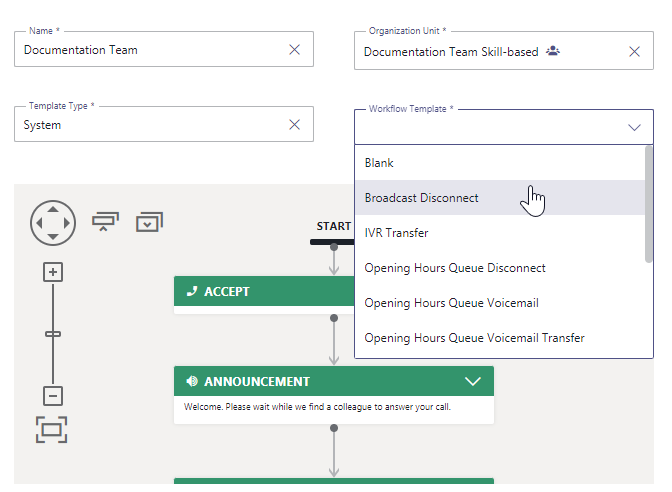
- Give your workflow a name that is easy to identify in a large list of workflows.
-
Pick the Organization Unit. The Organization Unit determines where your workflow is gonna be placed.
💡As a Nimbus newcomer you need to know that workflows – like all other data entities in Nimbus – always belong to one Organization Unit (OU). Think of this as placing the workflow in a "file tree" in which the workflow will be visible to you or other users. - Next, you might pick from existing Workflow Templates. To keep it simple, select one of the available system templates.
🔍 In our example, we use a simple "Broadcast Disconnect" template to get a reference point. You can visit Workflow Templates to learn more.
💡 You can adapt this or any other template in the next step.
- Once you are done, click "Create".
The Workflow Editor
✅ Now you're in Workflow Editing mode, so it's time to explain a few concepts:
- By clicking the settings icon on the top right, a popup with the workflow information opens:
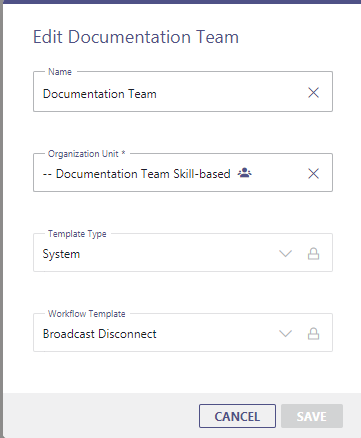
- The name of your workflow can be freely changed, which is useful when you expand it over time or change it's intended use.
- 💡 Note that the Organization Unit of your Workflow is now locked and can only be reassigned by a tenant administrator. This will ensure that only users within your Organization Unit (or admins) can access it. It also prevents the workflow to be moved away from your visible configuration, as your own user is also part of an OU (e.g. IT Helpdesk). Vice-versa, this OU placement also means that all team owners within the " IT Helpdesk " OU can see and edit this workflow once you save it.
- The next area that might catch your attention is the huge workflow editing area with a "Start" line. We'll get to that in the next step.
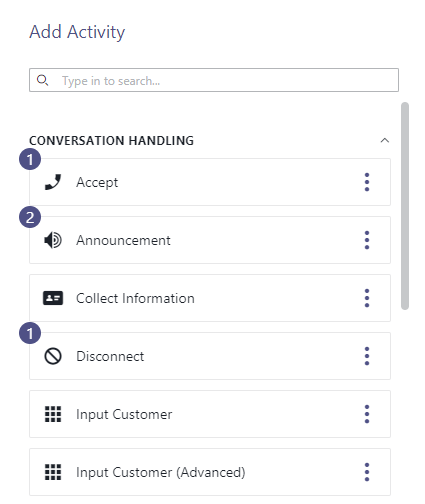
- The third area is the list of available Workflow Activities. You can access it by clicking "+ Add Activity".
- The list of – and available options inside – workflow activities may vary, depending on your enabled Nimbus Features.
- The search on the top can be used to quickly find your desired workflow activity even when it is out of view.
Adding Activities to Your Workflow
✅ Now it's time to edit your new workflow. With only few exceptions, typical service calls (involving human interaction) start with the the "Accept" activity, so Nimbus knows when to construct a session for recording, call handling, and reporting purposes.
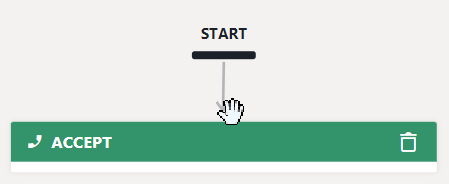
- As you can see, the "Accept" activity already exists in your workflow.
If it does not exist (e.g. it was deleted by accident or going by a blank template):-
Drag and drop the item from the list onto the editing area.
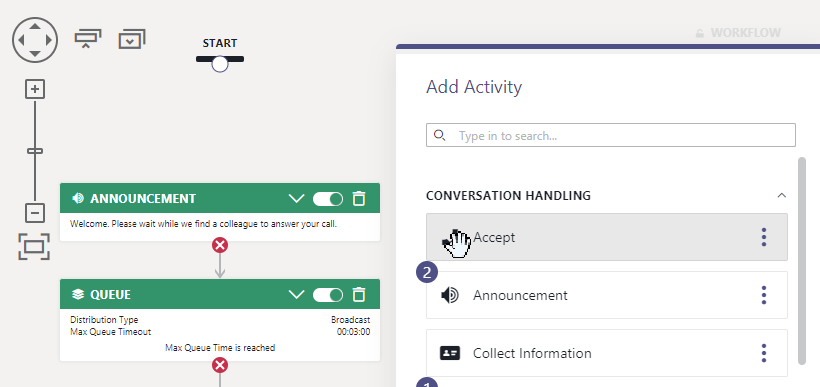
-
Connect the "Start" node to your activity by clicking the white dot/connector and dragging it to the “Accept” activity.
-
Drag and drop the item from the list onto the editing area.
- With just accept and disconnect activities, your service wouldn't really work. That's why there are also "Announcement" and "Queue" activities in your template. We'll assume that you want to individualize them, so let's learn about deleting and editing activities.
- First, delete your existing "Announcement" activity in the workflow area by clicking the delete icon on the right next to the activity name.
-
Drag and drop a new "Announcement" activity into the area.
💡 Notes and Learnings:- Removing an activity also severs it's connections to other activities. Ensure to reconnect activities after dragging them in.
- New activities will always come with their newest default settings. When Nimbus receives updates, existing activities in your workflow will remain unchanged until you drag in their "latest" variant.
-
Repeat the same with the "Queue" activity.
- 💡 Remember that you can search for activities even if the list items are out of view.
- 💡 Don't forget to connect your activities after dragging them in.
-
Now toggle the "Queue" activity inactive at its header. That way you can make adjustments but skip over it until you are ready.
💡 We will adjust the call settings later.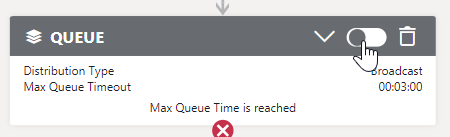
- Now it's time for some adjustments. Unfold the first "Announcement" activity at its header and change it's setting.
💡 In our example, we are using Resources (Audio Files) to play back as an opener.
💡 If you don't have any resources available, you can upload them (e.g. a prerecorded service greeting or jingle) and pre-listen to it directly in the activity.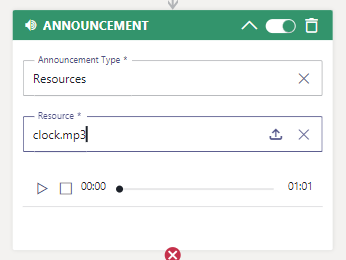
- The last announcement you can leave as it is. A text-to-speech notification will inform users that your service is currently "busy".
💡 You can adjust this announcement to anything else of course. - Remember the "Disconnect" activity requirement from earlier? Let's close up with that activity before we forget about it.
- Save your workflow.
🌟Congratulations - At this point you have created your first functioning workflow. Let's put it up to the test!
Applying the Workflow
✅ Precondition: You need to be signed in as owner of at least one Nimbus service to perform this change. If you haven't set up a service yet, read our Use Case - Setting up a basic IVR Service.
🔍 Good to know: By default, data entities in Nimbus (such as a workflow, resource audio files, services or users) don't do anything by themselves until assigned or applied within settings. Since your new workflow is ready to use, you can apply it now to take effect.
- Ensure you are logged in within the Nimbus portal UI.
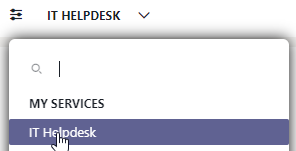
- Go to Services Overview > Service Settings.
- If you are in charge of multiple services, make sure to select the correct one from the drop-down menu.
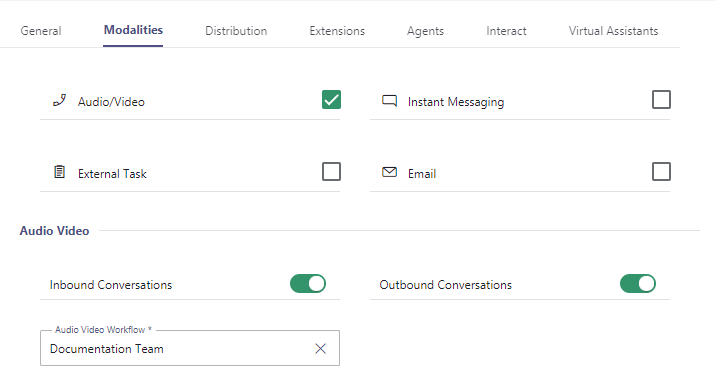
- Go to tab Modalities.
- In section Audio Video, enable the toggle for Inbound Conversations.
-
Select the newly created "Documentation Team" workflow as your active one.
-
☝ Once you click "Save & Apply", your changes immediately take effect. There are some important points of note:
- Workflow changes, both in the structure or settings, take effect immediately. Your next incoming caller will be handled according to that current state of the workflow.
- Be careful not to touch productive workflows or services during operation hours. It's always advisable to use test services and separate workflow copies first before going productive.
- ✅ You can try the "Test call" feature. For this, go to your Service > Service Settings > General > "Make a Test Call".
💡 Note that test calls are made only using the UPN of your service. If you need to test the PSTN Number, make sure to use a landline or mobile phone.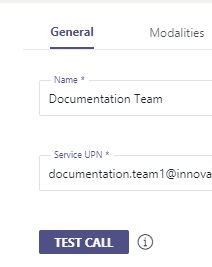
Adjusting Call Distribution in Your Workflow
✅ While testing your first workflow, you should hear your announcements back to back, but no actual call queueing. That's why we now make the necessary adjustments to how queues are handled in your service and which users should actually receive calls before we open the "floodgates" right away.
- While you are still in your Service Settings, head over to the "Distribution" tab:

🔍 There are a few things to take note of:- Depending on the user assignment type of your service, this setting determines the pool of available users your workflow can draw from.
- Only active users are considered for call distribution. Note that the "Active" toggle can be controlled by users via their Nimbus portal.
💡 If you want to onboard your new users first, you might want to disable the "New users immediately active" setting, so they don't get calls immediately as they join your MS Teams channel. - By default, calls are only distributed to "Available" users. You can extend the pool of users by also allowing "Busy" or "Away" as a valid status for distribution.
-
Now let's focus again on your service Workflows (located in Configuration).
✅ Your (previously disabled) "Queue" activity has properties that can be unfolded the same way. Let's do that now: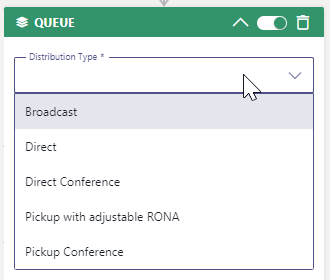
💡 There are quite a few options, so let's just focus on the "Distribution Type" for now:
Depending on your team size, expertise, level of focus on service tasks you might want to pick your distribution type accordingly:
| Distribution Type | Description | When to pick? |
|---|---|---|
| Broadcast |
Rings users simultaneously, selected in a batch size of 10 longest-idle users. The first user to pick up the call via Microsoft Teams will handle the task. 💡Does not apply RONA status as it would otherwise flag the entire user batch size. |
Achieves a higher visibility, but the ringing call sets 10 selected agents as "Not Available", not allowing further calls to be distributed to them in the meantime. 👎Makes little sense in high-speed scenarios when the agents are dedicated only to the client to accept calls within a few seconds. Situationally for very large teams where high-volume call handling is more important than equal work distribution. |
| Direct | Will distribute tasks directly to team members, prioritizing the longest idle (active) team member. RONA time is adjustable. No further actions are necessary aside from accepting the call via Microsoft Teams. |
The call with the selected team member is first established via a Teams peer-to-peer call, before it gets escalated to the regular Nimbus conference session. Useful if you have "Busy on Busy" features enabled for your users. 👎Otherwise slower than "Direct Conference" and generally not recommended. |
|
Direct Conference(1) 🌟
|
Same distribution as "Direct", but selected team members are directly invited to the Nimbus conference session, allowing them to join much faster and be able to talk to the original caller sooner. | 🌟 Our general recommendation for most services. Ensures faster handling of calls without blocking too many users at once for the same ringing call. |
| Pickup(2) with Adjustable RONA | Will show extra "Pickup" controls in the tasks list of the called team. A call session will be directly established without further intervention, and no further call reporting is possible after this point. A call session that is not accepted (after "Pickup" is clicked) within the given RONA time can be reinserted into the task queue or handled otherwise. | In small teams (e.g. volunteers) where it's acceptable to lose a call and reporting data isn't as important. Adds adjustable RONA time to flag users. |
| Pickup(2) Conference(1) | Same as "Pickup with Adjustable RONA", but will directly invite the agent to the Nimbus conference session, allowing them to join much faster and be able to talk to the original caller sooner. |
Best performance of all "Pickup" types. Unanswered calls can be re-inserted into the queue and no reporting data(1) is lost. Suitable for scenarios in which the agents can keep an eye on the Nimbus app or to "park" calls in a queue so that other calls can be answered first and retrieve them later from the queue. |
- Note how your queue configuration options change based on your selected "Distribution Type".
🔍 Refer to our list of Workflow Activities for a full reference on " Queue " properties and all other activities available to your workflow. -
Once you are satisfied, enable your "Queue" activity and save your workflow.
☝ Just as a reminder: Changes to your workflow take immediate effect with the next caller! Don't forget to test changes to workflow or Service Settings with your team.
WANT TO LEARN MORE?
🔍 Further inspiration required? Check out our Workflow Templates page which is steadily updated. Nimbus comes with a large set of templates that you can use as inspiration to get started on your own workflows.
🔍 More service flexibility? We recommend to gradually expand your Configuration with your available options. For instance, you can define Opening Hours and include them in your workflow to route callers accordingly.
🤔 Getting curious what else can be done? Once you feel safe enough, have a look at advanced Nimbus Features and get in touch with your customer success partner if you require a demonstration.
🤔 Trouble with your configuration? Check our FAQ and Troubleshooting section, as well as our ever-growing List of Use Cases for more inspiration.