PRECONDITIONS
- You require tenant administrator rights to create and update tenant and service settings.
- You need have the required licenses ready to be assigned.
Delegated user permissions are required to run the application. The provisioning script will take care of that once you have assistant configured and enabled.
- You need to access your users to upgrade their license for Assistant. This is done within the User Administration .
- 🔍 (OPTIONAL) You can make use of your own dedicated ACS (Azure Communication Service) instance from Azure.
💡Luware provides this functionality out of the box. This is also done during initial setup with your Customer Success representative.
Own Dedicated ACS for Assistant
Assistant Prerequirements
The following steps describe how Azure should be configured for Assistant. You require an ACS (Azure Communication Services) endpoint for the connection string and for Assistant to receive incoming calls. Assistant will not initiate or accept any calls within the application itself. ACS is only used to listen to the incoming call event and execute triggers upon the specified configuration.
🔍 IDs, users and strings generated below need to be applied within Nimbus Tenant Administration.
INC ACS Instance Setup
The following steps describe how an ACS instance can be setup. Which is required for Nimbus Assistant and/or Interact.
INC Interact Azure Billing
AZURE BILLING
The usage of Interact will cause additional monthly ACS (Azure Communication Services) costs depending on modality (IM/AV) used. These cost are determined by Microsoft. Also see: https://learn.microsoft.com/en-us/azure/communication-services/concepts/pricing
- Before enabling additional modality features for your services, get in touch with your Luware Customer Success specialist to discuss terms, usage scenarios, and necessary setup procedures.
- Please note that Nimbus and Interact support does not cover pricing discussions or make recommendations based on the Microsoft Azure infrastructure.
Create new Azure Communication Service
To create a new Azure Communication Service perform the steps:
- Head to Azure Portal and login with tenant admin rights.
- Search for "Azure Communication Service" component and click "Create".
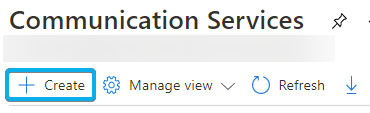
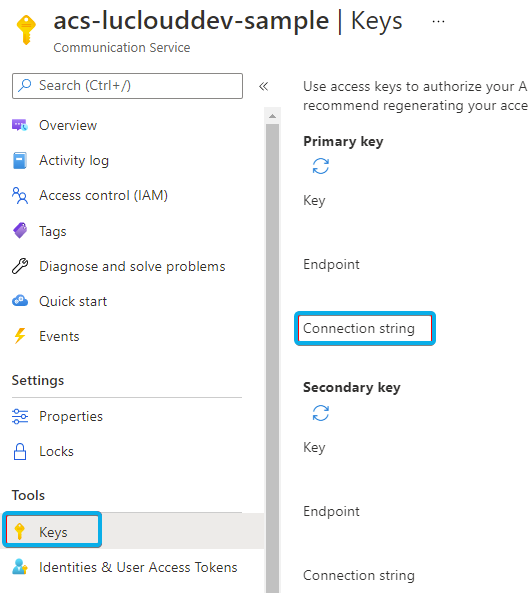
☝ Make sure not to use any underline/underscores within the name. - Switch to the Keys tab and copy the connection string
- Log into Nimbus Admin Portal
- Select your tenant or create a new one.
- Within the Tenant Administration > Interact and Assistant section, fill out all the required fields.
- Make sure you don't enable interact unless you want to use it.
🔍 Refer to Use Case - Setting up Interact. -
Fill in your ACS connection (retrieved earlier in ACS in step 1) and test if it works by clicking "Check connection".
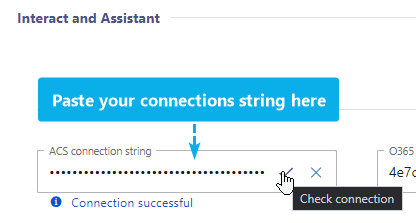
💡 Leave other fields unchanged for now.
- Make sure you don't enable interact unless you want to use it.
- Save your changes.
- Follow the other steps and as final step run the provisioning script.
☝ Note: Licensing Assistant may cause additional monthly cost on your Nimbus subscription. Get in contact with your Luware Sales representative to discuss terms and setup procedures.
Show Icon Legend
| 💡 = A hint to signal learnings, improvements or useful information in context. | 🔍 = Info points out essential notes or related page in context. |
| ☝ = Notifies you about fallacies and tricky parts that help avoid problems. | 🤔 = Asks and answers common questions and troubleshooting points. |
| ❌ = Warns you of actions with irreversible / data-destructive consequence. | ✅ = Intructs you to perform a certain (prerequired) action to complete a related step. |
Configure Your Tenant for Assistant
- Navigate to Nimbus Admin > Tenant Administration.
- Select the Extensions tab.
- Locate to the Assistant section. If desired, an own ACS connection string can be provided, otherwise Luware provides one.
- Save the changes.
- Go to the Data Privacy tab.
- Enable "Show User Time in State".
💡When enabled, User States times are tracked and shown as "Time in State" within the Nimbus UI.
Configure Direct Call Template
- Navigate to Nimbus Admin > Configuration > Nimbus Assistant.
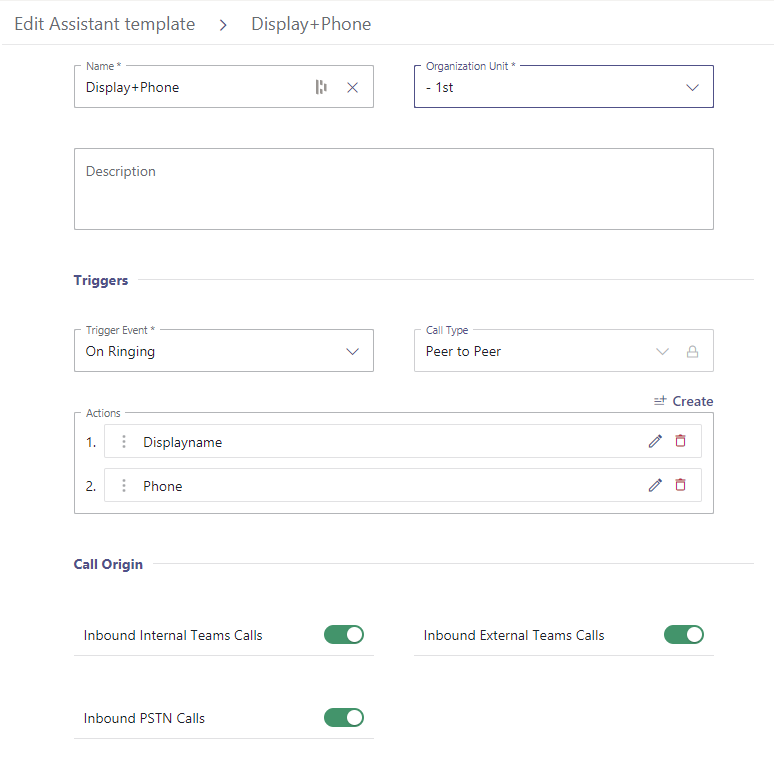
- Create a new Direct Call Template.
- Specify all required Nimbus settings:
- Name
- Organization Unit
- Description (optional)
- Triggers
- Call type: fixed for Peer to Peer (direct) calls for now
- Call Origin
| On Ringing | Performs the action when the call is ringing. |
|---|---|
| On Accepted | Performs the action after you accepted the call. |
| Inbound Internal Teams Calls | Inbound Calls from within the same domain (e.g. your company) |
|---|---|
| Inbound External Teams Calls | Inbound Calls from outside your tenant (company domain) |
| Inbound PSTN Calls | Inbound Calls made via phone number. |
- Click Create.
Configure Actions for the Direct Call Template
- Open your (newly created) direct call template.
- In the Trigger section > Actions field, click Create.
- Select the Action Type and click Create.
- Fill out all the required fields.
Find out more about template actions…
Template Actions
Each template type can consist of one or multiple data handling actions (HTTP Requests with header and body) which get executed in order.
Web Request action
General
| Item | Description |
|---|---|
| Name | Name of the action (as shown in listings) |
| Trigger ID | Randomly generated ID, not changeable. |
| HTTP Method |
The HTTP request method (GET, POST, POST-multipart/form-data, PUT, DELETE, PATCH) 💡 Only available when "Open in default browser is not selected". |
| Open in Default Browser |
Opens the "URL" specified in your default browser as a tab. 💡 Will ignore the HTTP Method setting and disable tabs accordingly. |
| URL (required) |
URL to call or open depending on the options chosen above. 🔍 Allows to include Custom Parameters as well as System Fields and Parameters as part of the URL. |
| BodyRequest (bodyForm) |
✅ Enabled when HTTP Method "POST-multipart/form-data" is selected. 🔍 Allows to include Custom Parameters as well as System Fields and Parameters as part of the URL. |
Headers
Key / Value header pairs for your request (specified in the "General" Tab).
| Header | Description |
|---|---|
| Key | e.g. "Service UPN" |
| Value | e.g. "$(Service.Upn)" |
You can add Parameters and Context / System Fields to be part of this request header.
Authorization
Authentication details sent alongside with your request.
| Item | Description |
|---|---|
| Authentication |
|
| Username / Password | For basic authentication |
| Scopes | 🔍 Uses -Scopes: See official microsoft documentation: https://learn.microsoft.com/en-us/azure/active-directory/roles/assign-roles-different-scopes |
| Use Agent Token | 🔍 Use Agent Token: Allows to query Graph API with the token acquired for Nimbus Assistant, based on the Required App Permissions for the Assistant app (delegated permissions). Refer to our Use Case - Retrieving Microsoft Entra ID fields via Agent token for a usage example. |
Response
| Item | Description |
|---|---|
| Wait for response | Waits for a response from the web request. |
| Wait Timeout |
hh:mm:ss Timeout to wait before the next action trigger starts. |
Application action
General
| Item | Description |
|---|---|
| Name | Name of the action (as shown in listings) |
| Trigger ID | Randomly generated ID, not changeable. |
| Path (required) | URL to local script, batch file or application. ☝ UNC network paths are not supported. |
| Parameters | 🔍 Allows to include Custom Parameters as well as System Fields and Parameters to be passed to the app specified in the path. |
Response
| Item | Description |
|---|---|
| Wait for response | Waits for a response from the application |
| Wait Timeout |
hh:mm:ss Timeout to wait before the next action trigger starts. |
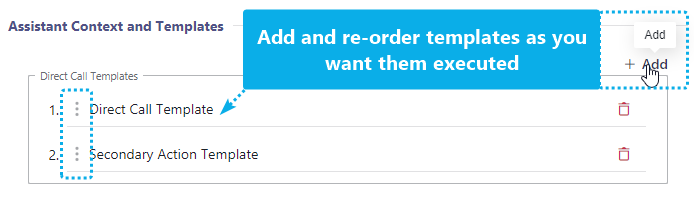
💡 Note that either action can be sorted in their order of execution via the handles. However, certain requests may create dependencies on each other which will cause a warning.
USING PARAMETERS IN YOUR TEMPLATE ACTIONS
The following parameters are supported within any action template:
| Parameter | Value | Body | URL | Header | Service Call Templates | Direct Call Templates |
|---|---|---|---|---|---|---|
| Caller Display Name | $(Caller.DisplayName) | ✅ | ✅ | ✅ |
Supports these parameters the following action types:
Additionally you can add and mix your own custom Parameters and Context / System Fields into your request. The parameters also work in Attendant - Service Transfer and Workflow-transfer scenarios. In these cases, the "Caller" name persists but the target "User." type parameters get updated. 🔍 Refer to Use Case - Chaining of Assistant requests for a hands-on example. |
Supports these parameters the following action types:
|
| Caller Id | $(Caller.Id) | ✅ | ✅ | ✅ | ||
| Caller Tel Number | $(Caller.TelNumber) | ✅ | ✅ | ✅ | ||
| Random Guid | $(Random.Guid) | ✅ | ✅ | ✅ | ||
| User Display Name | $(User.DisplayName) | ✅ | ✅ | ✅ | ||
| User Email | $(User.Email) | ✅ | ✅ | ✅ | ||
| User Id | $(User.Id) | ✅ | ✅ | ✅ | ||
| User Upn | $(User.Upn) | ✅ | ✅ | ✅ | ||
| Service UPN | $(Service.Upn) | ✅ | ✅ | ✅ |
💡 Note: Caller refers to the customer side, User is the Agent/Member of the service.
Configure Users
- Navigate to Nimbus Admin > Users.
-
Enable Assistant for the user by assigning the corresponding license.
⮑ The Assistant tab becomes enabled. -
Select a (previously created) Direct Call Template.
💡 Please Note: Only templates with the same or higher Organization Units are visible in the list. You may see also see templates available on tenant level provided by other administrators.
- Save the changes. → On direct calls to the user (with Assistant running) the templates will now be executed.
Run the Provisioning Script
- Run the latest provisioning script with admin permissions. You can do it as
- Azure Admin
- Tenant Admin
- Run as admin
Try It Out!
- Install Assistant on any machine of your choice.
-
Start up Assistant on that machine.
💡 We recommend putting the App on autostart. - Log in with the Nimbus user configured in the previous step.
-
Make a direct call to the user and see if the templates are triggered.
💡 Ensure that the templates are configured to trigger only in the cases you want (e.g. from external and PSTN calls).