This Use Case is meant to give you a step-by-step walkthrough through best practices of a multi-modal contact center. You can visit this page to learn more about the modalities supported by Nimbus.
INC Icon Legend Accordion
Show Icon Legend
| 💡 = A hint to signal learnings, improvements or useful information in context. | 🔍 = Info points out essential notes or related page in context. |
| ☝ = Notifies you about fallacies and tricky parts that help avoid problems. | 🤔 = Asks and answers common questions and troubleshooting points. |
| ❌ = Warns you of actions with irreversible / data-destructive consequence. | ✅ = Intructs you to perform a certain (prerequired) action to complete a related step. |
Best Practice 1: A Structured Approach
Start structured
Start by defining the structure of your organization and the respective services, users, and their skillset. Think about the following questions:
- What do I want to use the services for?
- Who will be part of which service?
- What are the opening hours of a service?
- Do my users serve different modalities?
- Will I be using the services for outbound calls?
✅ As you answer these questions and read the contents of this page, we recommend opening the admin-side configuration so you can follow alongside in the Nimbus UI.
Think about a good structure for your Organization Units (OUs)
Most companies organize their organization units in Nimbus according to their Microsoft Entra organization structure. OUs give permissions from down to top, which means the lower level sees all above, but the upper level doesn't see any objects that have been created underneath. Think about how many teams are involved and who are the supervisors.
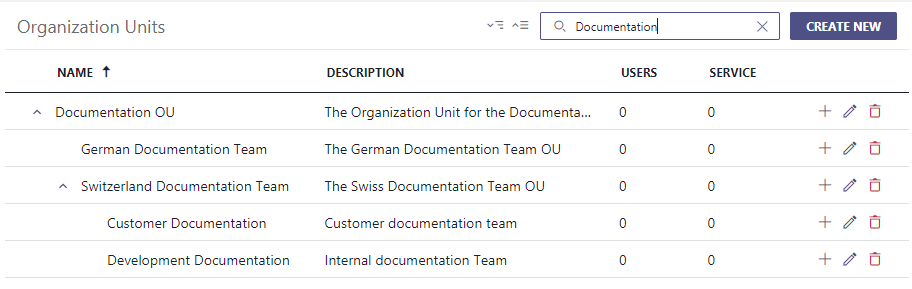
🔍 In Nimbus, Organization Units determine the “visibility” of all Configuration items, Users and Services. Each of these entities must have one position in the Organization Unit hierarchy tree, allowing you to share (or hide) them from each other.
Best Practice 2: Configuration Preparation
Set up workflow templates for your modalities
As a Nimbus user with admin rights, you can create Workflow Templates. These templates can be locked against change in varying degrees, depending on how much flexibility you want to give to your service team owners and supervisors.
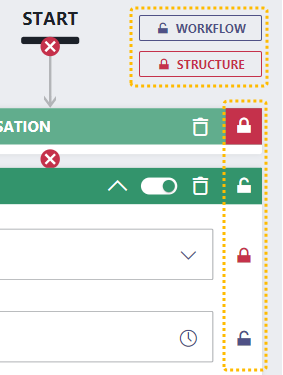
Keep in mind that templates also bear some operative risk, as you can overwrite properties meant to be individual. We recommend designing your “common ground” templates together with other team owners and also agree on naming conventions to indicate purpose and intent.
🔍 In Nimbus, Workflow Templates will unify your task handling structure and can be designed for every modality individually. Each service can apply the workflows in their Modalities Service Settings. Note that you need to make the templates available for the corresponding Organization Unit (levels).
Making use of skills, responsibility profiles, and distribution policies
For the optimal distribution of tasks, assign your users Skills and Responsibility Profiles, and define distribution policies for your settings. By doing so you can handle customer issues more quickly, by picking the most-skilled (or responsible) person and avoiding unnecessary internal transfers.
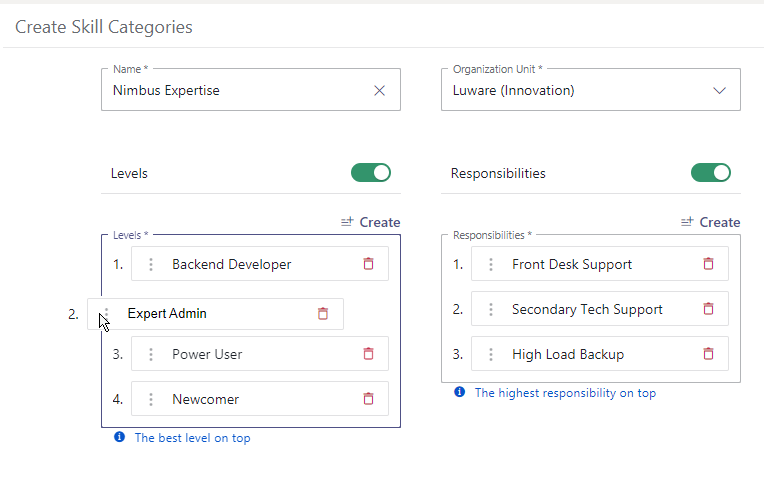
🔎Refer to Use Case - Setting Up a Contact Center for step-by-step instructions.
Best Practice 3: Service Concepts
Single-modality vs. multi-modality services
Either you want to have single-modality services (e.g. a service that distributes only calls) or services which use multiple modalities (e.g. call and Instant Messaging), there are pros and cons to consider. The table below gives you an overview.
➕Pros |
➖Cons |
|
|---|---|---|
| Single-modality services |
|
|
| Multi-modality services |
|
|
Best Practice: One Modality per Service
It is best practice to start with one service per modality instead of mixing modalities together within a single service. Start with an inbound calling service and set it up completely. Then gradually add more Features and modalities as needed. This also keeps Configuration complexity initially lower, as you test with individual Service Settings and perhaps include Power Automate Use Cases for integration.
💡 The advantages of having only one modality per service in more detail:
- The service KPIs are defined at service level - You cannot define different KPIs for different modalities, unless you spread the modalities over different services.
-
The distribution profiles are assigned at service level - The skillset which is enabled for the service applies to all modalities within that service. You can still en- oder disable modalities on each user, but all your users are pooled together for distribution.
If you split modalities into distinct services, users can use responsibility profiles to adjust their active skillset and thus shift priorities towards different modalities. For example, a duty profile called “No Calls - Only Text” could enable the skills needed in an Email and Instant Messaging service, while disabling the ones needed for inbound and outbound calling services. -
The My Sessions page is highly configurable at service level - Administrators or supervisors can decide what information to show on this page. For different modalities you might want to show different fields. You can do this only if you split modalities into distinct services.
For example, a service focused on handling only external tasks for all of your incoming tickets might want to show only specific information about the ticket and perhaps even embed the ticketing system's website directly into the My Sessions view. - Personal and Non-Personal Dashboards can be catered towards multiple services not just to distinguish modality, but also also per service, e.g. to keep the different KPI, visual thresholds and individual User Availability States apart.
- All other distribution settings except of the workflow are defined at service level - This means they apply to all modalities and include:
- The service management is less complex following the one modality per service approach. This also minimizes productive impacts from (unexpected) changes to KPIs, Workflows or other related Distribution Settings.
💡At a glance: At the service level, you can do the following individually:
- Adjust the Service Settings
- Set the KPIs
- Determine the durations for ACW/RONA
- Set the Distribution Service Settings
- Set the Task Priority
- Configure individual Power Automate Use Cases
Best Practice 4: Portal UI Adjustments
Organize custom Dashboards by purpose
You can create Non-Personal Dashboards in the admin portal and make them available to your users. It is recommended to organize them by topic or purpose, e.g.:
- Supervisor dashboards focus with widgets about on User States and provide Dashboard Supervision features like listen-in, barge-in for existing calls.
- Service dashboards provide service-centric and comparative KPIs among other useful statistics of services and users, usually targeted for a wider audience to see.
Learn more about this by reading on Dashboard Supervision and individual Dashboard Widgets which you can customize with various filters and thresholds via the Dashboard Widget Properties.
Add Nimbus Assistant for your users
We highly recommended you to enable Nimbus Assistant for Contact Center agents. Nimbus Assistant shows the task flow for each incoming task. This works independently of the modality type (call, IM, etc.). Users can also log their absence with Not Available Reasons.
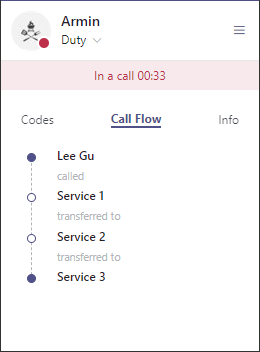
🔍 Refer to Use Case - Setting Up Assistant for a walkthrough on the configuration. Make sure to visit the Assistant page to learn about the full scope of available features.
Best Practice 5: Leverage Power Automate
Use Power Automate for integrated Contact Center functionality
Once your services are up and running, you should be ready to integrate Nimbus with other tools in your organization. By using Power Automate, you can greatly extend the interaction range of Nimbus, e.g. by retrieving and storing customer data from external databases, storing them in Nimbus to show as Parameters.
🔍 Refer to our list of Power Automate Use Cases for inspiration.
Use a Global Power Automate Account for All Flows
We recommend to read about the Nimbus Power Automate Connector in full detail before starting with first integrations scenarios. As a best practice, a dedicated MS Flow account should ideally be a member of the Nimbus tenant administrators group in your Entra ID, which grants them access to all your Nimbus services and configuration items such as Address Book objects that you wish to maintain. This way, the account does not need to be setup for a team or service owner of specific services, avoiding additional configuration effort.
💡 Multiple users can utilize this account to make changes if needed, without being dependent on one specific individual who may be out of office at a crucial time.
Avoiding data conflicts and performance issues
Multiple users setting up individual Power Automate flows for the same Nimbus services and events can lead to conflicts when concurrently retrieving, processing, and returning data. This can become extremely hard to troubleshoot as the flows will not automatically become visible to everyone in your organization.
→ It is therefore recommended to use a dedicated service or user account with a single Power Automate license to create and maintain all Nimbus-relevant Power Automate flows in one place.